Roger Dunham
Published July 04, 2024
Updated May 18, 2026
5 min
Aligning and Distributing Annotations: Creating a Professional Looking PDF
Roger Dunham
Summary: Annotation alignment and distribution are essential features for applications that handle document editing and review. They contribute to a professional appearance, improve readability, enhance collaboration, and ensure consistency. Check out how WebViewer lets you quickly and easily align and distribute annotations.
Introduction
In the decades since Microsoft Word was released, we have all become familiar with the idea of aligning things, the most obvious ‘thing’ being the content of paragraphs. If you have used PowerPoint, then you will also be familiar with the idea of being able to align or space out items that have been dropped onto a page.
Apryse WebViewer now supports that functionality, too, allowing you to align or distribute annotations. This offers a great solution to the question, “How do I create a professional-looking PDF form?”
With this new functionality, you can create a form that contains a table of text fields that are quickly and uniformly laid out. Awesome!
This article will examine this new functionality, which was added in version 10.10 and is available for download now.
Alternatively, you can check it out using the Apryse Showcase, which is where the screenshots in this document were taken.
Annotations in WebViewer
It’s been possible to add annotations to a PDF using WebViewer for several years, and there are many types of annotations that can be added. Not all annotation types can be aligned using the new functionality, but the following can:
- Free text
- Freehand highlight
- Freehand
- Note
- Rubber Stamp
- Signature
- Images
- Attachment
- Callout
- Shapes
The remaining annotation types are tied to a text location, and moving them independently of the text would not be useful. As such, they cannot be moved using the new functionality. These annotation types are:
- Underline
- Highlight
- Squiggly
- Strikeout
Setting up a Sample PDF
You can use WebViewer to create and edit documents for several reasons to give them a professional, well laid-out, look. For this article, though, we will keep things simple and focus on the new functionality.
Let’s start by adding three different rectangles to the second page of the sample PDF at showcase.apryse.com. I’m using rectangles and the second page of the PDF only to make the screenshots clearer, so feel free to try other options.
For the benefit of this article, I have also set the stroke width to 10 pts and used a different color for each rectangle. Again, that is only to make the screenshots clearer.
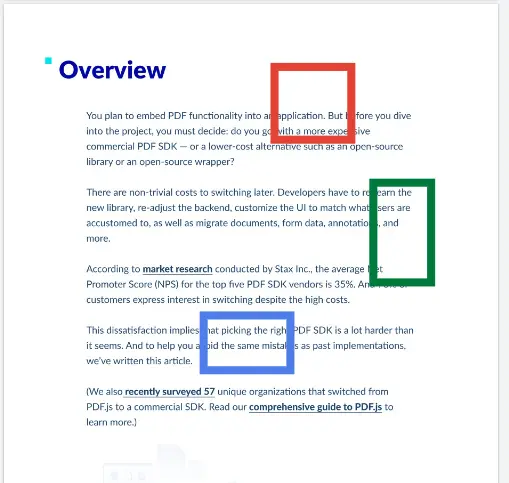
Figure 1 - The second page of the default PDF with three rectangular annotations added.
Next, select the annotations by dragging the mouse to define a selection area. You will need to choose a tool group where dragging does not add a further annotation, like for example, Edit.
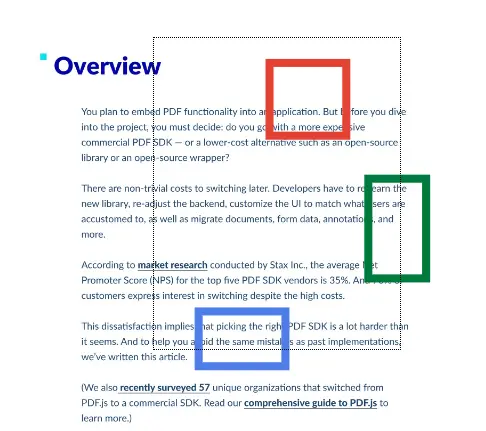
Figure 2 - The effect of dragging a selection area. If you end up creating an extra rectangular annotation, then choose a different tool group where the dragging does not create a new annotation.
When you let go of the mouse, any of the annotations that are even partially within the defined area will be selected. In the example above, note how the selection area does not include all the blue or green rectangles, but if part of those shapes are within the selection area, they will be included.
There are two other ways that you can select multiple items:
1. Using the Comments Panel: Each annotation has an associated item in the comments panel. With multi-select enabled you can check on whichever annotations you want to have selected.
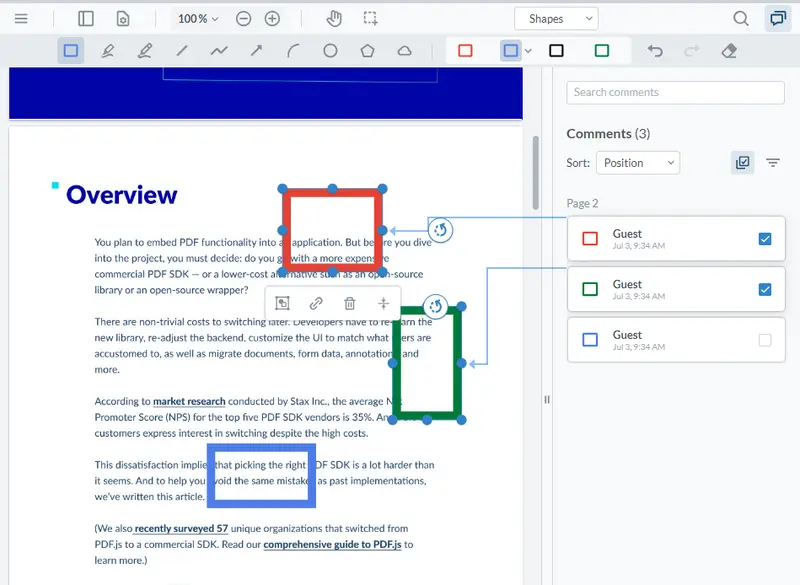
Figure 3 - The comments panel has a Multi Select button which enables you to select more than one annotation.
2. Via the Keyboard: If you are using Windows hold down the Ctrl button and click on each item in turn. Similar mechanisms are available for other platforms.
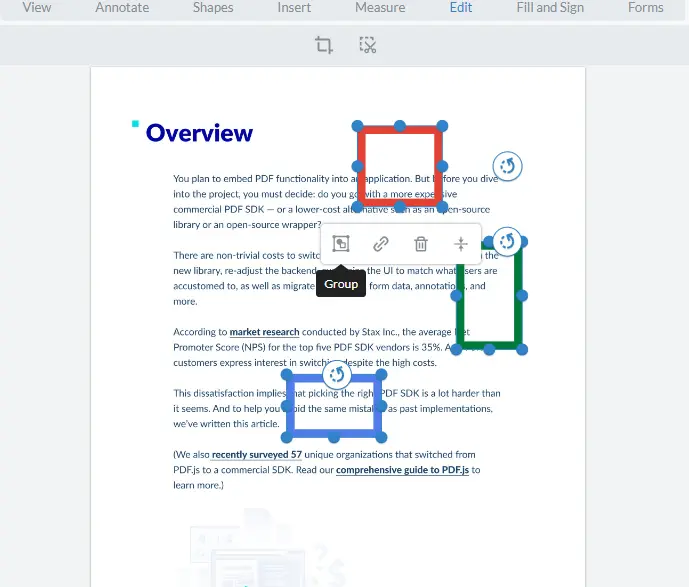
Figure 4 - All three of the rectangles have been selected, and the Annotation popup is visible.
Provided that there are at least two items selected, a new Alignment option will appear in the “Annotation” popup.
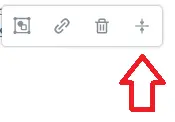
Figure 5 - The new Alignment button in the Annotation popup.
Clicking on the Alignment button expands a new menu (which has the data-element “annotationAlignmentPopup”) that allows us to align or distribute the selected annotations.
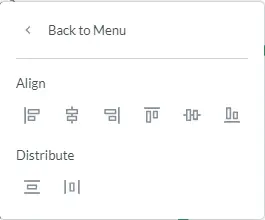
Figure 6 - The Annotation Alignment popup.
There are six alignment options: left, right, top and bottom, plus align horizontal (and vertical) center. There are also two ‘Distribute’ options, which we will look at next.
Checkout what is role based annotation control in WebViewer
The Alignment Options
The options are straightforward. For left, right and align vertical center the annotations will move horizontally only.
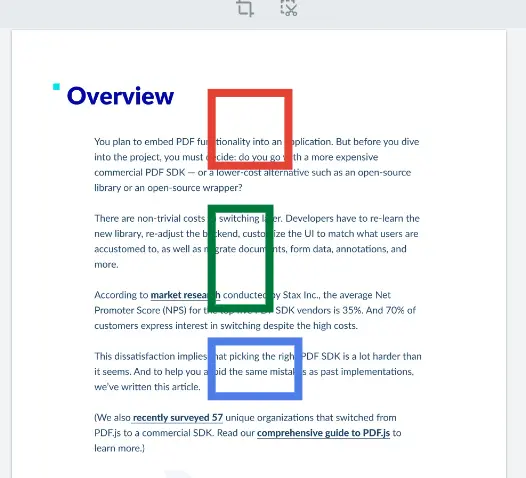
Figure 7 - The result of left aligning the annotations.
Similarly, the align top, bottom, and horizontal center options, result in the annotations moving vertically only.
The name of the center-alignment options is a little confusing – since aligning vertical centers involves moving the annotation horizontally and vice versa. If it helps, think of a vertical line that goes through the center of the annotation – these are what you are trying to align.
Figure 8 - When aligning vertical centers, you are aligning relative to a vertical line that goes through the center of the annotation.
It doesn’t really matter though, since it is easy to fix any mistakes. Try something, and if it's not what you wanted, it's easy to undo and try a different option.
Where Does the Alignment Relate To?
Alignment is relative to the bounding box that is just large enough to include all the selected annotations. In the example below, the black rectangle includes the outer edges of all the annotations.

Figure 9 - Annotations are aligned relative to the bounding box that includes all of the selected annotations.
Alignment is relative to this bounding box, whether to the top, bottom, left, right or center. In the example that I put together for this article, the center of the bounding box is just above the word ‘data’ – you can see this by looking at where lines that run from one corner of the bounding box to the opposite corner, cross.
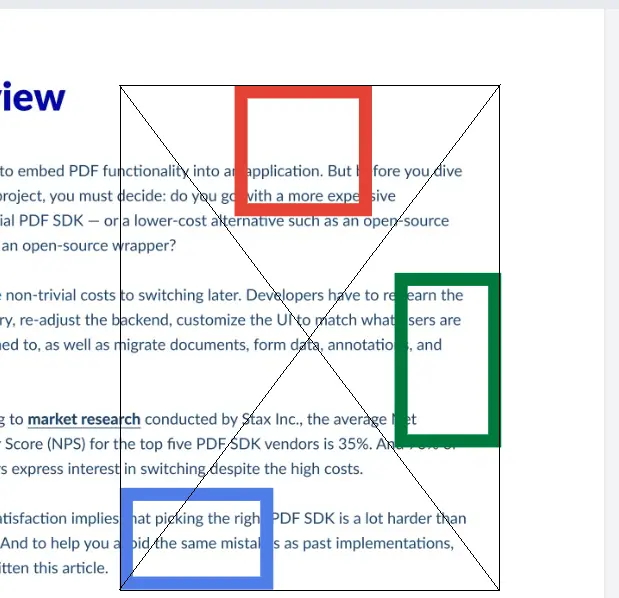
Figure 10 - By drawing diagonals from corner to corner we can see that the location of the center of the bounding box.
If we chose to align horizontal centers, then the annotations will move up or down ONLY so that their centers are in line with the center of the rectangle, which as we saw was located just above the word ‘data’.
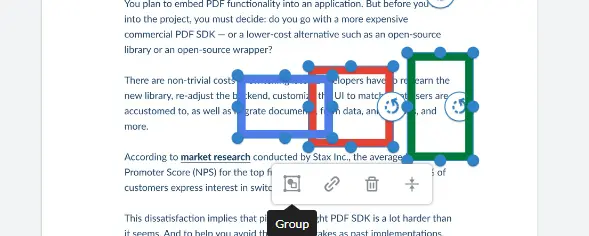
Figure 11 - Vertical alignment is relative to the vertical center line of the box rectangle that just enclosed all of the annotations.
Distributing Annotations
Next let’s look at distributing annotations. This can be useful if you want, for example. to lay out a form with check boxes that are equally spaced across the form.
For now, though, we will continue to just use colored rectangles.
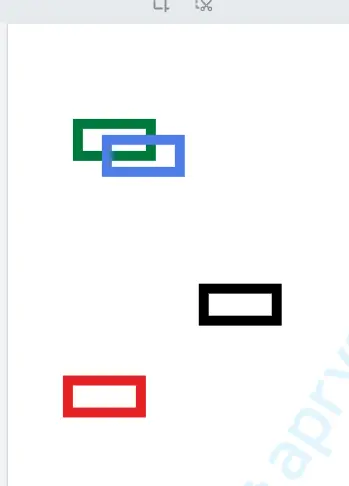
Figure 12 - Collection of colored triangle annotations added to a PDF page.
Just as before, we can select all the rectangles, but this time we will choose to distribute them vertically.
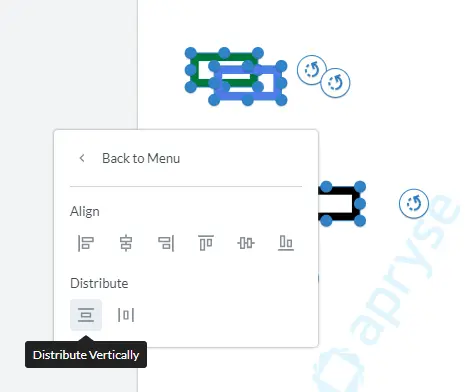
Figure 13 - Clicking on the Distribute vertically option will space the rectangles out evenly.
The rectangles will have been moved to their new positions. Just as with alignment, these positions are relative to the bounding box that enclosed all the annotations.
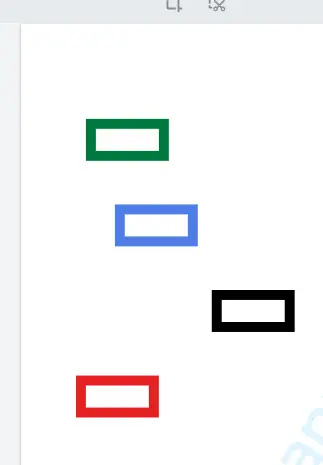
Figure 14 - The result of distributing the annotations vertically.
By now we have distributed the rectangles, but it is still not very tidy. However, we can left-align them using the knowledge that we already have. Note that since the annotations have moved from their initial position, the bounding box will also have changed.
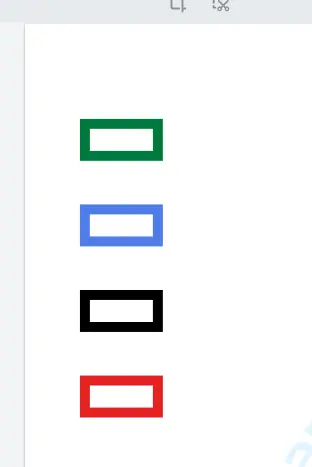
Figure 15 - The final result - by redistributing, then left aligning the annotations we have created a consistent layout.
We can see that by a mixture of selection, manual placement, alignment and distribution, we have quick and easy control over where the annotations are in the final document.
Check out the Annotation alignment documentation.
When Things Go Wrong: Undoing a Change
WebViewer supports both Undo and Redo for more than just text editing, so it is easy to revert your changes.
You can access Undo either by using a shortcut. For example, Ctrl+Z on Windows, or by selecting an undo button from the UI. By default, it is present on several of the tool ribbons.

Figure 16 - One of the locations where you can find an undo button in the default UI.
But How Do I Add This Functionality to My WebViewer Based App?
You don’t need to do anything – alignment functionality is available straight out of the box in WebViewer version 10.10.
If you want to remove the option, then that is also easy to do.
The default WebViewer UI supports disabling elements via the function disableElement and specifying the openAlignmentButton in the array of elements to be disabled.
instance.UI.disableElements(['openAlignmentButton'])NoMove Annotations
I mentioned above that most annotation types can be aligned, but it is also possible to prevent specific annotations from being aligned while allowing the rest to be moved.
This is done by setting the the NoMove property for the annotation to True. If an alignment function is invoked with an annotation that has NoMove set to True, that Annotation will be omitted from the alignment calculation.
Working with Alignment Programatically
While most of this article has looked at aligning annotaitons using the WebViewer UI, it is also possible to do so programmatically. This means that, for example, annotations could be added to the document from a database, and then aligned automatically either when the document loads or in response to a different event such as custom button being clicked.
The following code for example will align the selected annotations to the left:
Suggested Reads: How to effortlessly merge, annotate, and bookmark your PDFs?
Conclusion
WebViewer was already an excellent document processing tool, offering a wide range of functionality. The development of alignment tools takes it one step further and allows you to save time as you develop professional, well laid out documents.
Check out the documentation for the Annotation Manager which covers not just alignment but all of the other functionality that is available.
Try things out today using the Apryse Showcase, then download WebViewer and see how fast you can get to market using the Apryse tools. If you have any further questions, drop us a message on Discord .


