Roger Dunham
Published August 14, 2024
Updated May 18, 2026
4 min
Controlling Annotation Viewing and Editing with Role-Based Access Control
Roger Dunham
Summary: This article explores a powerful feature available in Apryse WebViewer: role-based control of annotation visibility and editability. Additionally, it covers UI customization based on user roles.
Introduction
PDFs are a great file format for sharing information in a way that can be read on many different platforms and devices.
PDFs can be viewed in a desktop application, directly within a browser, or within an in-browser application.
While basic features are available in nearly every PDF reader, the ability to use some features such as layers and PDF packages and the ability to edit or annotate PDFs is only available in a much smaller set, including Adobe Acrobat, Xodo.com, and Xodo PDF Studio for example.
In this article, we will look at a feature that is extremely useful but available in only a small set of tools. With Apryse WebViewer, you can control what annotations users can see or edit based on their role.
Just for fun, we will add a little UI customization that is also role-based.
This is not a feature of the PDF itself but instead a feature of the viewer.
What Role Based Access Control (RBAC) is Available with WebViewer?
Straight out of the box, you have access to two roles when dealing with annotations:
- Ordinary User: Add annotations but can only modify annotations that they created.
- Admin User: Add annotations and can modify annotations that were created by themselves or someone else.
In addition, you can specify that the current user is Read-only. For example, they can only read existing annotations and not add new ones.
With just these options, you already have lots of control that you can try out right now at the Apryse Showcase Annotation Permissions sample.
We’re going to take the essence of the code used in that sample and extend it further.
Take control of your PDF annotations with Apryse WebViewer. Learn how to manage user permissions and customize access based on roles.
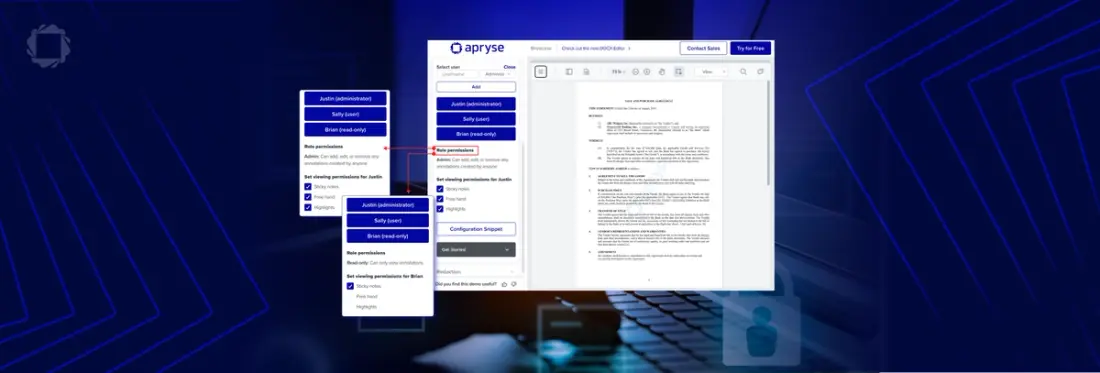
Implementing a Smarter Role-Based Access Control System
The sample code that you can get from the Apryse Showcase is a great start and allows you to see how permissions can be set for particular annotation types.
However, for this article, we will refactor the code, and rather than use the user name as a way to specify functionality, we will instead allocate each user to a role, then have the functionality controlled by role. This will result in code that will be easier to maintain if, for example, a new user joins the company.
To be consistent with the sample code in the showcase, we will have three users:
- Justin: An admin
- Sally: A user
- Brian: A read-only user
As we progress through, you will see that we could have other roles as well, each with specific functionality permitted.
A Note on Versions
This article was written using the following versions:
- WebViewer 10.10.1
- Node.js 18.19.0
- Windows 11
It is intended, however, that the concepts covered in this article are platform and version-agnostic.
Using the Sample Code
You can use the Apryse Getting Started samples and paste the following code into it. Alternatively, the entire code used for this article can be found at https://github.com/DocRog-maker/rbac-demo.git.
In production, you would get the user and role via some authorization and authentication system, but for now, let’s allow the user to be specified via a simple text entry Input element.
Let’s start the server and see what happens when we use this code with a simple PDF.
By default, if no user is specified then, the AnnotationManager.CurrentUser will be an Ordinary user with the name of “Guest”. You can, of course, specify a different name using annotationUser in the WebViewer constructor or, as in this case, by calling AnnotationManager.setCurrentUser after WebViewer has been instantiated.
As mentioned earlier, the default user is called “Guest”, so if we do nothing then all of the annotations will have that username.
[In the sample code, the role-based access control requires that the ‘Set user’ button is clicked, but that is a detail of the sample code implementation, and in production you would not use this mechanism anyway.]
As a guest, the user can create annotations, for example, an underline.
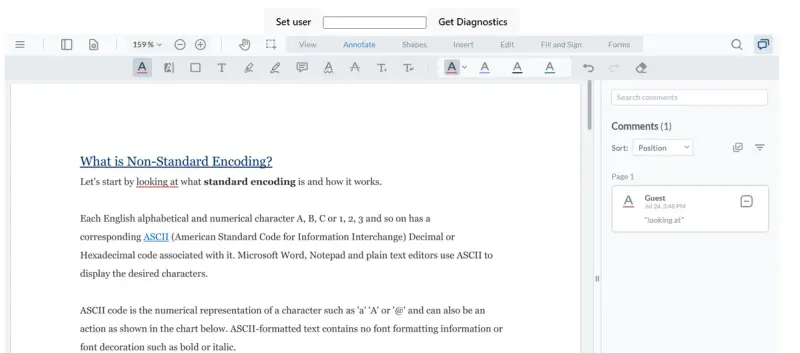
Figure 1 - The result of adding an underline annotation without specifying the user. Note - if you cannot see the comments at the right-hand side of the WebViewer then click on button at the top right.
We can see the underline, as well as information about who created the annotation and when.
Now, let’s log in as Justin who is an admin, (enter that name and press the ‘Set user’ button). Now enter a Free Text annotation.
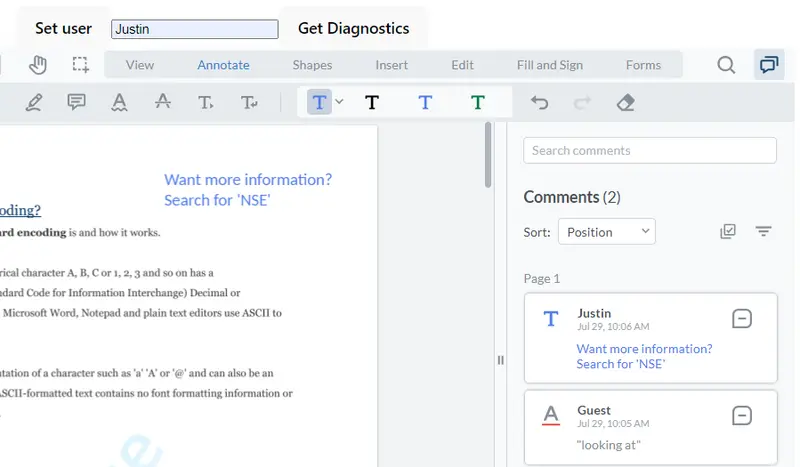
Figure 2 - Having logged in, the comments show the author's name.
We can now see Justin’s comment in the Notes (or Comments) panel.
As an admin, Justin can edit, add links to or delete annotations created by himself or by any other user.
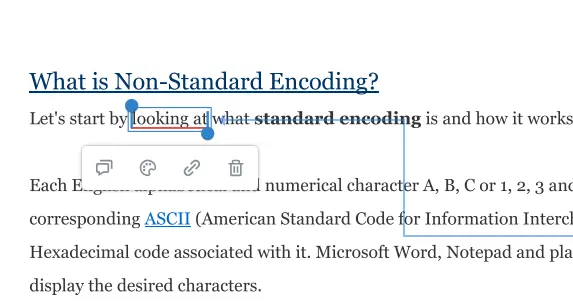
Figure 3 – If Justin, who is an admin, is the current user then he can delete any annotations.
Next, let’s log in as Sally – who is a regular user.
As an example of the sophistication that WebViewer supports, the code has been implemented so that regular users are not allowed to see underline annotations. This has been done by specifying a list of annotation types and then calling hideAnnotations.
Sally can, however, add a new free text annotation, and decides to draw attention to it using a green free hand line.
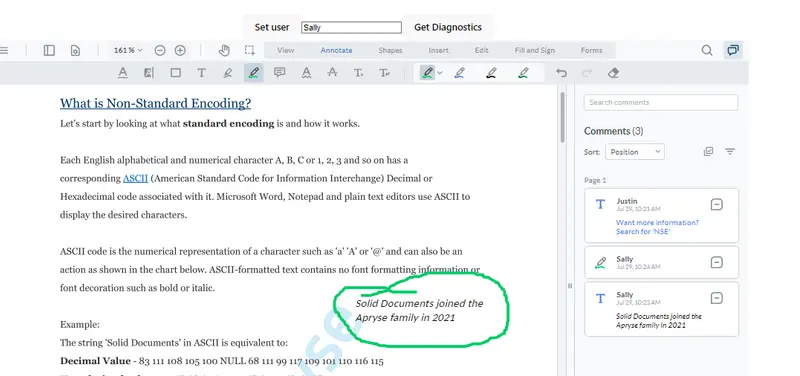
Figure 4 - Sally is able to add a new free text annotation and is drawing attention to it using a free hand line.
Because Sally is not an admin, while she can edit and delete her own annotations, she cannot delete those belonging to someone else.
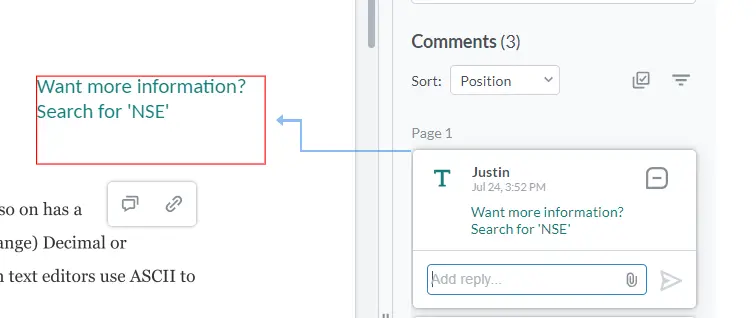
Figure 5 - Sally is not an admin, so there is no option for her to delete the text added by Justin.
A quick way to tell that an annotation was created by someone else is that, when selected, it will have a red bounding box. On the other hand, annotations that you created will have a blue bounding box.
Next, let’s log in as Brian, who is not an admin and has read-only access for annotations.
Again, just as an example of what can be achieved, the code has also been configured so that read-only users cannot see Freehand annotations.
Unlike Sally though, Brian can see underline annotations. This means that he can see the underline (that Justin added), but not the green freehand line that Sally added.

Figure 6 - Brian is read-only, He cannot add new annotations. The code has also been set up so that he also cannot see free hand annotations such as the green line that Sally added.
Yes, it is potentially complex, but that was my choice. In this example I am deliberately using functionality to demonstrate the sophistication of what is available.
Brian, being read-only, is not able to delete anyone’s annotations.
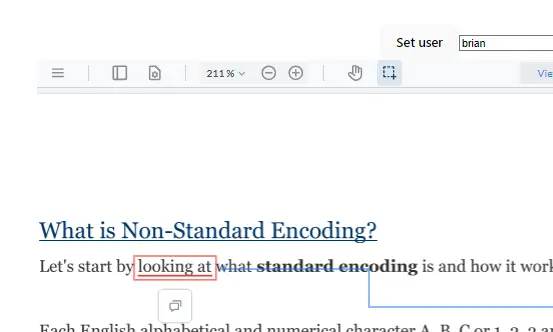
Figure 7 - Brian has read-only access and cannot delete any annotations.
Now let’s look at two more users.
Fred is a new user, who has not been set up to use the system. As such they are treated as ‘unknown’.
The sample code has been created so that, in this case, they are a read-only user, and should also have other elements of the UI restricted. In this case, the ViewControls and Select buttons have been removed.
UI.disableElements(['viewControlsButton', 'selectToolButton']); 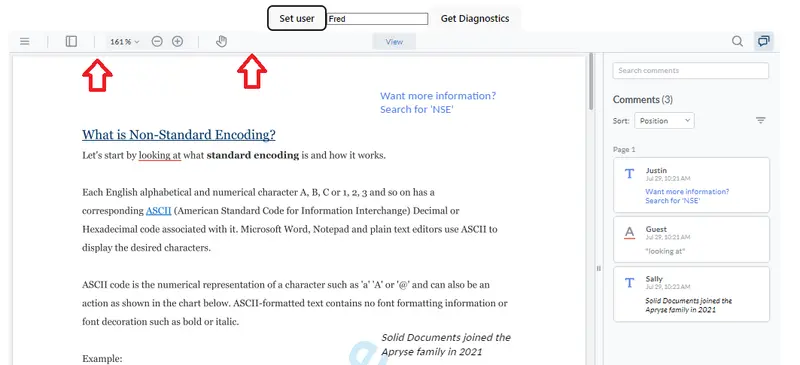
Figure 8 - When logged in as an unknown user – in this case ‘Fred’ - the ability to see some UI elements has been removed (marked by arrows), in addition to the annotations being read-only.
Finally let’s look at how we can extend the sample to set a role based on information from the PDF itself.
The author’s name is one piece of information that may be included in the metadata for the PDF. You can see what has been set by looking at the Document Properties in a suitable PDF Viewer.
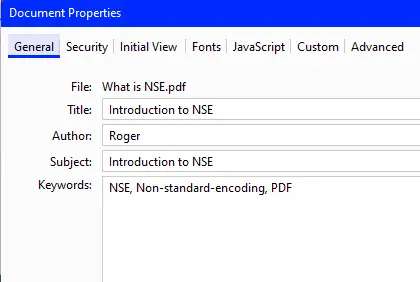
Figure 9 - An example of metadata within a PDF. Note: All these fields are optional.
For this PDF, the author is Roger.
As an example of how we can use this, we will set a rule that if the logged-on user has the same name as the PDF author, then they have full admin privileges, and will use the dark theme to style the UI.
How can you get the Author from a PDF?
The Apryse SDK allows us to get information from the document metadata via the DocInfo object. Note that the fullApi is required in order to access this.
Within the sample app, if I open the PDF then log in as ‘Roger’, the code recognizes that I am the author and sets permissions and the UI accordingly. The code has also been set up so that the author is an admin, so I am able to delete any annotations that I want, including those created by other users.
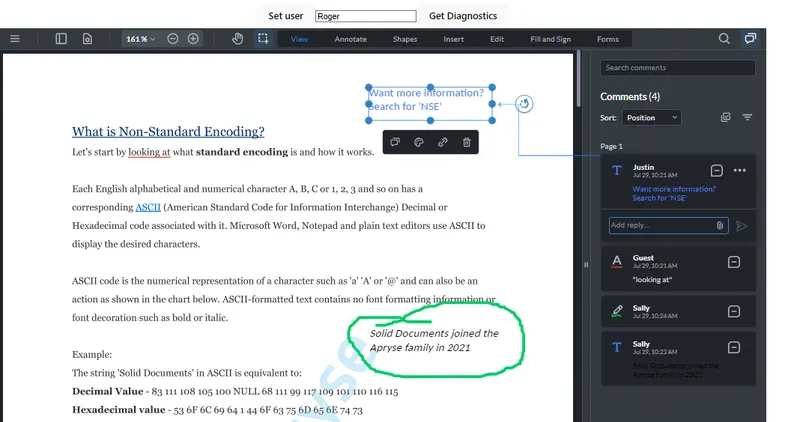
Figure 10 - If the author is the logged-on user, then the treats them as an admin, and uses the dark Theme for the UI.
On the other hand, the same user, Roger, will be treated as ‘unknown’ if they are working with a PDF that they did not author.
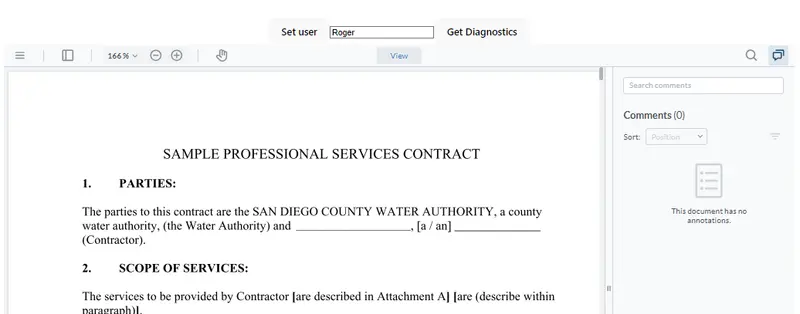
Figure 11 - The UI and behavior can be set up to be different depending on whether the user is the PDF author. In this example they are not, so they only have read-only access.
So now we have permissions that depend on both on who the user is, and properties extracted from the PDF. That’s pretty cool.
Can Custom Permissions be set for Specific Annotations?
Yes. But we’ll look at that in a separate article. In the meantime, check out annotationManager.setPermissionCheckCallback.
Conclusion
While this is a contrived example of what can be achieved, it demonstrates how the appearance of the PDF, and WebViewer, and what individual users can see and do, can be controlled using a simple Role Based Access Control system.
That offers a wealth of opportunities to use within your own business. You could get the permissions that specific users should have from a database, via an API call or even as some kind of coded information with the PDF metadata. There are lots of options available to let you maximize the value for your business.
When you are ready to get started, check out the documentation for the SDK which covers not just access control, but also a huge range of other functionality.
You can also reach out to us on Discord if you have any issues.


