Home
All Blogs
One Editor to Rule Them All: Working with PDF, DOCX & Spreadsheet files using the Apryse Web SDK
Roger Dunham
Published December 26, 2025
Updated March 25, 2026
5 min
One Editor to Rule Them All: Working with PDF, DOCX & Spreadsheet files using the Apryse Web SDK
Roger Dunham
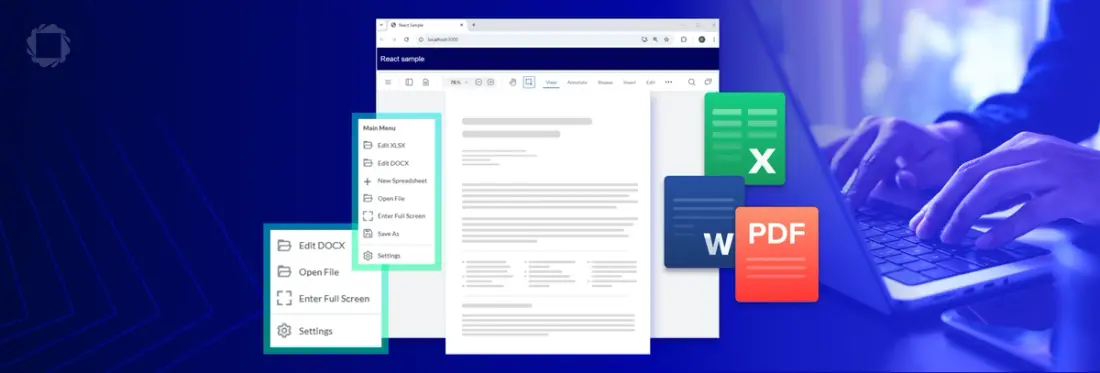
Summary: Create a smart, browser-based document app with Apryse WebViewer that automatically detects file types—PDFs, DOCX, or spreadsheets—and opens them in the right editor. With client-side file detection, a WCAG 2.2 AA compliant UI, and no downloads or external dependencies, working with files has never been easier. Keep reading to see how you can make this happen!
People upload files in all shapes and sizes — PDFs for reading, DOCX for editing, and spreadsheets that you want to run calculations in. A great document app doesn’t treat everything like a PDF, it detects the file type and brings up the tool best suited for the job.
We’re going to see how you can use the Apryse WebViewer to do exactly that. We’ll create a single app with an elegant interface that allows you to work with Spreadsheets, DOCX files, and other file types. What’s more, it runs within the browser, with no external dependencies and no need to download the file to work with it.
We’re going to cover how to:
- detect the file type client-side,
- add menu items to the WCAG 2.2 AA compliant Modular UI
- load a file into WebViewer with the appropriate editor mode (PDF viewer vs DOCX editor vs Spreadsheet editor),
If you want to just jump ahead, then you can get the source code for this project from https://github.com/DocRog-maker/multi-viewer
Why Apryse WebViewer is better
There are lots of PDF rendering tools out there – many of which are based on PDFium.
Those tools are often great for viewing PDFs. But once your use-case expands to needing to edit PDFs, or working with complex PDF functionality such as portfolios, or work with DOCX and Spreadsheet files then you quickly run into limitations.
At that point you’ll need to integrate a second, or even third library to get everything you need, and you could spend weeks trying to get all the separate parts working together by stitching together a patchwork of libraries. Worse still, you might have to rewrite parts of your existing codebase when you find incompatibilities associated with code from multiple vendors, or having to solve a security issue in a library that is no longer supported.
WebViewer is different. Since it was built from the ground up by the awesome developers at Apryse, we have complete control over how it works. As a result, there’s a single unified UI that supports multiple file types. All you need to do is integrate a single document viewer and editor, and let WebViewer intelligently adapt to whatever the user opens.
We’ve done the hard work, so you can focus on your specific business needs.
Explore using WebViewer with Firebase for real‑time document workflows.
Getting Started with WebViewer
There is a wealth of samples for working with WebViewer that you can get from our GitHub repo. These cover a wide range of functionality (such as creating files by combining JSON data with an Office based template, or applying redactions), and demonstrate how to integrate with a range of frameworks such as React, Angular and Vue, or even just vanilla JavaScript.
The code in this article is based on the React sample, but the concepts are valid regardless of which framework you use.
I’m starting with the React sample, WebViewer 11.8, and using Windows 11, but you should get similar results with macOS or Linux.
I just need to clone the repo, install the dependencies, add a license key and run the code. In just a few minutes I can have a PDF viewer and editor running in my browser.
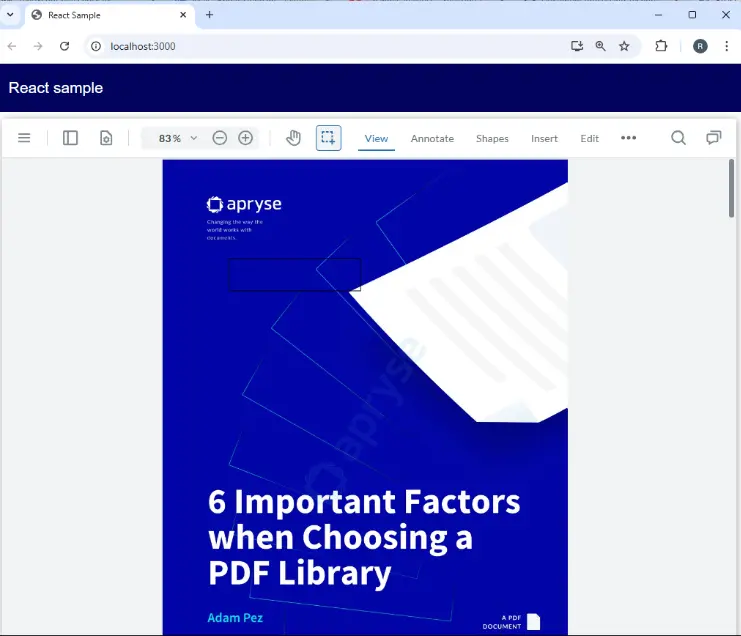
Figure 1 - The result of running the default WebViewer React project
That’s great, but I want to work with other documents , so let’s start with that sample code, but simplify it a little (it draws a rectangular annotation on the PDF, which is an interesting example, but not needed for what we are looking at in this article). We’ll also remove the code that specifies an initialDoc, and we’ll enable a filePicker (so that we can choose any file that we want).
The code smaple was written with WebViewer 11.8. In that version we need to use the Iframe version of WebViewer if we want to work with Spreadsheets. We don’t need to do that if we are just looking at DOCX files and PDFs.
Our code will now look like this:
If we run that code, then we can choose from dozens of different file types and see the file open in the viewer.
Currently, if we choose a DOCX file, it will be rendered within the default viewer, effectively, as a PDF.
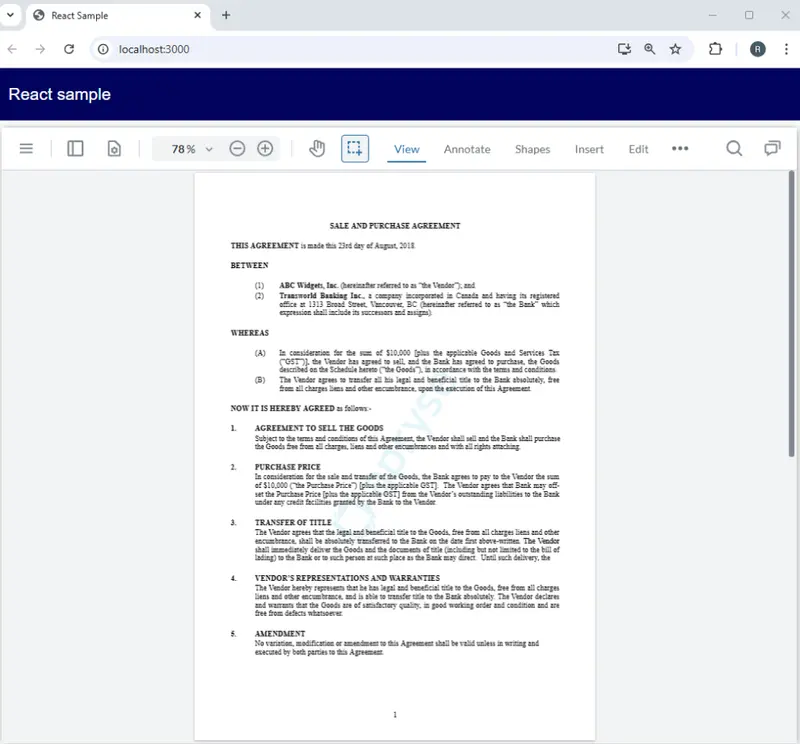
Figure 2 - Viewing a DOCX file in the default viewer.
Currently the DOCX file is viewable but underneath it isn’t a PDF.
As a result, you can’t do things that only work with a PDF such as insert, delete or rotate pages, apply redactions, or use any of the full PDFNet functionality. If you need to do that then specify loadAsPDF:true in the WebViewer constructor, which will convert the DOCX file into a PDF on the fly.
If we want to open the document with the DOCX editor, then we can do that by specifying the initialMode in the WebViewer constructor options:
Now, if we run the code the file appears in the DOCX Editor.
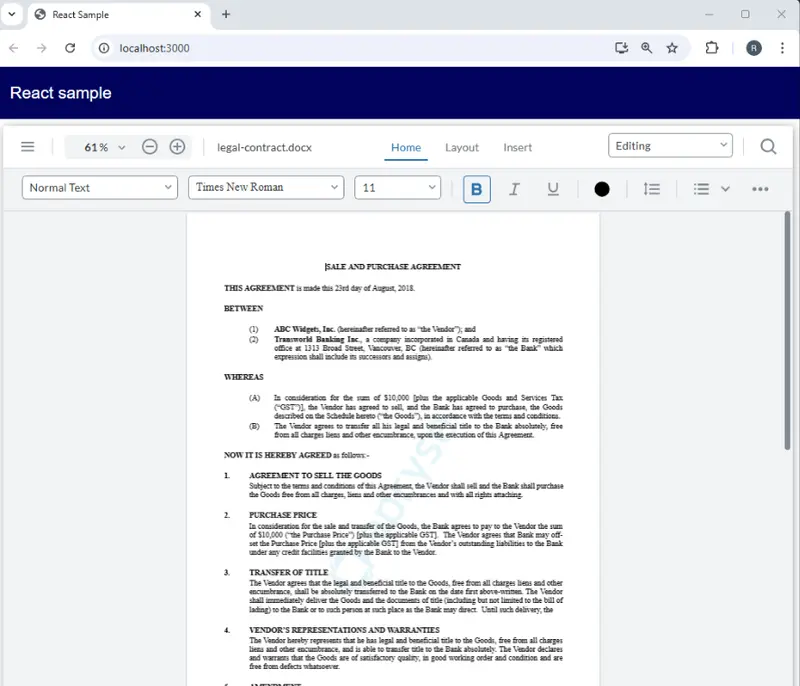
Figure 3 - A document opened in the DOCX Editor
That’s looking great – but if we need to specify the initialMode in the WebViewer constructor, won’t that mean that everything uses that mode - how do we change mode dynamically?
Great question! There’s another place that you can specify then initial Mode. That is when calling instance.UI.loadDocument.
In the code at the start of this article there was an instance object that became available once the promise that the WebViewer Constructor returns had resolved.
That gives us an alternative location where we can set the initial Mode, provided that we know the file that we want to open:
That sounds easy, but there’s an important step before you get to load the document – you need to know which file to open.

Figure 4 - Before we can open a file, we need to know which one it is - much like the saying that you need to catch a hare before you can use it in a recipe.
One option for getting the selected file would be to intercept the default File Picker functionality.
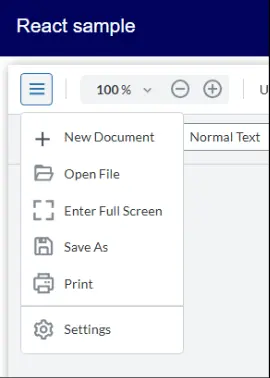
Figure 5 - We could intercept the event that fires when someone clicks on Open File, but we won't.
However, we won’t do that, since, by leaving it in place, we will still have the option of opening a DOCX file or spreadsheet in the default viewer rather than the dedicated one.
As an alternative we will add two new options to the Menu item.
We’ll start off with just the one for working with DOCX files. Dealing with just one at a time means that we can understand what is going on with a minimal amount of code. Later, we will add the option for working with Spreadsheet files.
Step 1 - Add a file input tag into the return block
First let’s add a file input to the return block – one that accepts just .docx files:
Step 2 - Create a custom button
The WebViewer Modular UI makes it easy to configure the user interface. You can either specify the configuration via the API or import a config file.
For this article we’ll use the programmatic option and create a new button.
We’re giving the custom button a label and title which describe what it does, and we’re also specifying a dataElement which is how we will refer to the button within the UI.
We’re also specifying an image to go with the button (in this case it’s the same as the one used for the default file picker, but we could have defined our own).
Finally, we’re creating an OnClick handler, which, in this case, will fire the click event on the file input that we created in Step 1.
Step 3 – Handling what happens when the user selects a file
When the user clicks on the menu item, the file input will open. We now need to handle what happens when the user selects a file within that input.
The files array will contain the list of files that were selected – we are only interested in the first one.
Provided it’s not null, we then have everything that we need to open the file. Furthermore, since we know that the event occurred on the DOCX file input, we can set the initialMode to WebViewer.Modes.DOCX_EDITOR.
We then clear the file input value as part of the tidy-up process, which gives the option, should we want it, to open the same file again.
React often calls the same code multiple times, and since we only want to create the event handler a single time are using dataset.listenerAttached as a way to store whether we have already added the event handler. Nice!
Step 4 - Add the button the Main menu
Within the Modular UI. menus are known as “flyouts”.
There’s a little bit of code needed to add a button to the menu. We need to know which flyout to add it to, the button object, and the location within the menu where we want to add the button. We’ll use those in this method.
We get the list of items from the flyout – these are the default menu items (although after the first render our new menu item will also be there).
We then iterate through that list of items looking for an item that has the dataElement that we specified for our new button. In the case of the DOCX editor button it was 'load-docx-in-edit-mode'.
If an item with that dataElement already exists then nothing else is needed. If no such item exists then we splice our button in the list and use that to setItems for the flyout.
That way we add the button if it’s needed, but only once, and we’re calling that function when we first render.
We’re calling this function from another one which searches for the flyout with the name “MainMenuFlyout”. (which is the one where we want to add our button), knows the const that defines our button (“loadDOCXInEditModeButton”), and calculates the index where we want to add the button (which for now is hard coded as zero):
If we run that code, then now we have our new menu item.
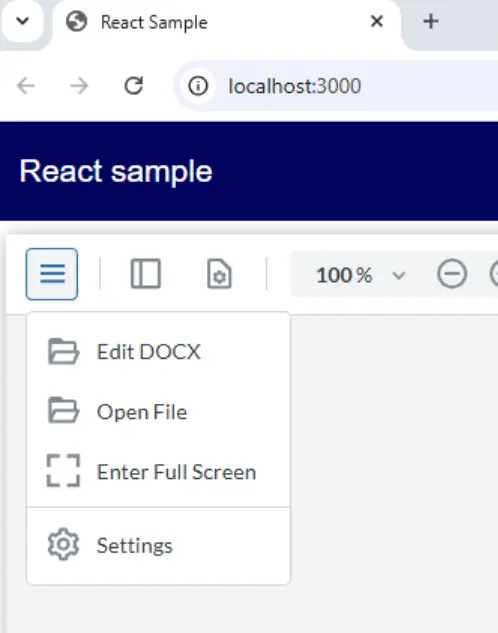
Figure 6 - The new ‘Edit DOCX’ button in the main menu.
If we click on the new button, then we get to choose a DOCX file, and it appears in the DOCX editor. On the other hand, if we use the default “Open File” then we can choose any valid file type, including DOCX, and it will open in the default viewer. Awesome!
Step 5 – Adding the menu items in a different editor
We’ve seen that WebViewer has three different editors – for PDF, for DOCX and for Spreadsheet. Each one has its own versionof the main menu – which is great since it means that you can offer different options when working with spreadsheets to those that are available when working with PDFs.
However, it also means that when we change the initialMode we need to make sure that our new menu items are still available – so far, we have only added it to one.
We can do that by adding an event listener that fires when a document is loaded. When that occurs, we just call the function that we have already written that ensures that the flyout buttons exist. It’s safe to do that since we wrote it to be called multiple times without a problem.
  documentViewer.addEventListener('documentLoaded', () => {
         ensureFlyoutButtons();
   });
Now our menu items will be present in the main menu of each Editor Mode.
Step 6 – Extending the code to work with Spreadsheets
We can now build on what we have seen, to allow us to also have a dedicated Spreadsheet viewer menu item.
First, let's update the WebViewer constructor, so that if we are working with a spreadsheet then it can be edited immediately. This is only available in WebViewer 11.8 onwards. In earlier versions, a different mechanism was needed to make the document editable, and we will look at that at the end of this article.
Next, we need to add another file input, which will accept just .xlsx files, into the return block:
The button definition and the Change handler for that new input are essentially the same as we used for the DOCX button, other than now when we call UI.loadDocument we use a different initialMode.
The only significant difference is that we need to adjust the index where we insert the new menu items.
For historical reasons the menu used when the Spreadsheet Editor is shown has a title of “Main Menu” that is not there for DOCX editor or the default viewer.
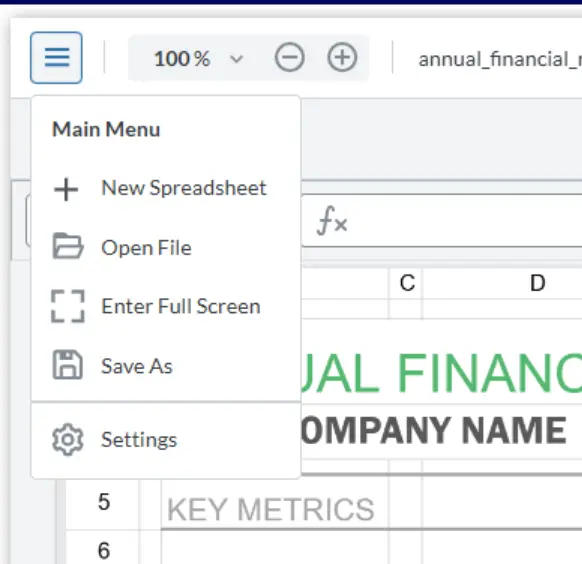
Figure 7 - In Spreadsheet Editor the main menu has a title of 'Main Menu', which isn’t present for DOCX editor or the default viewer.
As a result, if we are in Spreadsheet editor mode then we need to insert the menu items starting at index 1, not index zero.
In order to know what the start index should be, we need to know which editor is open. We can do that by getting the type of the current document.
Finding the current document type
The easiest way to get the type of document that is currently being shown is to call getType() on that document.
There are some potential scenarios where you can get a document returned from the documentViewer that does not have the function getType available, so it’s wise to allow for null-ness.
const docType = documentViewer.getDocument()?.getType?.() ?? ''; At the end of this doctype will have been set, if it can be, or else it will be an empty string.
The likely outputs, other than an empty string are:
- ‘pdf’
- ‘officeEditor’
- ‘spreadsheetEditor’
If the doctype is ‘spreadsheetEditor’ we know that we need to set the index for the XLSX button to 1, otherwise it will be zero. I’ve also made the design decision that the DOCX menu item will be added after the spreadsheet one.
Our code for adding buttons now looks like:
That’s it! We now can have both extra menu items added to the UI.

Figure 8 - We now have our two new menu items available in the main menu.
Working with Spreadsheet Editor
Spreadsheet Editor is being actively developed and there are a few things that you need to consider:
Running in an Iframe
In WebViewer 11.9 and earlier we need to use WebViewer.Iframe if we are using the Spreadsheet Editor. If you forget to specify Iframe, then WebViewer will appear to load a spreadsheet, then hang.
That is no longer the case from WebViewer 11.10, where the Spreadsheet Editor became available in the WebComponent version of WebViewer.
Opening Spreadsheet Editor in Editing Mode
When first released, Spreadsheet Editor opened documents in “View” mode.
In 11.8 it is now possible to include Spreadsheet editor options in the WebViewer constructor as we saw above.
spreadsheetEditorOptions:{initialEditMode:'editing'} With earlier versions of WebViewer though, you could achieve the same result programmatically using calling setEditMode on the Spreadsheet Manager.
The easiest way to do that is to call that function in a timeOut callback which fires after a spreadsheet document loads.
We’ve already got a documentLoaded event handler which we have been using to make sure that the main menu for each of the initial Modes has our new menu items, so we can just extend that.
That’s it. We now have a version of Web Viewer with two custom menu items, giving us the option to open DOCX files or spreadsheets in the editor that is appropriate for them.
What’s more we’ve done that with around 140 lines of code – that’s huge flexibility available with just a little coding.
Next Steps
We’ve seen how you can use a single library – The Apryse Web SDK to work with multiple file types in a consistent way which is nonetheless targeted at the specific file types.
We’re only getting started though – there is a huge range of other functionality available with the Web SDK. So, grab yourself a trial license and try things out, and if you have any questions reach out to our support team.
Why not check that out at the Apryse Showcase? You can do that right now, with no coding needed at all and you can see many of the ways that Apryse helps you to work with documents.
Sure, Apryse offers PDF editing, and DOCX editing and Spreadsheet editing which might be enough for what you do today, but with so much other functionality available, you are minimizing the risk of needing to find an alternative library as your requirements change.


