Roger Dunham
Published August 15, 2025
Updated May 18, 2026
6 min
Using the API to get more from Spreadsheet Editor
Roger Dunham

Summary: This article explores how to use the API to programmatically work with data in the Spreadsheet Editor. Learn how to enhance user workflows and add dynamic functionality—unlocking the full power of Apryse’s AI-ready, browser-based spreadsheet editing.
Apryse released the first version of their web-based Spreadsheet Editor in April 2025. While initially view-only, the second release - just three months later – added a wealth of additional functionality. It’s a great piece of software allowing users to view and edit spreadsheets directly within the browser without the need to ever download them to a local machine.
Recently I wrote a blog that described how to create a Spreadsheet Editor in a React based Web App. In this article we will look at how we can programmatically interact with the UI- offering the ability to customize the way that your users work.
Where we got to last time – a running Spreadsheet Editor
I’m starting this article at the point where I left the previous one – with the Spreadsheet Editor running in the browser, with an initial document open, but also with the ability to select a different file using a file picker.
The code at that time was as follows:
This code creates a WebViewer with a feature rich WCAG 2.2 compliant UI, that allows you to work with Spreadsheet data directly within the browser.
The essential part of this code is initialMode:WebViewer.Modes.SPREADSHEET_EDITOR which sets the UI to be the Spreadsheet Editor, rather than the DOCX or default PDF (and other files type) viewer and editor. In a future blog I’ll write about how to swap between the types of document that are displayed after WebViewer has been initialized.
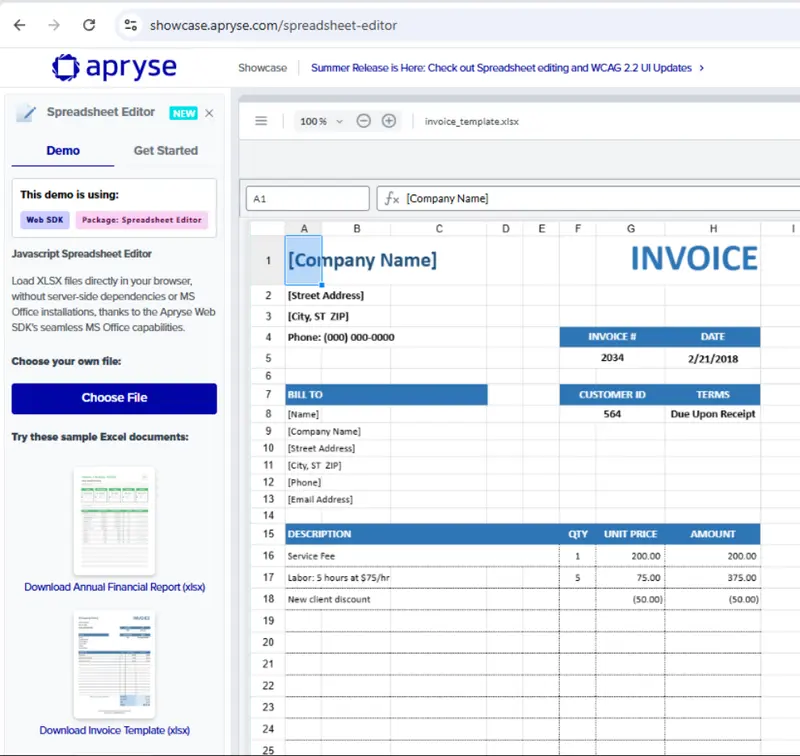
Figure 1 - The Apryse Spreadsheet Editor shown running within the Apryse showcase
Now let’s go one step further.
Interacting with the API – using the Instance object
In order to interact with the WebViewer API we need to get access to the WebViewer instance. There are several ways to do this, but the easiest (in my opinion) is to use the instance object that is returned when the WebViewer constructor resolves.
In the code at the start of this article we had access to that object but didn’t actually use it.
The instance object provides a mechanism that lets us perform a wide range of tasks, either on the UI, or within the document itself. When working with the Spreadsheet Document it is essential to allow it to fully load before interacting with it.
Gotcha! Don’t try to access the API before Spreadsheet Editor is ready
You can write code that will apparently let you access the Spreadsheet API but gives an error when you use it. The following example tries to get the value that is displayed in the top-left cell.
Note: there are a couple of known issues with Type definitions that I’m working around by using //@ts-ignore. If you find others, then please let us know.
The code all looks good, but when it is run, you are likely to get an error when you try to access the SpreadsheetEditorDocument
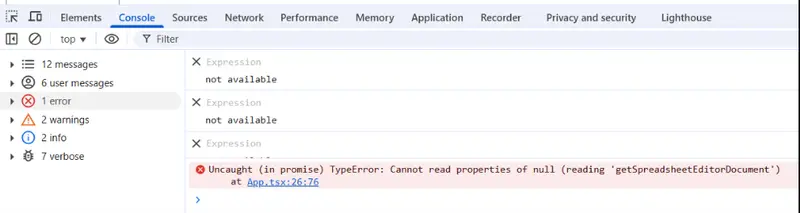
Figure 2 - If you try to access the SpreadsheetEditor API before it is ready then you will get errors logged to the console.
A “null object” sounds like a problem! The solution is, however, simple.
Interacting with the API – The Right Way
Before we try to access the Spreadsheet Editor API we need to wait for the SPREADSHEET_EDITOR_READY event to be fired – the name explains it all!
Now, we can now get the value displayed in the first cell (I haven’t included the code for that here - we’ll look at that in a minute).
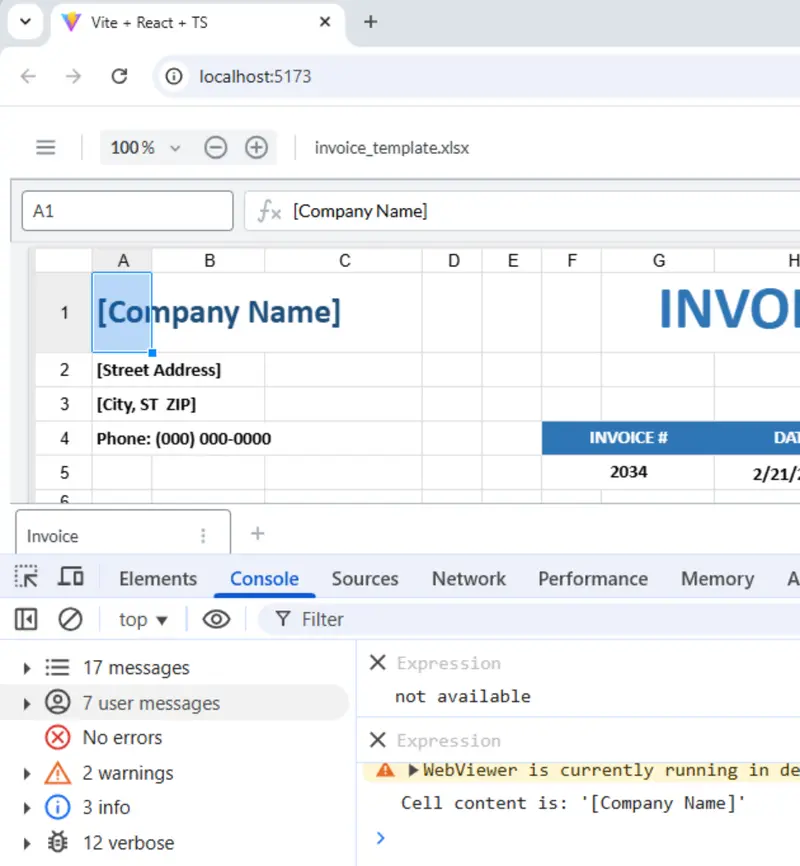
Figure 3 - An example of getting data from the spreadsheet - in this case the displayed value from cell A1.
Before we delve into working with the data, let’s first look at how to set the editor mode programmatically.
Setting the Editor mode
The Apryse Spreadsheet Editor can be configured to allow the data in the spreadsheet to be editable or for it to be view-only. (Before v. 11.6 it was only available as view-only, so if you have an earlier version you will want to upgrade).
One way to switch between editor modes is using the Mode Flyout on the UI.
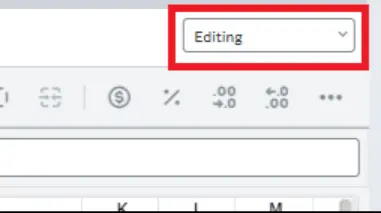
Figure 4 - The Mode flyout on the UI - you can use this to switch between View and Edit mode.
An alternative way is via the API.
At its simplest you can use this to make all spreadsheets editable (or all view-only) when they open. But if you need something more sophisticated, then you can leverage the API to make specific spreadsheets editable, but others are not. For example, you could make spreadsheets created this month editable, but ones created earlier are view-only.
Alternatively, you could get user data from your authentication system and create a system whereby some users can edit all files, and others can edit only some. There is flexibility to create whatever system your business rules require.
Regardless of the logic you use, the process of implementing the control is the same – in the following code whether something is editable depends on their filename, but you swap that logic for your own.
As we noted earlier, we need to wait until the SpreadsheetEditorEvents.SPREADSHEET_EDITOR_READY event fires (which will happen each time that a new document is loaded).
Spreadsheet editability is controlled using spreadsheetEditorManager.setEditMode(), passing in the appropriate enum.
Of course, setting the UI programmatically to restrict editing is moot if the flyout for editing mode is still available – but with the modular UI it is a breeze to remove (or add) UI elements. For now, though, I’ll leave it in place so that it is obvious whether or not editing is allowed.
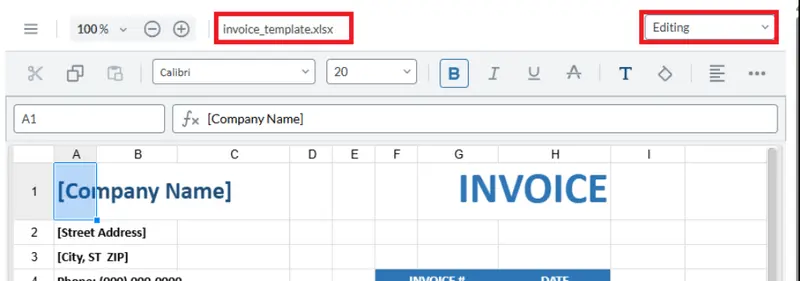
Figure 5 - The code has allowed a document whose name starts with "invoice" to be editable.
Figure 6 - The code means that a document whose name doesn't start with "invoice" is view-only. Note that even in view-only mode, you can still see what calculations are being performed in a cell.
It is always wise to verify a user’s access permissions when implementing a RESTful API for getting and saving data, and not just rely on the UI to control that, regardless of how easy it is to use the API to restrict editing of spreadsheets to particular users.
Getting the value of a cell
Let’s now look at how we can interact with specific cells. We touched on this earlier when we saw the “Gotcha!” of trying to interact with the Spreadsheet before it was ready.
As an example, let’s look at how we can work with formulas in cells, as that demonstrates a range of API calls.
We will use the invoice sample spreadsheet from https://showcase.apryse.com/spreadsheet-editor. As an example, let’s get the contents of the cell H17 which contains a formula.
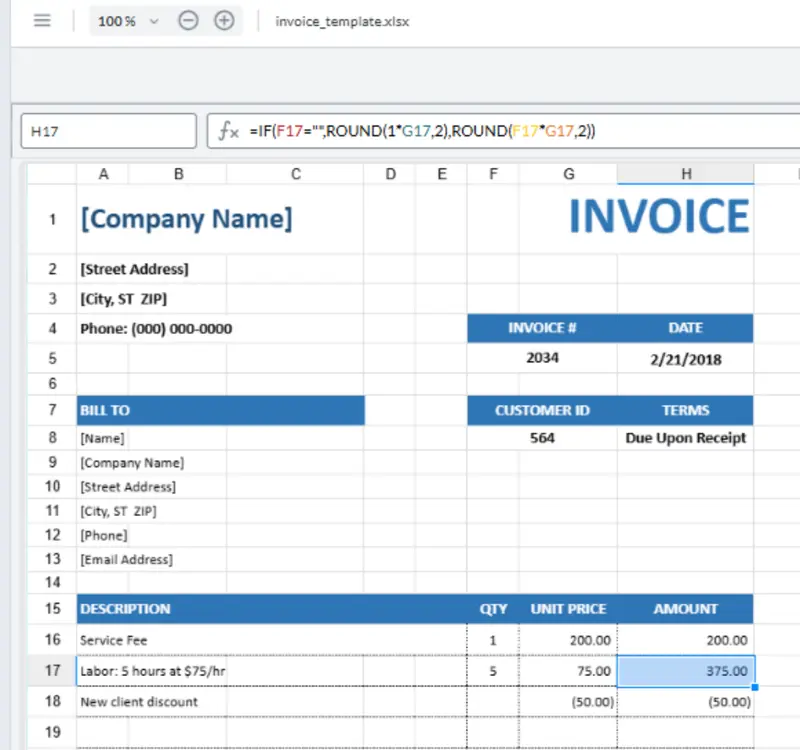
Figure 7 - The invoice sample document from the Apryse Showcase
When getting a specific cell, we typically specify the location using zero indexed row and column - as such the cell “H17” is found in row 16, column 7.
If we run that code then we can see the formula, calculated value, display value and the formatting applied to the cell.

Figure 8 - The output of running the code snippet.
That’s a lot of information for a single cell!
In particular note how there is a cell value (which is the result of the calculation specified in the formula), and the displayed value, which depends on the cell value and the cell formatting style.
That formatting style is complex – indicating the level of control that you have over the way that the data is formatted.
Make It Cell: The Art of Spreadsheet Style
The Spreadsheet Editor comes with a lot of cell formats built into the UI.
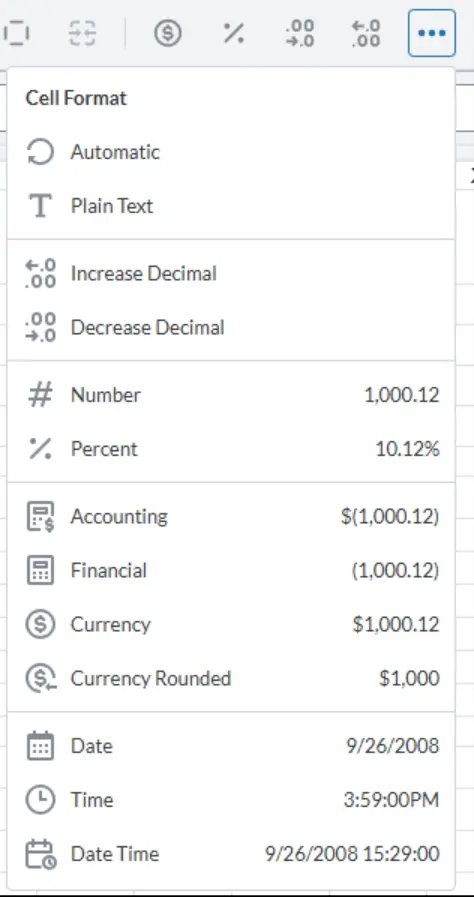
Figure 9 - The prebuilt formats that are available in the Spreadsheet Editor.
You can also specify border styles, fonts, colors and so on – all from the UI.
As you would expect though, with the powerful Apryse Web SDK behind it, it is also possible to specify styling programmatically.
We’ll also use the opportunity to change the cell content.
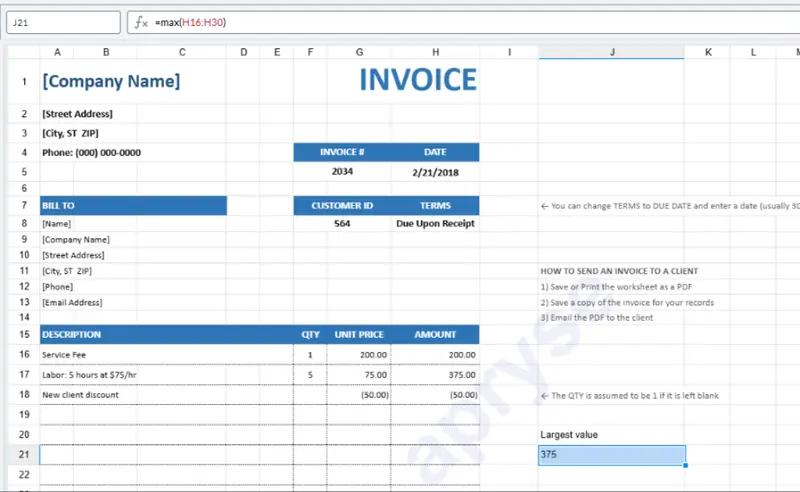
Figure 10 - The example document. We will be modifying the content of the date in cell H5
As an example, let’s look at the cell H5 which contains the date “2/21/2018”. In fact, that date is hard-coded text. It’s not ideal, but it is the kind of thing that is regularly found in real spreadsheets – sometimes just because people couldn’t work out how to make the date format the way they wanted.
Let’s imagine that we want to change that value to the current date. We will also update the date format to avoid confusion if the sheet is read by someone outside of the US, by showing the month as a word, rather than as a number.
Finally, and just for the fun of it, we will set the cell background color to pale green.
We could do a lot more with the code, but that’s a good example to start with.
If we know that the date will be in cell H5, then we could just edit that cell.
However, if someone updates the spreadsheet by adding (or removing) columns or rows then there is a risk that the cell that we are looking for will no longer be at “H5”.
To make our code mor robust we can search all of the cells in the spreadsheet until we find one that has the text “2/21/2018”.
Most of the code is iterating through the cells so that we can test each one. The actual test uses cellTest.stringCellValue – that function returns the contents of the cell as a string. If nothing is in the cell, then an empty string is returned.
Once a cell is found that contains the text that we are looking for (in this case “2/23/2018), we call setDateValue, passing in the current date converted to a string in the format '2025-07-29 13:13:00' (I haven’t included the function which creates that formatted, so that we can concentrate on the Spreadsheet Editor code).
Next, we get the cell style of the selected cell, set the DataFormatString to the way that we want and set the backgroundColor property to “lightgreen”
Then we call setStyle on the cell.
Note: In 11.6 there is a bug that requires you to call that function twice if you want to update the DataFormatString.
Finally, we set found to true, allowing us to short-circuit out of the loops searching through all the cells in the sheet.
Now when we run the code we get:
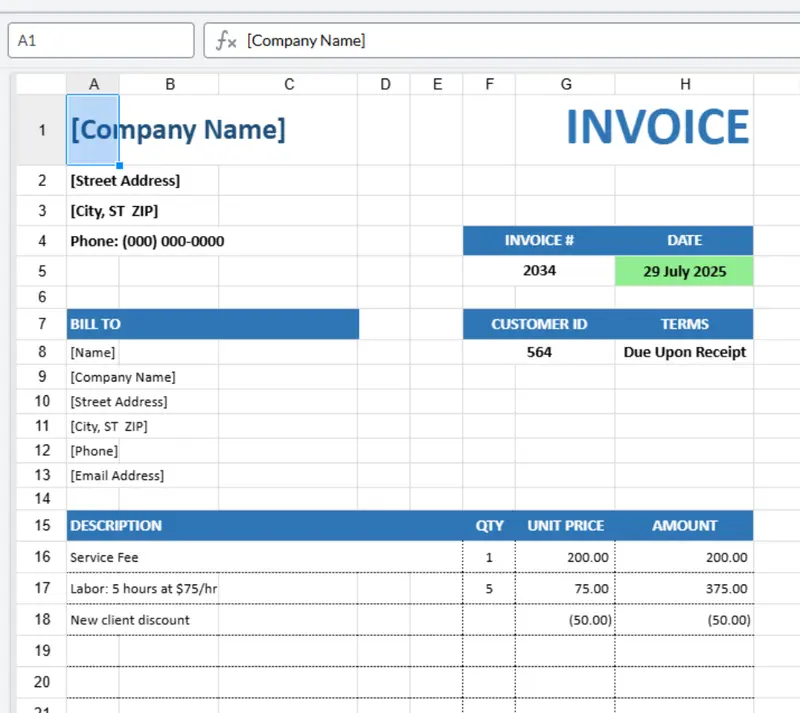
Figure 11 - The output of our code - we have updated the cell with the current date, specified a date format and set the background color.
Perfect!
At this point you could download the spreadsheet, serialize it and save it via a web API or do whatever you need to do.
Regardless of what you do next, the changes we made are still there – you can check that by opening it in Excel.
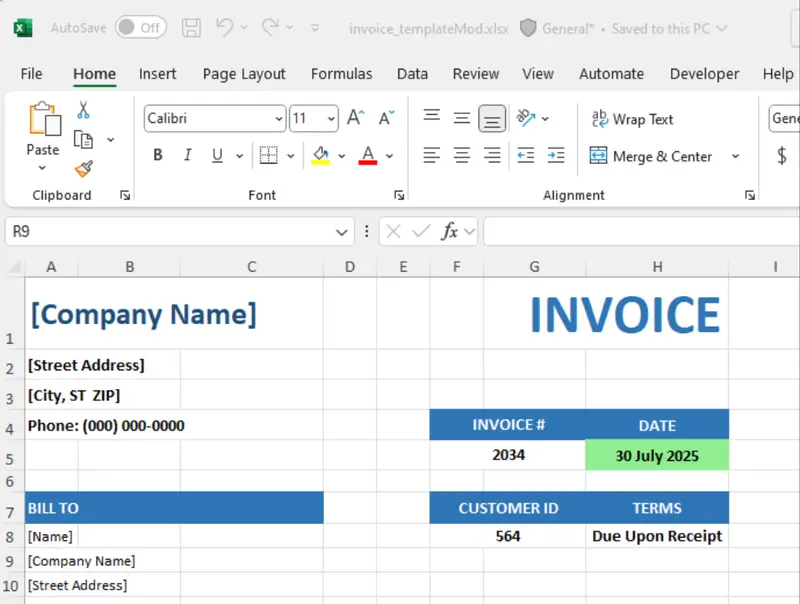
Figure 12 - Our modified file, now shown in Excel - our changes are still present.
That’s a great result.
Where next?
You could, if you want, extend this mechanism to allow you to dynamically populate spreadsheets in a similar way to how Apryse Document Generation will allow you to create DOCX and PDFs using Office templates and JSON.
Or you could interactively edit the spreadsheet with a mixture of UI based and programmatic commands.
Or you could search for values that are greater than expected (in a quote, for example) and flag them for manual review. What a huge range of opportunities!
We have only just scratched the surface of what Spreadsheet Editor offers. If that was not enough, with just a couple of changes in the code you can have a DOCX editor, or a PDF viewer and editor.
So, grab yourself a free trial license and try things out for yourself. There’s documentation to get you started and the Apryse Discord channel where you can ask for help or make suggestions.


