Roger Dunham
Published June 19, 2026
Updated June 19, 2026
6 min
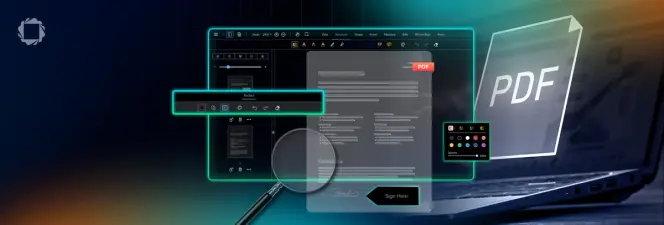
AI Powered Redaction from Within Apryse WebViewer
Roger Dunham
Summary: This article introduces a new Apryse code sample that leverages LangChain and LLMs directly within WebViewer to automatically detect PII and create redaction annotations to streamline the document security workflow. By integrating AI-powered detection, users can efficiently identify sensitive data while retaining necessary human oversight for final redaction approval.
Introduction
Every day, organizations collect, share, and store documents containing personally identifiable information (PII) from invoices and contracts to medical records, insurance claims and legal filings. Within those documents lie names, addresses, account numbers, and other sensitive details that, if exposed, can cause real harm both to the people whose details have been shared, and also to your business.
At the very minimum, breaches of PII will cause your business to lose trust of customers, at the other, it could be exposed to regulatory penalties, potentially with fines that run into the millions.
That’s where PII redaction comes in. The Apryse SDK has had the ability to apply redactions for many years; not just blanking out the text with a black box but also removing the underlying content.
In this article, we will look at how you can use a new code sample from Apryse that shows how you can call an LLM via LangChain directly from within WebViewer, and use the resulting information to automatically create redaction annotations.
How Redaction Was Done in the Past
Detecting PII has traditionally been a manual, and tedious, process.
One person would review the document in a tool such as Apryse WebViewer, looking for PII (or whatever else needed to be redacted) and marking it with a “redaction annotation”. They would then save the file.
At this point, the PII is still present, just highlighted.
A second person would then review the document, verify that the text marked for redaction was correct, check that nothing had been missed, and when they were satisfied, the redactions would be applied, with the PII being permanently removed from the document.
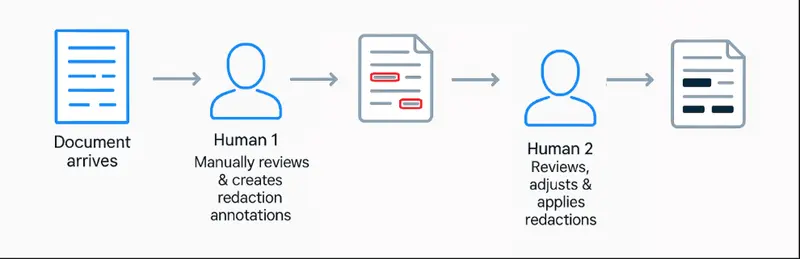
Figure 1: The traditional redaction process. Note that there are already two "humans in the loop".
That’s been an effective, albeit time-consuming, solution.
With the development of AI powered PII detection, we can replace the first step by having the Apryse SDK send data to the LLM, get back the PII, then create redaction annotations based on the data. These still need to be reviewed and applied (you could automate that, but that assumes that AI never makes a mistake, which might be described as “brave”).
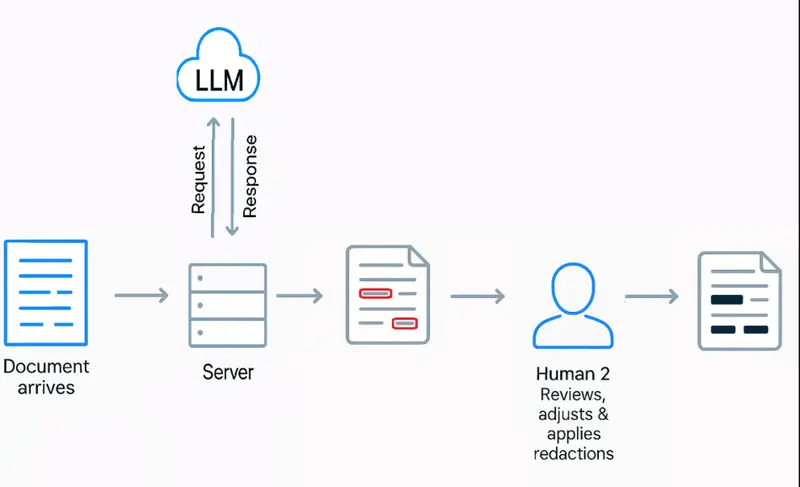
Figure 2: Using Apryse SDK running on a server to interact with an LLM to detect PII, then create the redaction annotations automatically. A human is still needed to review and apply the redactions.
In production, you would likely have the Apryse SDK running on a server and creating those redaction annotations. However, to demonstrate the concepts involved, we have created a sample whereby you can initiate the interaction with the LLM, and the creation of redaction annotations, directly from within WebViewer.
The document text is sent to an external AI service. You should therefore satisfy yourself that this is not, itself, going to result in data privacy issues. If that is a concern, then you may like to look at an on-prem PII detection system such as Presidio which can still be used to interact with WebViewer.
Running the Sample
Prerequisites
- A development environment that includes Node.js. This article was written using Node v24.15.0 running on Windows 11, but you should get similar results with other compatible versions of node and also on macOS and Linux.
- A license key for Apryse WebViewer.
- An API Key to allow you to use the AI tool of your choice. I’m using OpenAI, but since LangChain is used as an intermediary, you could use an alternative AI tool if you prefer. Note that while you can create an account with OpenAI for free and get an API Key, you will likely need to upload some credit in order to get free tokens for the sample to work.
Downloading the Sample
The sample can be found at https://github.com/ApryseSDK/webviewer-samples/tree/main/webviewer-redaction-ai
It’s part of a large set of WebViewer samples that can be cloned as a single repo. Once that has happened, you can navigate to the folder that contains the redaction sample.
git clone --depth=1 https://github.com/ApryseSDK/webviewer-samples.git
cd webviewer-samples/webviewer-redaction-ai
You will then need to install the various dependencies.
npm installSpecifying Credentials to Use the AI Model
Next, create a file called “.env” by copying the .env.example file that is included in the sample.
Enter your API Key for OpenAI, and values for the model, temperature (which affects how random the model is) and maximum number of tokens (which limits how much the model may cost to run).
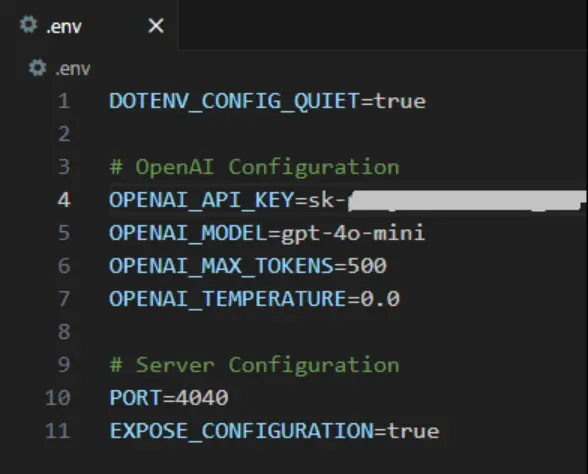
Figure 3: Example configuration options.
Specifying the License for Apryse WebViewer
Enter your WebViewer license key into the WebViewer constructor options within the file index.js.

Figure 4: Part of the WebViewer constructor code. Enter your license key as an option.
The WebViewer options also include three other options that are important for this sample to work:
- fullAPI:true — needed for advanced document handling (such as redaction)
- loadAsPDF:true — needed since redactions can only be applied to PDFs
- enableRedaction:true — allows the Redaction tool bar to be shown
Starting the Project
Within a terminal window enter “npm start”.
After a moment or two, you will be able to open a webpage that contains WebViewer and a default document by clicking on http://localhost:4040/client/index.html.
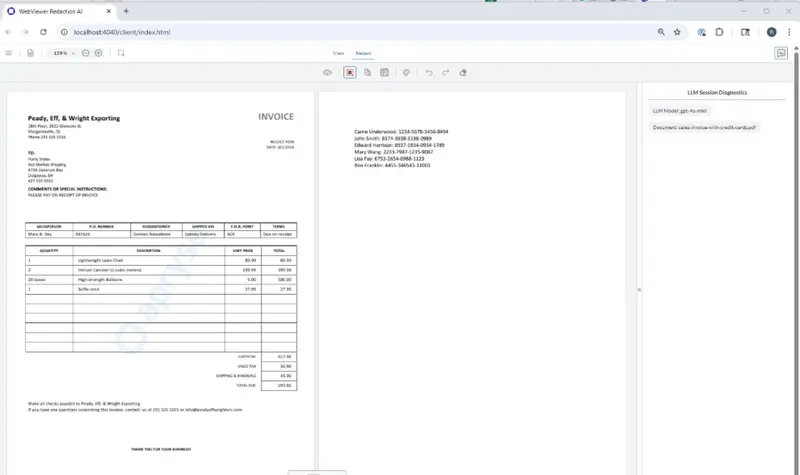
Figure 5: The sample app. Note that there is a new panel at the right-hand side.
But this isn’t the regular WebViewer!
- There is a new panel at the right-hand side that is toggled by a custom button. The panel shows debugging output from the LLM.
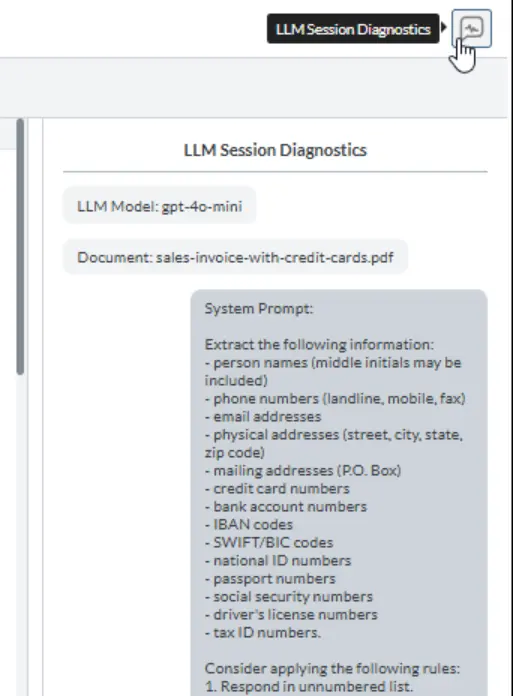
Figure 6: The new panel at the right-hand side of WebViewer.
- The number of menu items is greatly reduced as there is just View and Redact.
- The redaction ribbon has a new button.
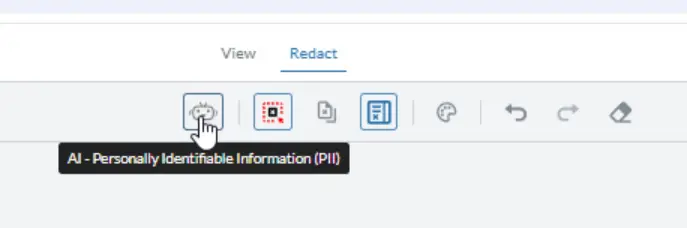
Figure 7: The new button added to the redaction ribbon menu. It allows you to initiate the interaction with OpenAI.
That’s a significant change from the default UI, but it was simple to implement. That has been done using a config file to control the WebViewer Modular UI.
See the App in Action
Getting the app to create redaction annotations is easy. Just click on that new button, and after a few moments, the AI Diagnostics panel shows the response from the server.
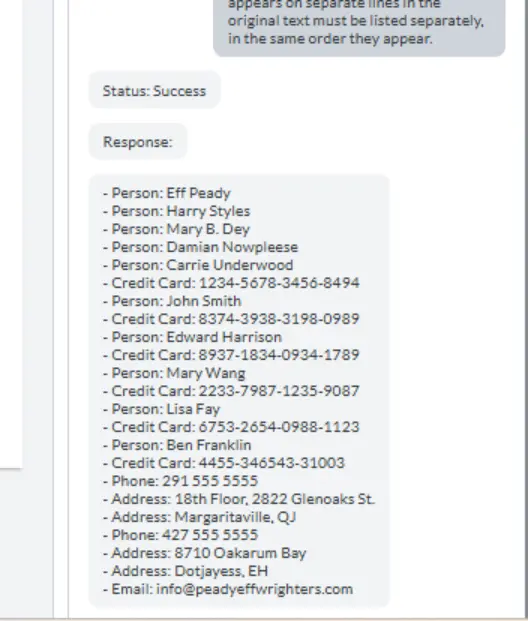
Figure 8: The AI Diagnostics panel. You can see both the prompt that was used and the PII (and type of PII) that was detected.
Under the hood, OpenAI has returned both the text and the type of data (such as “Phone”). WebViewer then uses that data to search for all occurrences of the text within the document and creates redaction annotations where they are found.
Once all of the returned data has been processed, the redaction panel is opened so that you can see where the redaction annotations are located.
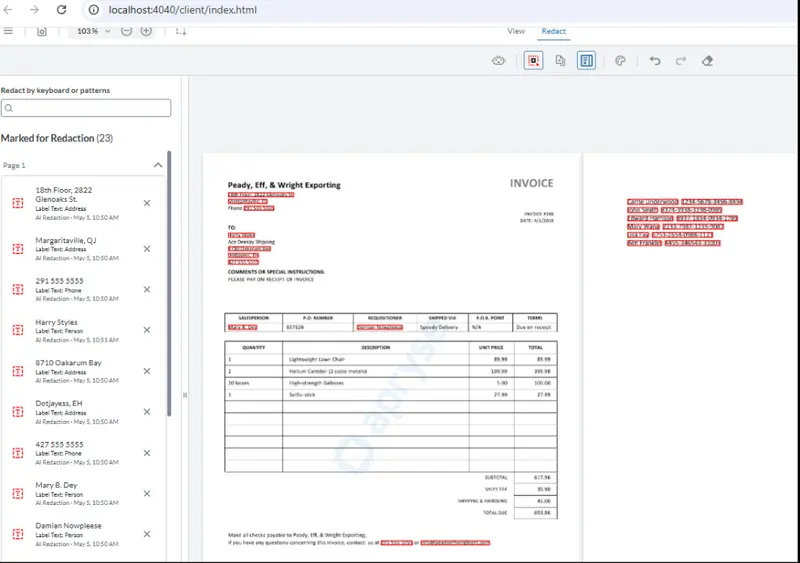
Figure 9: WebViewer has used the Apryse SDK, in the browser, to create redaction annotations based on the information returned by OpenAI. Note that the Redaction panel is on the left-hand side. That’s another example of customizing the Modular UI.
At the moment, these are redaction annotations. They show what text should be redacted—BUT the redaction has not yet occurred. While you can save the file at this time, the PII has not yet been removed.
That is not an AI specific issue. The same scenario occurs with the traditional manual process, one person marked up redaction annotations and saved the document before another person reviewed and applied them.
Applying Redactions
The final step in this workflow is the same as with the original manual process—a person reviews the redaction annotations and checks that they are correct. For example, something might have been incorrectly detected as PII, but you need to keep it, in which case the person just needs to delete the specific redaction annotation.
When you are happy with the list of redaction annotations, you can click on Redact All. You will be asked to confirm that you want to do this.
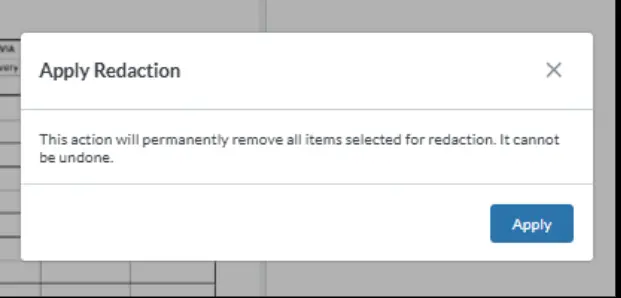
Figure 10: Confirmation box.
If you click on Apply, then the redactions annotations will be converted into redactions, with the underlying content removed. The location of the removed text could be left as a black (or other color) rectangle, but the code has been set up so that you can see the type of thing that has been redacted.
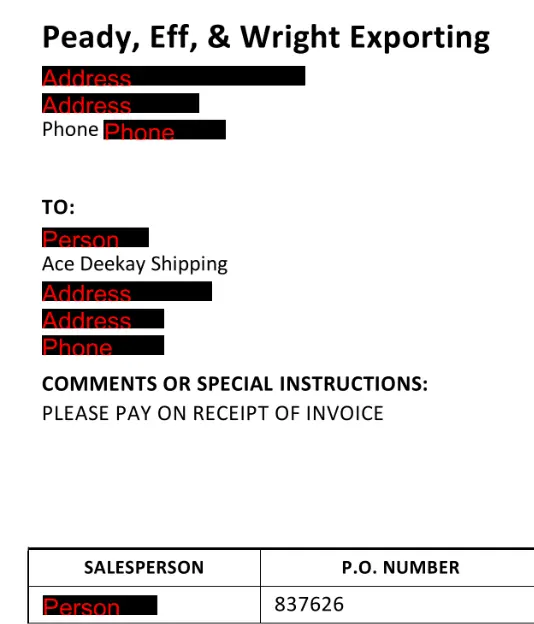
Figure 11: The final result. The PII has been removed, but you can see the type of data that it was.
Wrapping Up
Redaction matters. But manually finding text to be redacted is time-consuming. AI offers an automated way to do this, which can be combined with the Apryse SDK running on a server (or in this case, within the browser) to create the redaction annotations.
WebViewer then provides an easy and accessible UI where a human can review the document and then apply the redactions.
And this is just a fraction of what WebViewer can do. You can try things out for yourself, right now, using the Apryse showcase.
Alternatively, get a trial license key, download the samples, and see how it can help in your document workflows.
If you have any questions about WebViewer or the SDK, you can reach out to us on our Support channel.
If you have any questions about this blog, or there are other blogs that you would like us to write, then please contact us at blog-feedback@apryse.com.