Roger Dunham
Published March 14, 2025
Updated February 13, 2026
10 min
React, Firebase, Apryse and Signing PDFs
Roger Dunham
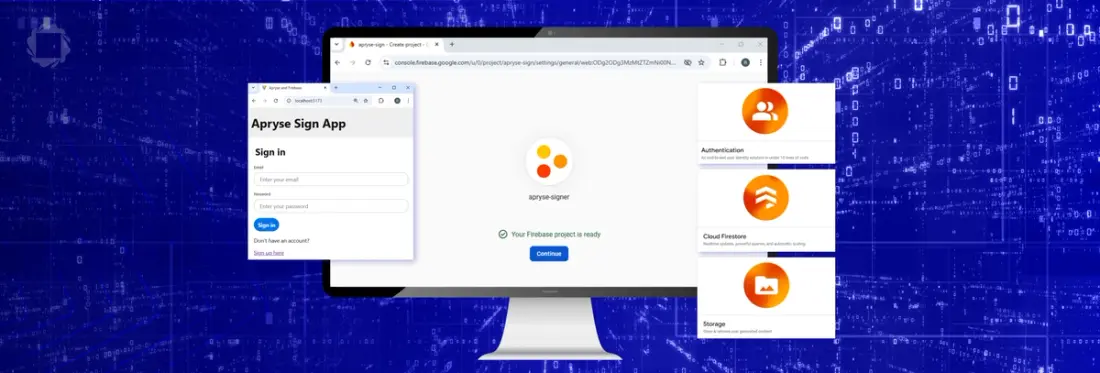
PDFs have taken the world by storm -offering a highly portable document type that is easy to share. While the format started as ‘read-only’ it has long since been possible to add comments and annotations, as well as more recently to be able to edit the content of the PDF with tools such as the Apryse SDK.
This is one of a pair of articles that show how to combine the flexibility of PDFs with the power of Firebase to develop a system for PDF management with WebViewer and Firebase, where one user can set up a PDF to have an e-signature added, and a different user can then, having reviewed the document, add that signature.
In this article we will look at how to set up the Firebase environment and get it interacting with your code. In the companion article we will look at how to use the collaborative app.
While this article is about using Firebase, the principles are the same for Azure and AWS and other Cloud based providers.
Caution: Think Security for Production Code
We will set up this project to get it working. We will do that by using less restrictive permissions than should be used in production.
This article is primarily about using Apryse, not about using Firebase. Once you move beyond the Proof-of-Concept stage, it is strongly recommended that you follow best practices for working in a cloud environment.
Prerequisites and Versions Used for This Article
This article was written in January 2025, with screenshots taken on a Windows 11 machine.
You will need to sign up to get an account for Firebase. A free account provides access to a lot of functionality.
However, as we progress through this article we will get to a point where we need to use storage buckets, and these are not available with a free subscription. As such, you will need to register a credit card to use them. However, for the purposes of following along with this article, you are unlikely to exceed the free data allowance.
Part 1: Configuring Firebase
There are several steps needed to set up the Firebase side of things, we will step through these first, then in the second part of this article move onto using the code that will interact with Firebase.
Step 1: Initialize the Project
Once you have a Firebase account, login and click on Go to console.
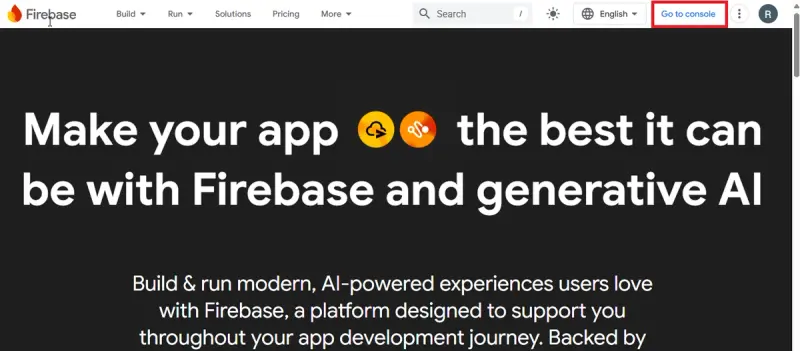
Figure 1 - Getting started with Firebase. Click on “Go to console”.
This will take you to the Welcome page.
Then click on Get started with a Firebase project.
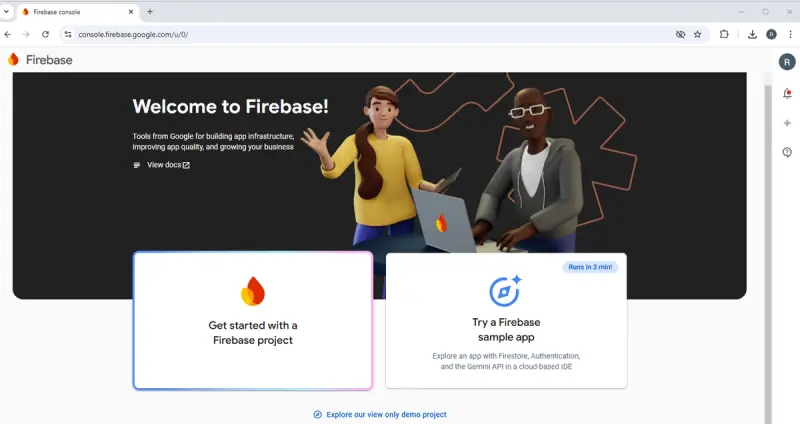
Figure 2 - The welcome page in Firebase. If you have previously created projects, then they will be shown here.
We need to create a name for the project. You can call it whatever you like, but for this article we will call it “apryse-signer”.
The casing of the app’s name matters. While you can use upper case if you prefer, that can become confusing when you configure the software part of the app to work with Firebase.
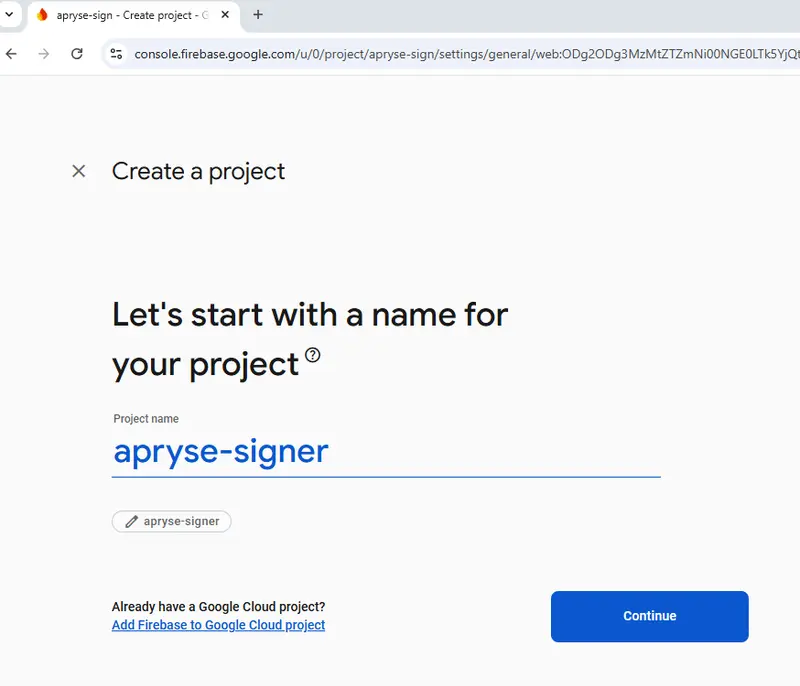
Figure 3 - Creating a name for the project.
Now click on Continue
You will then be asked if you want to enable Google Analytics for the project. It’s up to you, but we won’t (it adds a few extra steps that aren’t essential, and I’m trying to keep this tutorial short) so untoggle that option, then click on Create project.
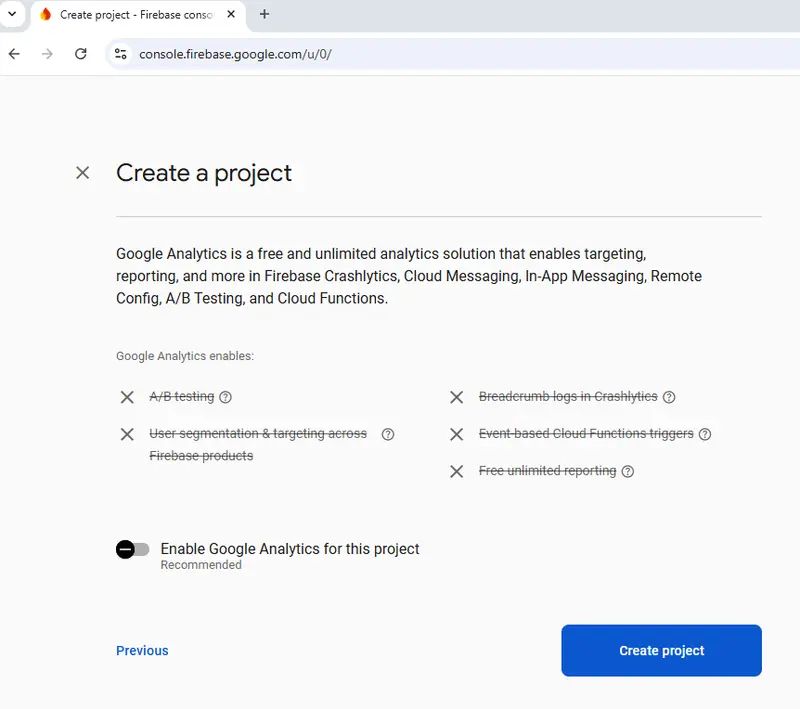
Figure 4 - Google Analytics is enabled by default. I have disabled it only to simplify the set-up process.
It will now take a few seconds to provision the resources.

Figure 5 - The project has been provisioned- nice work!
When that is complete press Continue. You can now click on the home button which will show you settings for the app.
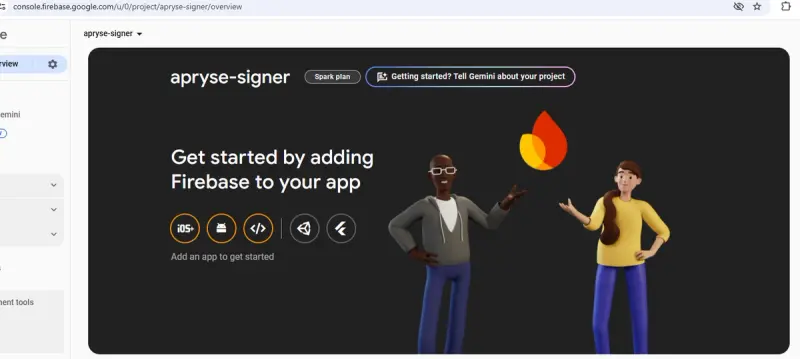
Figure 6 - The top part of the home page for the app.
Cool! You now have the App ready for the next stage.
Step 2: Set up authentication method
We want to control who can use the app, so we need to set up authentication.
Firebase provides lots of Authentication methods – but for this article we will only use email and password.
You could, if you want, add an alternative such as Google, but for now we won’t do that.
From the home page, scroll down and click on Authentication.
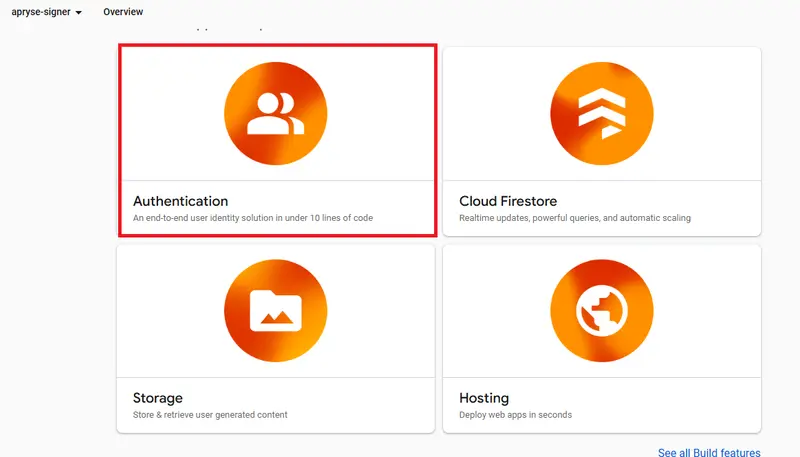
Figure 7 - Click on Authentication to start setting it up.
This will lead you through the steps required.
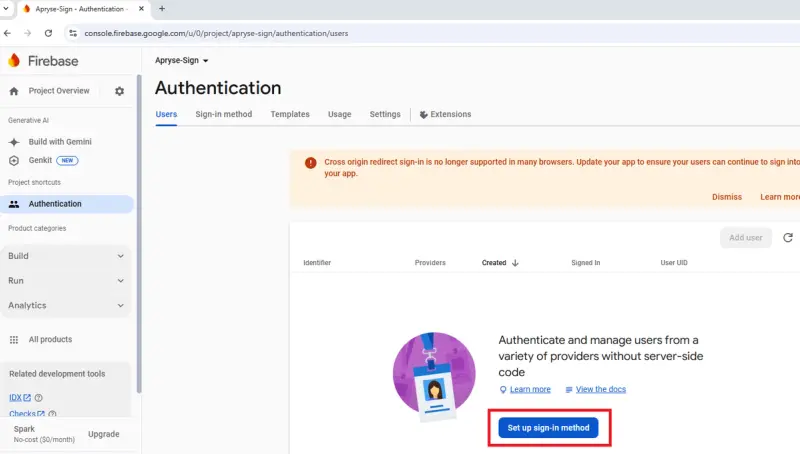
Figure 8 - The first part of setting up Authentication.
Click on Set up sign-in method.
There are lots of options. We are just using one - Email/Password.

Figure 9 - The list of Authentication methods available in Firebase.
Click on Email/Password which will cause a new tab to open, then enable that option and press Save.
[You can use the Email link option if you want, but we won’t do so for this article.]
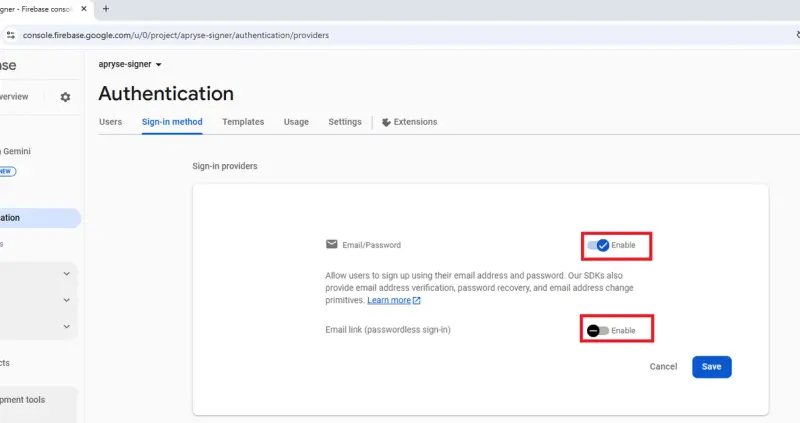
Figure 10 - Enable the Email/Password option and click on Save to use that authentication method.
The UI will update, and you will see that Email/Password has been added to the list of “Sign-in providers”.
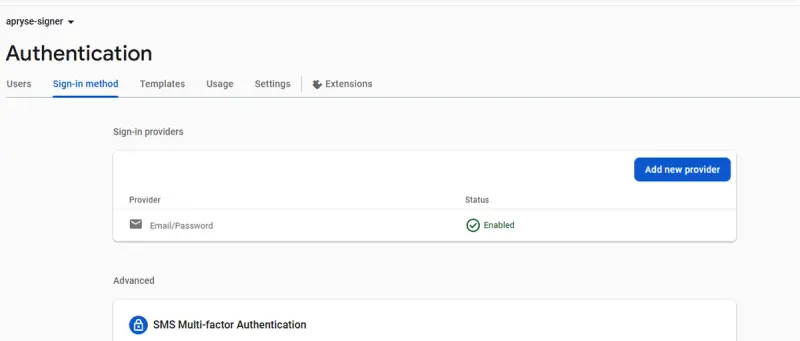
Figure 11 - Great! We have enabled Email/Password authentication.
Great! That’s the authentication set up.
Step 3: Setting up Storage
When we get to the stage of running the app, we will need to upload documents to Firebase. That needs to be done both before they are signed and also after signing has occurred. We will do that using ‘Buckets’.
Click back onto the Project Overview then scroll down to find the Storage option.
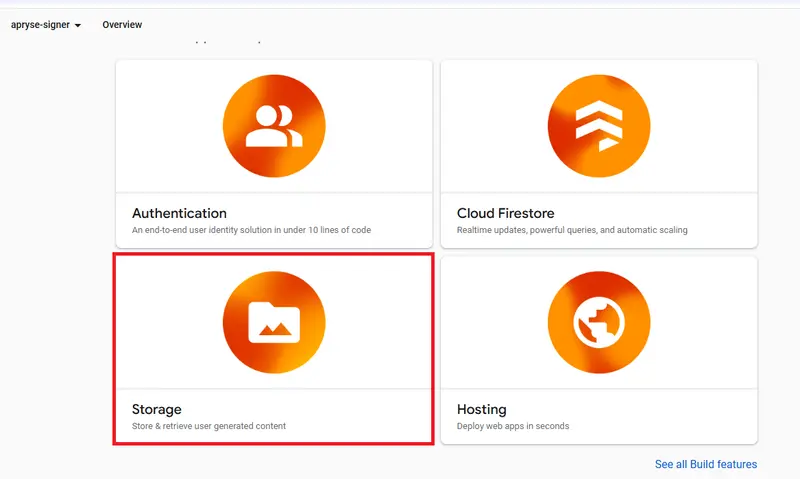
Figure 12 - The storage option on the home page.
Click on the Storage option.
Storage is not available on the no-cost “Spark” plan, and you will be warned about this. You will therefore need to upgrade your project’s billing plan.
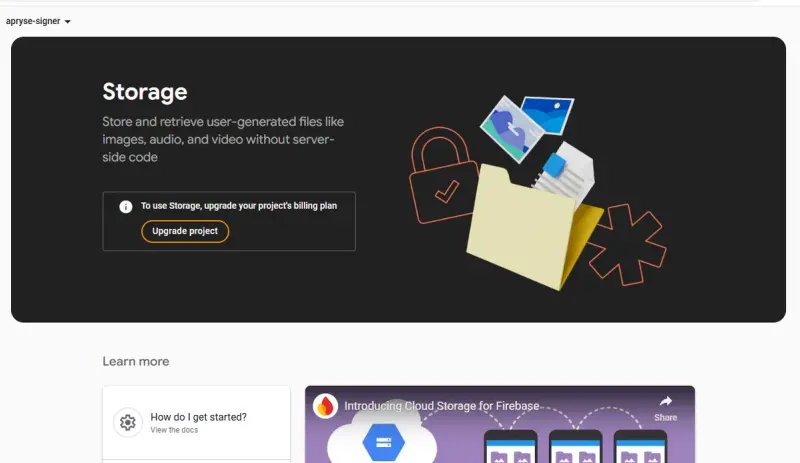
Figure 13 - Storage isn't available on the free plan, so you will need to upgrade.
Click on Upgrade project and follow the steps, which will help you to set up the “Blaze” plan.
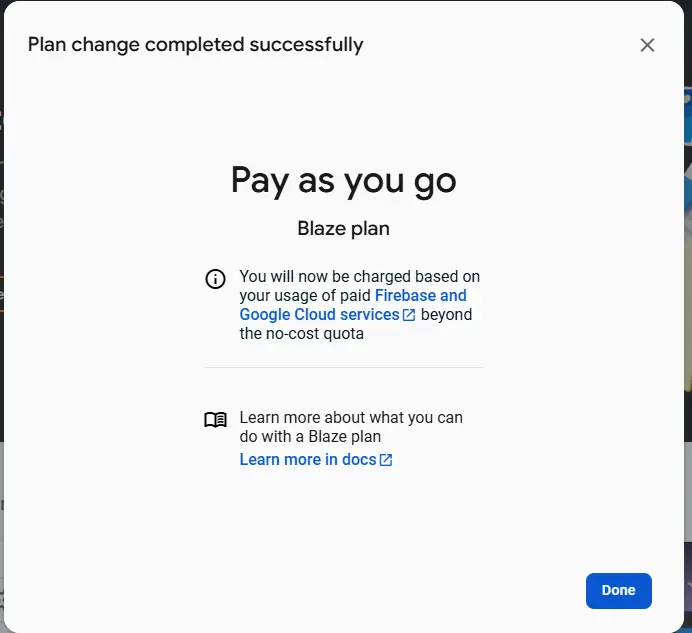
Figure 14 - I upgraded to the Blaze plan in order to use Storage
Once the Blaze plan is enabled, you will be able to click on Get Started on the Storage page.
You will need to specify a location for the storage.
What is available may depend on where you are, but I chose US-CENTRAL1 which was the default no-cost option. There are many other options, which may help to reduce latency, but may have a cost implication.
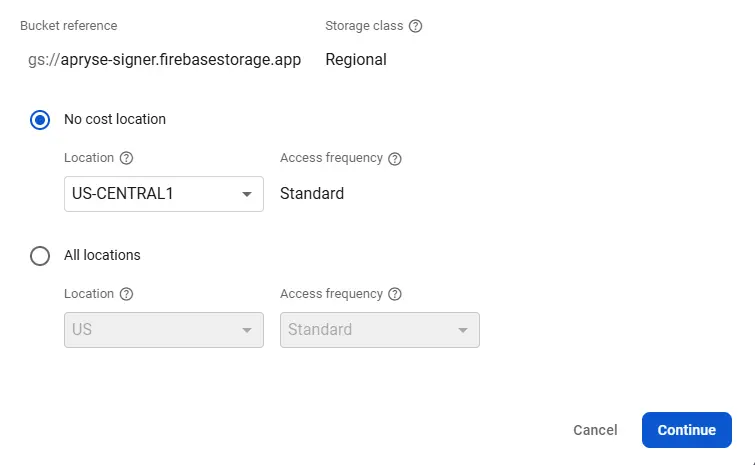
Figure 15 - Setting up the location where the storage will be located
Click on Continue.
Next you need to specify Security rules. The default options are production or test. We will change them in a minute, so it doesn’t matter which you choose.
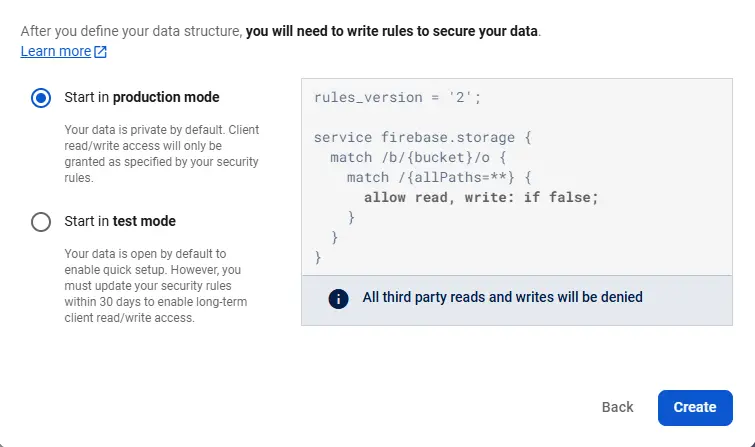
Figure 16- Setting up the storage security rules.
Leave the option as “Production mode” and click on Create.
Once again there will be a short delay while Firebase creates the storage resource.
Now let’s update the storage rule so that only authenticated users can access the resource.
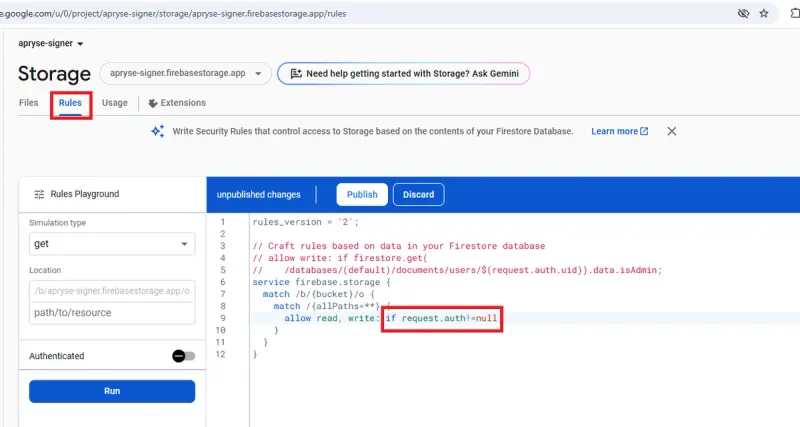
Figure 17 - Updating the storage security rules to allow only authenticated users to access the bucket. This is not as strict as it should be but is a good start for a Proof of Concept.
Then click on Publish. It may take a few moments for the new rules to propagate through the system.
This is not a very secure rule, so you will want to make it more restrictive when you move to production.
Step 4: Setting up Firestore
Finally, we need to set up Firestore. This is the database that links information about users and the location of the documents within storage
Once again click on the Project Overview button.
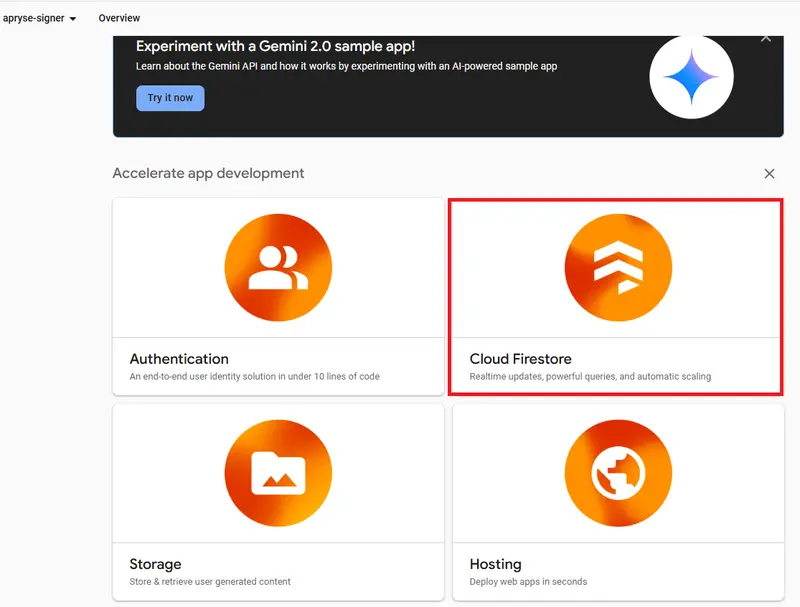
Figure 18 - Click on Cloud Firestore to start the process of setting up the database.
Click on Cloud Firestore which will start the set-up process.
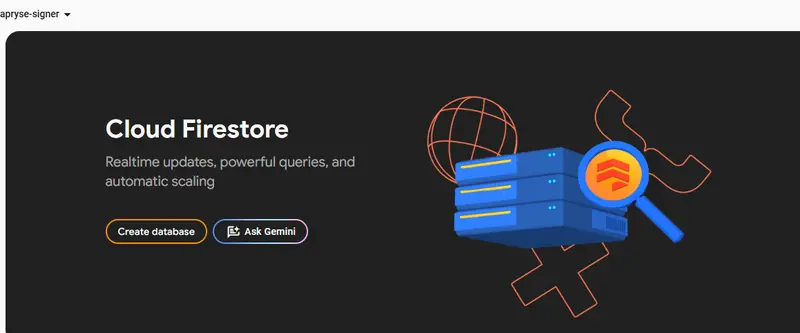
Figure 19 - The first part of the process for setting up the database.
Click on the Create Database button.
Once again you will need to specify a location – for this article we can just use the default values.
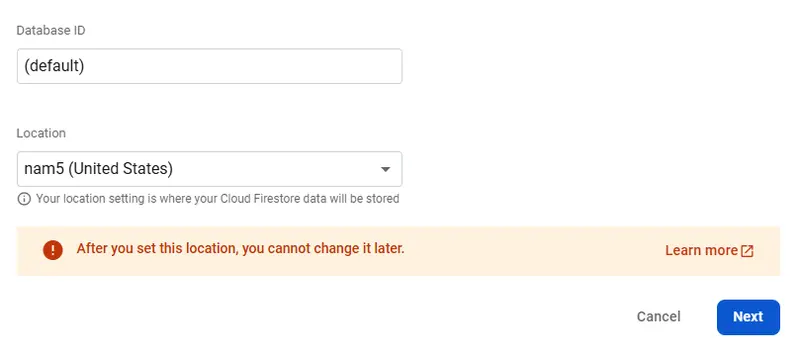
Figure 20 - Specifying the location and ID for the Firestore database.
Click on Next.
Once again, we will need to specify security rules. As before, choose either production or test, as we will modify the rules in a moment.
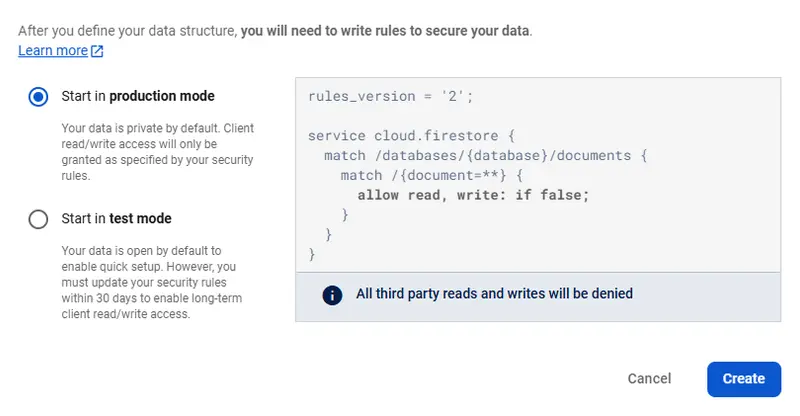
Figure 21 - Specifying the initial security rules for the database.
Click on Create, and the Firestore will be provisioned.
Just as before we can update the security rules, so we will do so and make them match those that we set for the buckets:
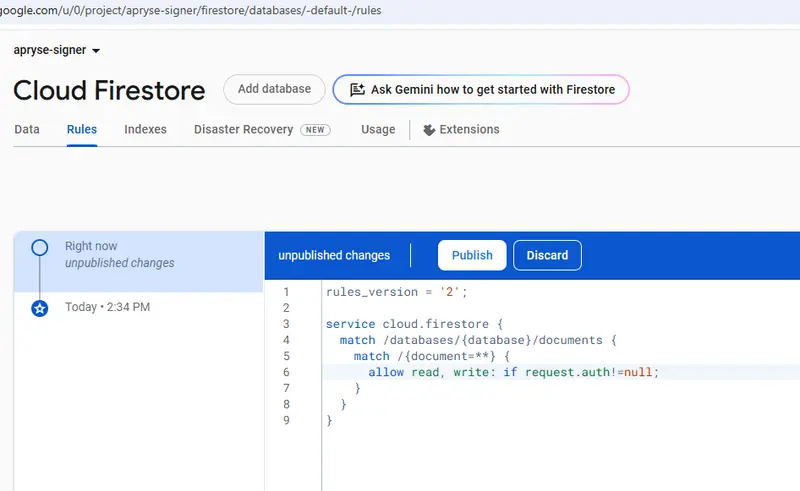
Figure 22 - Updating the security rules for the database.
Click Publish, and as before the changes will propagate through the system.
Step 5: Registering the app
The final step is to register the app. Click on the Project Overview then on the </> button.
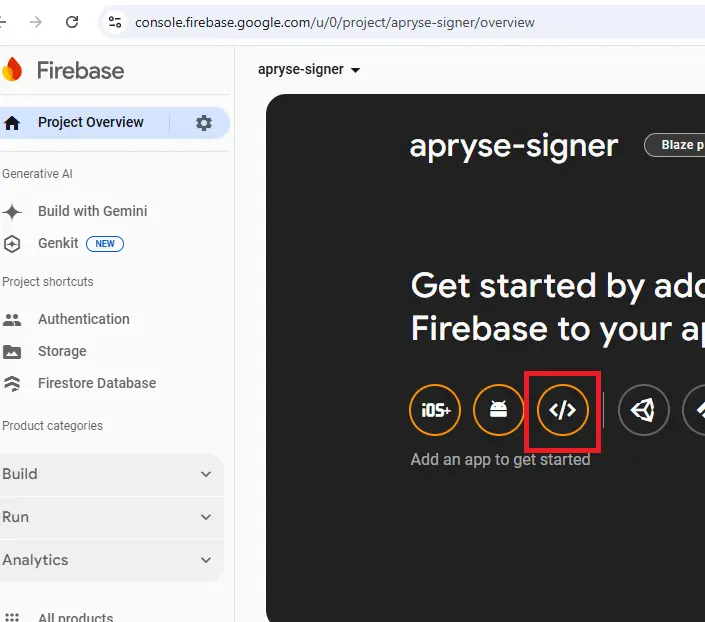
Figure 23 - Registering the app to use on the Web
Enter a value into the App nickname field (we will use “apryse-signer”) then click on Register app.
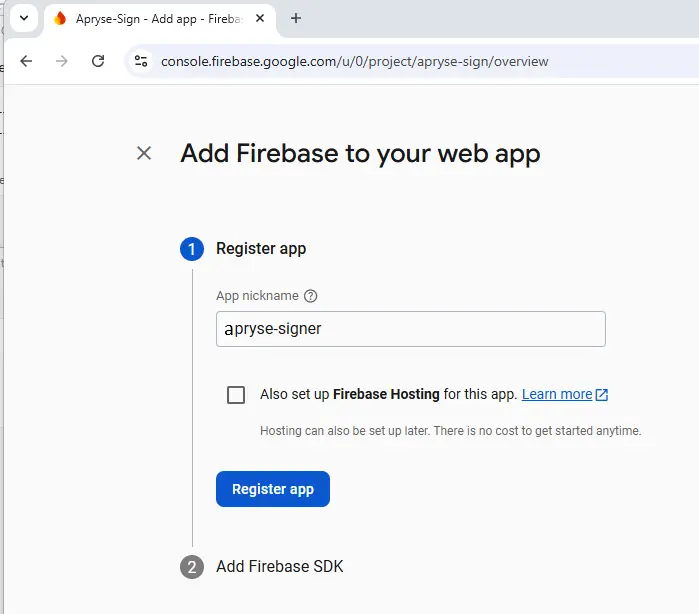
Figure 24: Give your app a nickname. In this case we are using ‘apryse-signer’ which is the same as the project name.
After a moment or two, the UI will update and show some values that we will need in order to access the app from our code. You may wish to copy them into VSCode (or a text editor) so that you can access them later.
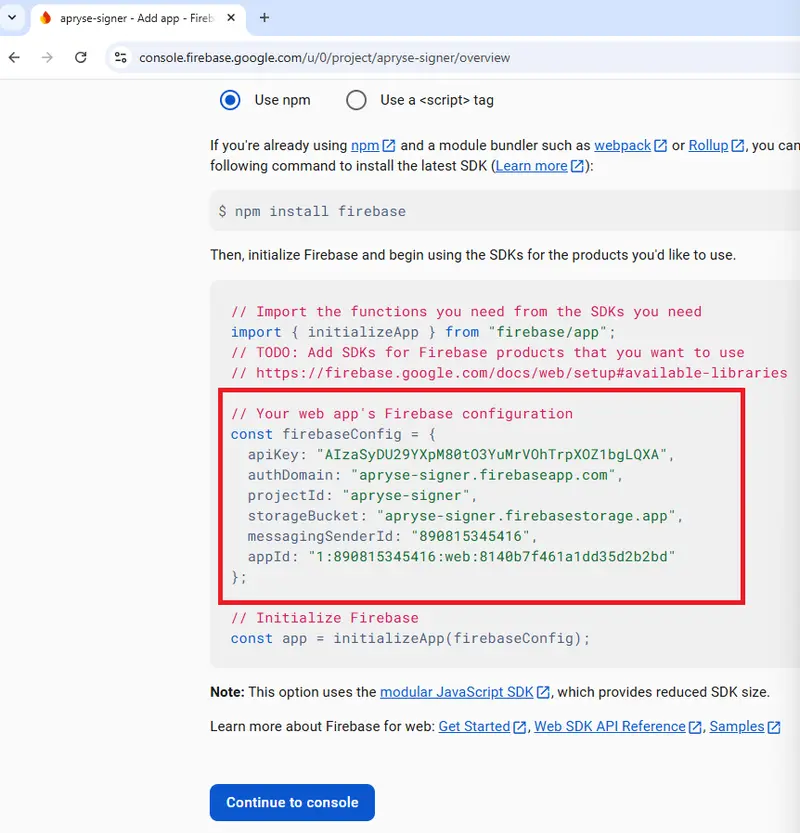
Figure 25 - The config values that you will need in order to access the app from our code. Your values will be different (and these ones won’t work by the time that the article is published).
That’s everything set up in Firebase.
You can find those config values (if you forgot to save them) by clicking on the Settings button next to Project Overview.
Step 6: Setting up CORS
We still need to set up CORS. However, we won’t do that just yet.
It’s easy to forget to do, so we will see how to identify the problem and fix it when we get the code running.
Part 2: Setting up the code
The code is available on GitHub. It is scaffolded using Vite, and can be run from within Visual Studio Code. It’s a relatively complex project, so we won’t walk through all the individual parts, but feel free to browse through it as it shows how to use the WebViewer UI in a configurable way.
Let’s download the code, run it, and see what it can do.
Prerequisites and Versions
For any Node based project there is the ongoing issue of versioning and keeping dependencies up to date.
I’m using Node 18.19.0 and npm 10.9.2
The project is also using v11 of the Firebase API, but this will be installed automatically by npm.
Step 1: Clone the app.
Clone the app to a new folder then navigate to the created folder. You could download the zip file for the GitHub, but I used git clone https://github.com/DocRog-maker/Firebase-WV11.git
Step 2: Install Dependencies
Run npm i to install the dependencies.
You may see warnings about some of the dependencies (it’s the nature of complex software). The Apryse SDK has no external dependencies, and the warnings relate to things that are involved in the scaffolding for the project not the Apryse SDK itself.
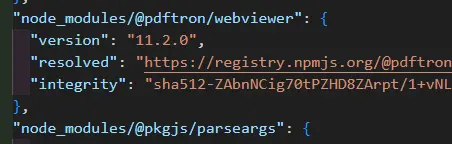
Figure 26 - The Apryse SDK (formerly known as PDFTron) library has no third-party dependencies.
If the warnings worry you, then you can use npm audit fix or even npm audit fix --force to resolve them.
Step 3: Create a .env file and add the config values
Next add a .env file to the project. I’m doing that within VSCode.
Add the following keys to it then add the values which we saw in Firebase
VITE_REACT_APP_API_KEY
VITE_REACT_APP_AUTH_DOMAIN
VITE_REACT_APP_PROJECT_ID
VITE_REACT_APP_STORAGE_BUCKET
VITE_REACT_APP_MESSAGING_SENDER_ID
VITE_REACT_APP_APP_ID
VITE_REACT_APP_DATABASE_URL
(Note naming of the keys matters - Vite will only import keys from the .env file if they start with the word ‘VITE’).
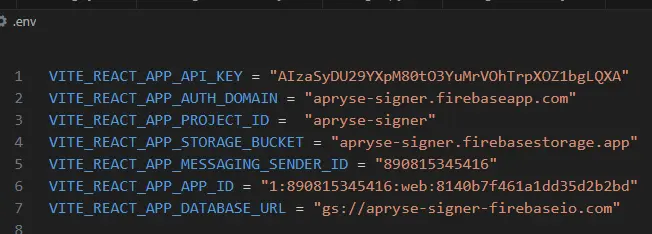
Figure 27 - The config values shown copied from Firebase into the .env file.
The only difficult value is APP_DATABASE_URL, which isn’t shown in the settings within the Firebase console.
The correct value for this key is “gs://” then the value for REACT_APP_PROJECT_ID followed by “-firebaseio.com”.
Watch out! APP_DATABASE_URL is case-sensitive. It is the reason that I called my app ‘apryse-signer’ not ‘Apryse-signer’!
Alternatively, if you don’t want to use a .env file, you can copy the values directly from Firebase and drop them into the file firebase.jsx (though again you will need to add the databaseURL by hand).
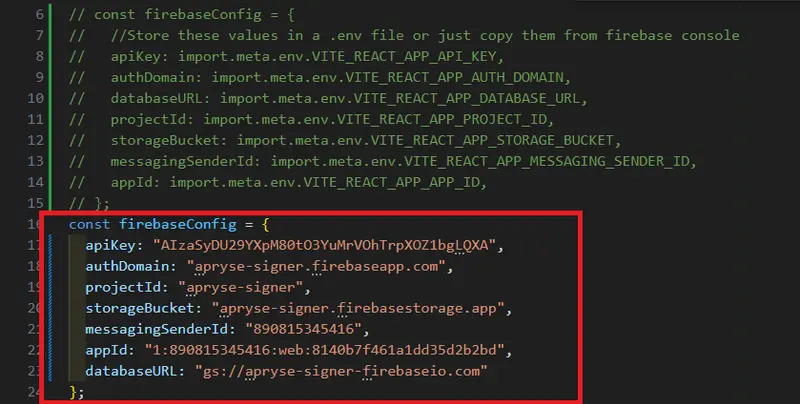
Figure 28 – As an alternative to a .env file you could copy the values directly from Firebase into the file firebase.js
Step 4: Run the app
Start the app by using npm run dev.
The app has been scaffolded with Vite, which is much faster than Create React App. In a few moments the start page will appear.
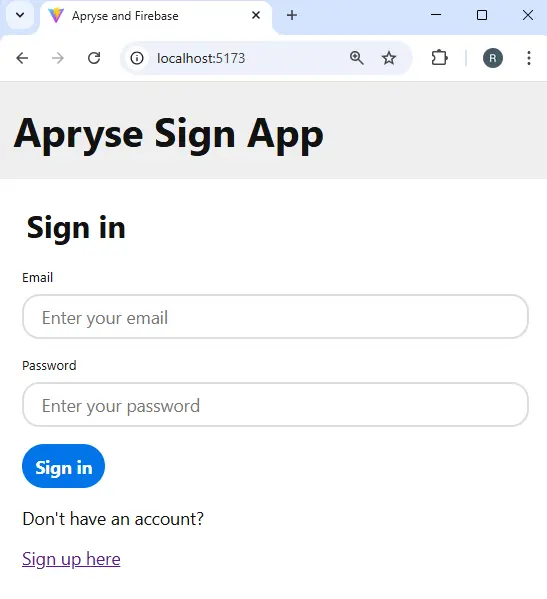
Figure 29 - The app running in Chrome.
At this point you can do a lot – you can add users, and prepare a document for signing.
But don’t show it to your colleagues yet!
If you remember, we haven't set up CORS yet, and when you come to signing the PDF then nothing will appear to happen. However, if you open the browser’s DevTools then you will see CORS errors in the console log.
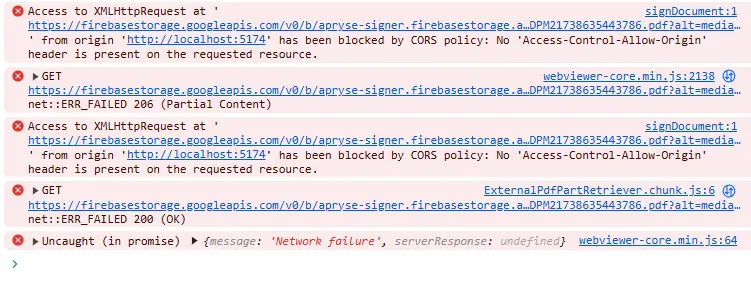
Figure 30 - Typical CORS errors - these are easy to fix when you know how.
Step 5: Resolving CORS errors
Thankfully it is not hard to resolve CORS issues with Firebase and Apryse.
There are several ways to do so, but we will download and install the gcloud CLI . This is the replacement for gsutil which is no longer available (but which you will still find lots of references to).
You will need a cors.json file in the root of your project folder (I’ve included one in the GitHub). This file specifies the CORS rules that you wish to enable. I’ve used simple rules, and you may wish to modify them if you need something more complex.
[
    {
        "origin":["*"],
        "method":["GET"],
        "maxAgeSeconds": 3600,
        "responseHeader": ["Content-Type", "Range", "Content-Range"]
    }
]
Now enter gcloud storage buckets update gs://BUCKET_NAME --cors-file=CORS_CONFIG_FILE
Where BUCKET_NAME is the name that we are using within the app, and CORS_CONFIG_FILE is the name of the file that we just created.
In our case the full command is gcloud storage buckets update gs://apryse-signer.firebasestorage.app --cors-file=cors.json
If you get an error about “only accepting bucket URLs”, then check that you are using hyphens and not an em-dash (let’s not talk about how I found that out.) When everything is correctly set up the CORS rules update will complete successfully.

Figure 31 - CORS is now successfully updated
The app is now set up and ready to use, so check out the blog about how to use it, or if you prefer, the video.
Where Next?
If you’ve followed this tutorial, then you will now have an app that demonstrates the ability to work with other users to create a collaborative workflow. You could extend on the ideas within the code to create an app that adds Digital Signatures (as opposed to a signature appearance), provides redaction functionality or a host of other things.
Grab yourself a free trial license key, and try things out for yourself - see how Apryse can simplify your processes and save you time.
In this article we have been working with a browser-based example. If you need something running on the server instead, then check out the Apryse SDK which offers the same functionality server-side, and is available in many programming languages.
In either case there is a wealth of documentation to help you to get started quickly.
If you have any questions, then feel free to reach out to us on our Discord channel.