DOCX Table Editing in WebViewer 10.8
By Roger Dunham | 2024 Apr 16

5 min
Tags
docx editor
table editing
release
Apryse offers unrivaled document processing technology for developers. Each new release builds on strengths to improve the software.
Release 10.8 contains a range of improvements across the product suite, but a particular highlight is the introduction of DOCX table editing within WebViewer.
It’s been a year since the implementation of the ability to edit DOCX files directly within the browser without conversion to intermediate formats, server-side processing, or embedding third-party dependencies. Since then, we have received lots of extremely positive feedback from customers that are already using it.
Over the year, we have continued to add more features like images and lists to the DOCX editor to include the majority of things that users want on a daily basis.
In the latest version, 10.8, it is now possible to create tables (and edit existing ones) directly within the DOCX file.
You can try this for yourself using the Apryse Showcase DOCX Editor. In fact, for this article we will use just the Showcase and work through steps that demonstrate how to use the table editor. You can use the table editor for whatever you want, of course, but as an example, we will create a schedule for a hypothetical three-day conference.
Adding and Editing Tables in WebViewer
The Showcase demonstrates a wide range of features including annotation and manipulation of pages, editing PDFs, redaction, and how to work with digital signatures. For the purpose of this article, though, just go to the DOCX Editor sample.
The sample allows you to open an existing document, but for now let's create a brand new document using the option in the main menu.
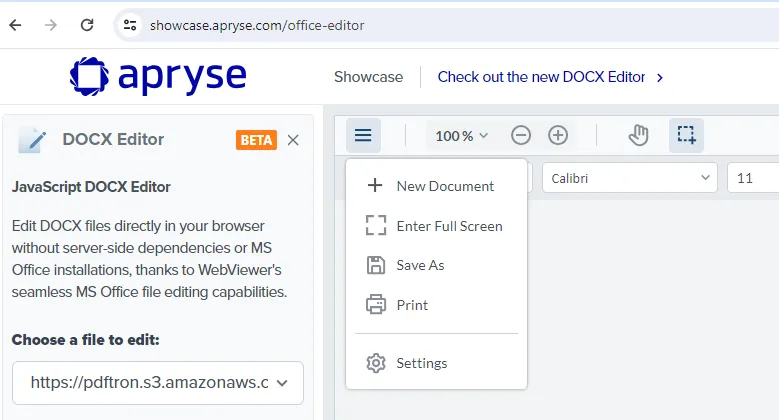
Figure 1 – The main menu in WebViewer showing the New Document option
Next, let’s add a title “Conference Plan” to the new document, then select the Table dropdown and create a 3x4 table. That is done by dragging the mouse over the grid until it is the correct size, then releasing the mouse.

Figure 2 – Adding a new table to the document
Adding text to the table cells is intuitive, so let’s add it – in this example we'll use the three days of the conference.
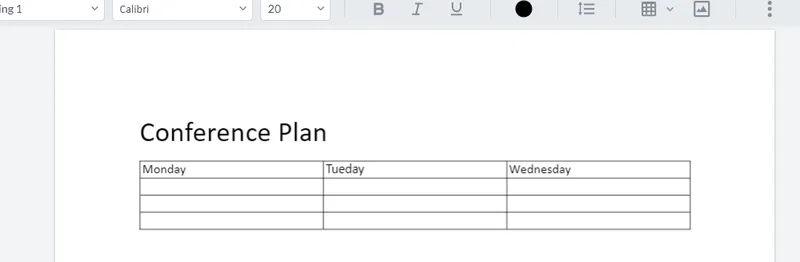
Figure 3 – Adding text to the first row of the table
Uh-oh, we forgot to add a column for titles for the rows – but there is an easy solution. Right-click in the first column of the table and a menu will appear that gives us lots of table-related options. In this case, add a new column using Insert Column Left.
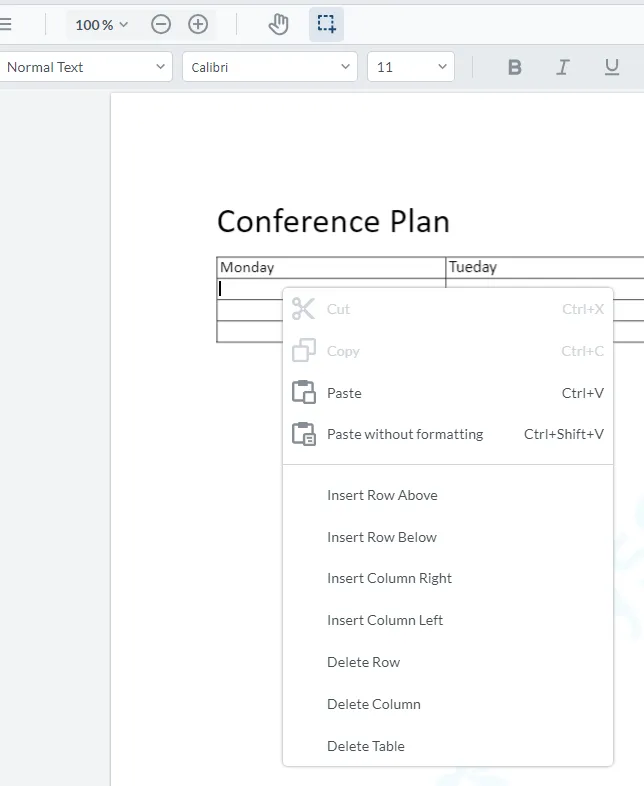
Figure 4 – The context menu for the table. This appears if you right-click in the table.
Great. We can then add the titles for the rows – in this case, they are the times of various sessions that will occur at the conference.

Figure 5 – Adding text to cells in the newly inserted column
We are now ready to start entering text into the various cells.
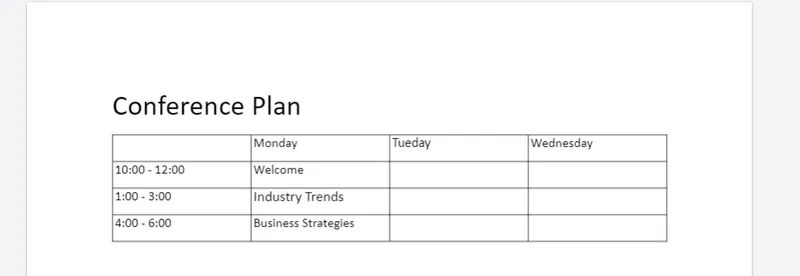
Figure 6 – Text has been added into some of the cells in the table.
It’s usually about this time that I run into a problem – what I want to put into a cell isn’t just simple text. As an example, let’s consider that for the Tuesday morning session the team will split into two groups. Each group will look at two different subjects, so we need a table within a table.
No problem! WebViewer supports that too.
Just click in the cell, then select the Table dropdown again and choose a 2x2 table.
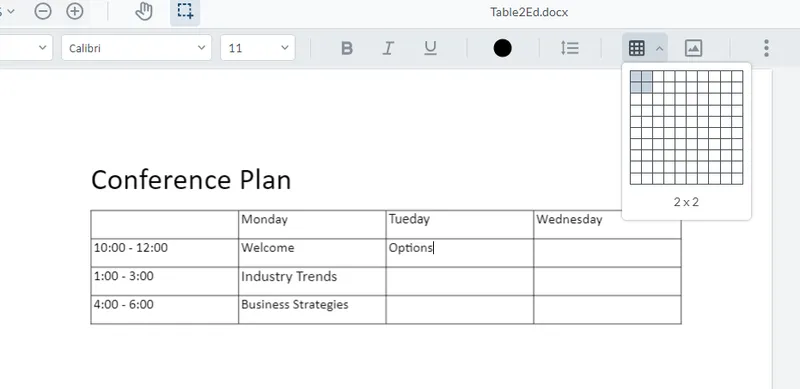
Figure 7 – Adding a 2x2 table into an existing cell
Just as before, a table will appear. This time, though, it is contained within an existing cell. We can now add the text that relates to the two subjects each group will discuss.
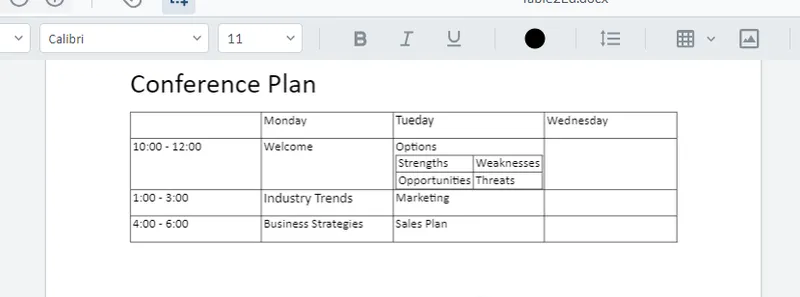
Figure 8 – The table, now with a sub-table included in one of the cells
So far, so good. We can then enter the text for the final day, and everything is going smoothly until we get to the final cell, where we have another problem.
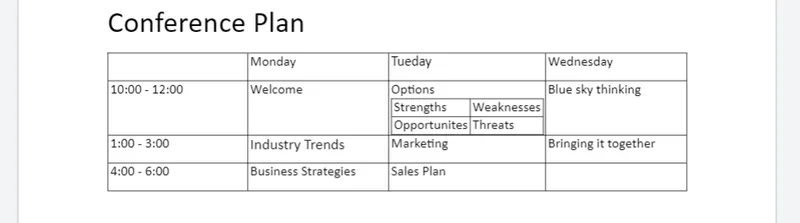
Figure 9 – The table is now nearly complete.
The last thing that we need is a session where, in the first half, the attendees split into three groups based on where they live. Then, after a short break, they split into two groups based on what they do. Once again, WebViewer supports this – you can have multiple tables of different sizes within a single cell, and they can be separated by text.

Figure 10 – The table with multiple sub-tables in a single cell
Great! We have added all the information into the cells. However, the layout is rather uninspiring.
As you would expect, it is extremely easy and intuitive to change font face, color, text alignment (using the buttons in the header), and so on (and also to fix the typo in the word “Tuesday”). We can even make it clear that there is coffee on Wednesday afternoon.

Figure 11 – Our final document, with the table and text formatting
Perfect! That’s exactly what we needed. Job done – all within WebViewer.
Enabling DOCX Editing in WebViewer
For DOCX editing to be available within WebViewer, it is necessary to specify enableOfficeEditing: true.
Once that is done, all the DOCX functionality, including font selection, alignment, indentation, numbered and bulleted lists, as well as table creation will automatically be available.
Conclusion
The DOCX editor was already a great step up for WebViewer. With the ability to add, and edit, tables directly in your DOCX files, this is a major leap forward in WebViewer’s document processing functionality.
Whether you are new to Apryse or an existing customer, you can try out many aspects of the functionality at the Apryse Showcase. Alternatively, you can download Apryse WebViewer and test it locally.
If you have any technical questions, feel free to chat with us on our active Discord group.
Or, if you have sales questions, get in touch with the Sales team who will be happy to help.
Tags
docx editor
table editing
release

Roger Dunham
Share this post