Changing the Default Styles for Tools in WebViewer using TypeScript
By Roger Dunham | 2024 Feb 23

7 min
Tags
webviewer
typescript
annotation
Summary: This blog explores the versatile annotation capabilities of WebViewer, focusing on the Free Text tool for demonstration. It guides readers through the process of manually setting annotation options and delves into establishing default values through TypeScript code. The article provides code snippets, utilizing the setStyles method, to empower users to tweak stroke thickness, colors, font styles, and rich text styling.
Introduction
The Apryse WebViewer allows you to quickly and easily support viewing, editing, and annotation of PDFs and Office documents directly within the browser. Better still, it works with no external dependencies. The document is processed securely within the browser, rather than being sent over the internet to a server outside of your control.
The WebViewer UI is an open source project and is extremely customizable, either by modifying the source code itself or using the built in options to change the UI language, add or remove buttons, change icons and so on.
WebViewer allows you to add many types of annotations to a PDF. The style of the annotations, including stroke width, font, text size, and many other properties, can be specified at runtime, with four preset options available for each annotation type.
In this article, we will look at how to manually set the options for an annotation, and then we will go a step further and see how we can set the default values for those presets within your own code.
Note: This article is written based on WebViewer 10.6 running within Chrome on a Windows 11 PC. The experience on other platforms, or with other versions, may be slightly different.
Adding an Annotation
The Apryse WebViewer UI provides support for many different types of annotation – you can try them out using the Showcase.
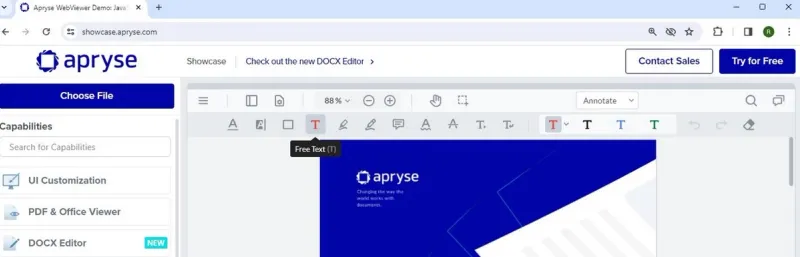
Figure 1 – The Apryse WebViewer Showcase, which illustrates the huge range of supported functionality
To start, let’s look at the Free Text annotation type, since it is reasonably complex, yet easy to see how our changes make differences. What we learn about with Free Text is transferrable to the other annotation types.
Click on the Free Text button, then drag an area on the document to indicate the location where you want to create the annotation.
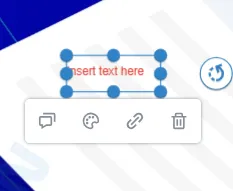
Figure 2 – Adding a Free Text annotation to a PDF
Once you click inside the box, you can start entering whatever comment you want.

Figure 3 – Updating the Free Text annotation with your own text
Changing the style of the annotation, for example to make the text larger, is simple – just click on the annotation, which will bring up a menu and select the Style button.
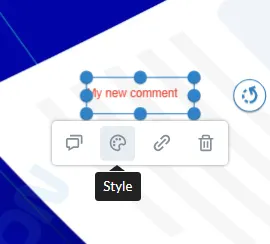
Figure 4 – The Style button which will open the pop-up for editing the style
This will open a modal dialog that lets you choose the required options for the tool. For Free Text there are many options available, but for other tools fewer options may be available.
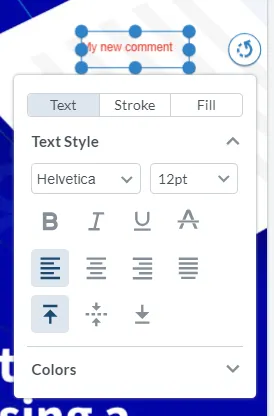
Figure 5 – Some of the options for editing the style. The available options depend on the tool type.
With just a few clicks, we can change the comment from being red 12pt Helvetica font to semi-transparent green 22pt Liberation Serif font.
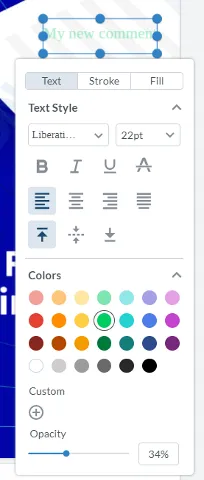
Figure 6 – The Free Text with the modified style
If you want to, you can even change the box outline to give an entirely different look. There is also the option to use different styles for different comments, so the number of possible variations is huge.

Figure 7 – Two Free Text annotations with distinctive styles
What’s more, any changes that you make to the style will be remembered, so the next time you create a Free Text annotation it will use the same style. (If you want to clear what is remembered, you will need to delete the cookies and site data. If you are not sure how to do this, reach out to support and we can help.)
This functionality could be achieved with just a single Style tool button that you can keep modifying. But the Apryse WebViewer UI provides four separate styles straight out of the box, allowing you to quickly switch between them. Each style is preconfigured with default properties.
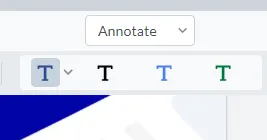
Figure 8 – The four styles for the Free Text tool. Other tools also have four options available.
Changing the Default Styles
Having default styles available is great, but what happens if you want to change what the default styles are? For example, you might want to always use large red text in a box to indicate one thing, and smaller green text without a box to indicate something different, and not want to manually have to set that the first time that you create a Free Text annotation.
With a small amount of code, it is simple to update the default values. The rest of this article is based on the code created from this video, which is, effectively, a TypeScript version of the React WebViewer sample.
The general code pattern is to use setStyles for the tool as follows:
documentViewer.getTool([Name of tool]).setStyles({

Option: Value,

Option: Value,

Option: Value,

});
Where each option relates to one of the properties of the tool.
Getting the Name of the Tool
While you can specify the name of the tool directly as a string, if you are using TypeScript you may prefer to use the ToolNames enum. Note that with four options available for the tool the first one does not have a suffix, but the rest have suffix #2 through #4.

Figure 9 – Part of the ToolNames enum. Note that the first one in each group does not end in “1.”
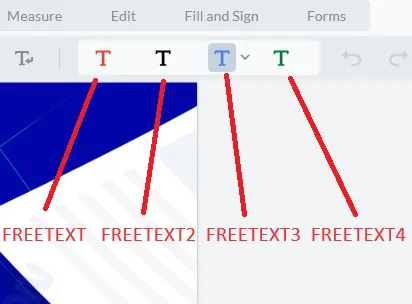
Figure 10 – Example of how the tool names relate to the preset buttons
It’s not always easy, at first glance, to tell which tool name matches a tool. One way to do that is to look up the data-element associated with the tool, then search the source code.
Having acquired the object, you can then call setStyles, passing in an object that contains the properties that should be changed. The documentation says you can also use a function, but you may prefer not to because it is deprecated and causes issues with Lint since the function name is unused.
The style properties available differ from tool to tool but are described within the API. The Free Text tool, for example, supports the following properties.
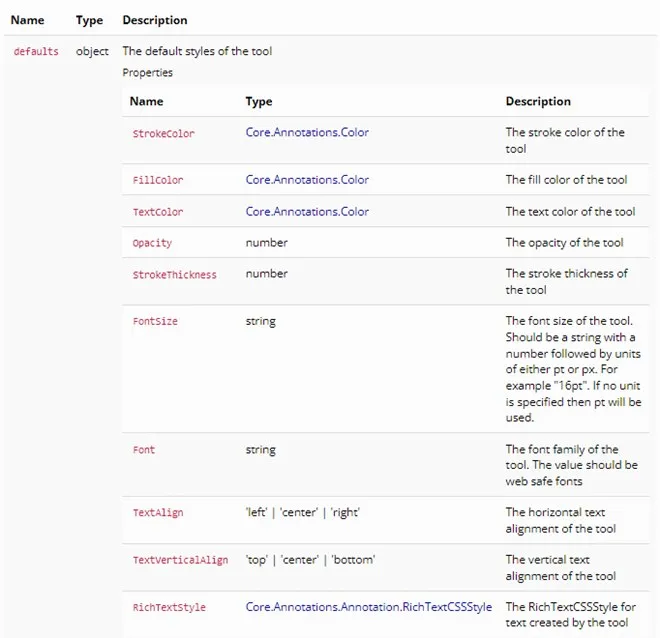
Figure 11 – The properties available for the Free Text tool
As an example, the following code can be used to set many of the properties Free Text supports.
documentViewer.getTool(Tools.ToolNames.FREETEXT).setStyles({

StrokeThickness: 5,

StrokeColor: new Annotations.Color(0, 0, 255),

TextColor: new Annotations.Color(0, 0, 0),

FillColor: new Annotations.Color(200,200,200),

FontSize: '20pt',

Font: 'Arimo',

Opacity: 0.75,

TextAlign: 'right',

TextVerticalAlign: 'bottom'

});
This results in Free Text styling as shown below.
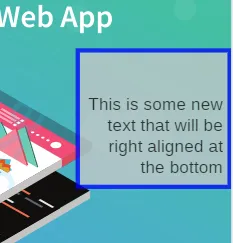
Figure 12 – The result of specifying the style for the Free Text tool
Taking Styling to the Limit – Rich Text Styling
While many of the properties are easy to understand, RichTextStyle is more complex and allows very specific formatting, for example, multi-colored and styled text within a single line.
I can’t imagine why you would want to, but then I never cease to be amazed by the creativity of Apryse customers! For example, the following code results in text that has a mix of colors, with some text bold, and some in italics.
documentViewer.getTool(Tools.ToolNames.FREETEXT).setStyles(({

StrokeThickness: 5,

StrokeColor: new Annotations.Color(0, 0, 255),

TextColor: new Annotations.Color(0, 0, 0),

FontSize: '20pt',

RichTextStyle:{

0: {

'font-weight': 'bold',

'color': '#ff0000',

},

10: {

'font-style': 'italic',

'font-weight': 'bold',

'color': '#0000ff',

},

12: {

'text-decoration': 'underline',

}

}

}));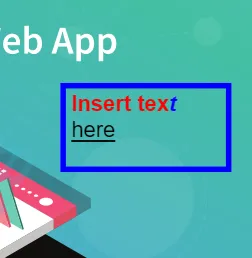
Figure 13 – The result of specifying a complex RichTextStyle, with the first nine characters as bold red, the next two as bold italic blue, and the rest as underlined default color
Note: You can make the styles non-editable using the "disable elements" method outlined in a previous article on Modifying the UI in WebViewer. However, this method removes the option to edit styles for all tools. If you'd like a workaround, feel free to get in touch with us or raise a feature request.
Conclusion
The Apryse WebViewer UI is an awesome tool that offers annotation, text editing, page manipulation, redaction, form filling and creation, and a lot more. It ships with default styling options that suit many users, but of course, different people have different requirements. If you need to modify the default values then that is easy to do, and there is lots of documentation to help.
The easiest way to learn is by doing, of course, but if you have any issues you can also reach out to us on Discord. When you are ready to take the next step, please contact us for a license.
Tags
webviewer
typescript
annotation

Roger Dunham
Share this post


