Roger Dunham
Published June 14, 2024
Updated May 18, 2026
11 min
Apryse WebViewer: A One-Stop Shop for Creating Digitally Signed Documents
Roger Dunham
Summary: Learn why Apryse WebViewer is the only tool you need to create digitally signed invoices, incident response reports, and other documents – saving you time and helping you develop an efficient and effective workflow.
Introduction
The Apryse WebViewer is a powerful JavaScript based library that allows you to work with PDFs and Office documents without ever leaving the browser.
In addition to allowing you to view documents, it enables you to edit PDF and DOCX files, compare files, add annotations, apply redactions, and much more.
In this article, we will look at how to take it even further and use WebViewer to build an entire workflow for generating digitally signed PDFs based on up-to-date data.
Starting from a brand new, empty Word file we will:
- Create a document template
- Fill the template with JSON data to create a PDF
- Allow multiple users to annotate and view the document (and learn how we can control what each user is allowed to do)
- Digitally sign the document, then verify that it has been signed and has not subsequently been modified
This blog post has more details than the video and links to other articles explaining how to implement the various aspects of the workflow.
The source code used for this demo is available on GitHub.
A Note on Versions
This article was written based on the functionality available in WebViewer 10.9.
Getting Started: An Overview of WebViewer
If you’d like to explore WebViewer features before diving in, you can try out much of the functionality using the Apryse Showcase.
Of course, WebViewer allows you to view PDFs, but there is much more functionality available. You can view CAD drawings and videos, edit the text directly within the PDF, add annotations, and customize the UI.
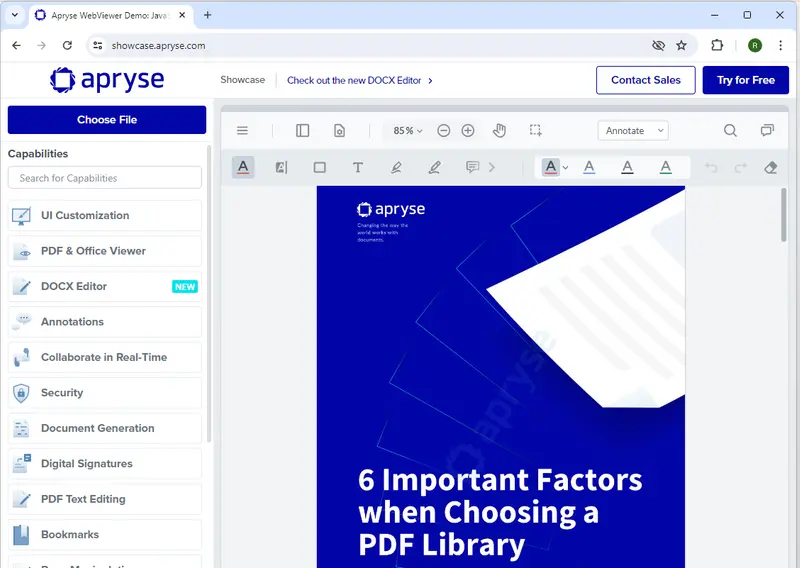
Figure 1 – The Apryse WebViewer Showcase: a great place to understand how WebViewer can help you
Here, I will be using two distinct modes of WebViewer. You may wish to look at the Showcase to see more examples of what I am doing before diving in further.
Much of the time, we will be viewing or editing a PDF, and we will also use the DOCX editor. As we go through the workflow, we will also look at document generation and annotation permissions. Finally, we will add a digital signature.
Note that not everything covered in this article uses the same data that is available in the Showcase, but the underlying functionality is the same.
For this article's purposes, I customized the UI by adding seven new buttons. These let me work through each aspect of the workflow.
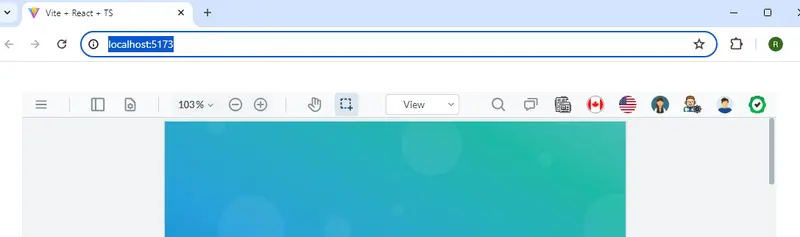
Figure 2 – The custom buttons added to the WebViewer UI
Had I wanted, I could have implemented the workflow in fewer steps. Or, if I had used the new Modular UI, I could have put all of the buttons into a single menu. For now, though, I kept them as separate buttons to help to make it easier to see what each step does.
Step 1: Create a Word Template
In the next step we will take a DOCX-based template and populate it using JSON data to create a PDF.
Before we can do that, we need the template. This is just an ordinary DOCX file with “keys” marked by “mustache braces.” It can be created in any editor that understands the DOCX format – including Microsoft Word, LibreOffice, or Apryse WebViewer.
DOCX editing has been supported by WebViewer for more than a year, and it is still being actively developed. For our example, it already has all the functionality we need.
Let’s create a new empty document and add text, including the keys in mustache braces. We can also add a single row table, and using the {{loop}} {{endloop}} keywords, this will generate a table with a separate row for each record in the JSON data.
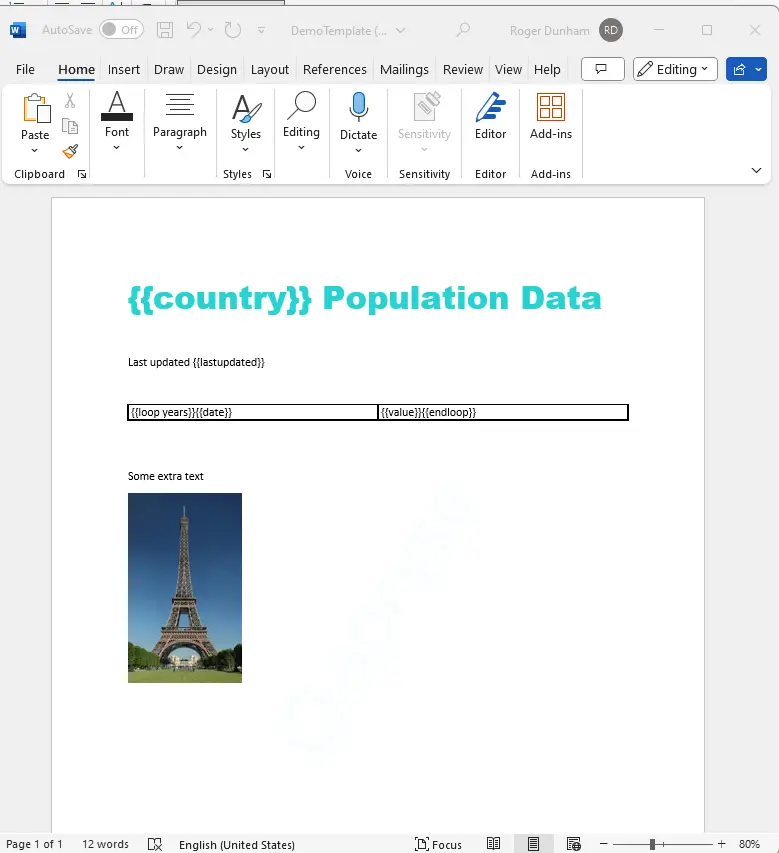
Figure 3 – An example DOCX template shown in Word. The text in mustache braces will be replaced when the document is generated.
We can also add any text we want, format it in whatever way we want, and even add an image.
When we are happy, the template can be saved. It can be reopened any time and updated to include any needed changes.
Step 2: Document Generation
The next step uses the Apryse SDK Document Generation (DocGen) mechanism. This takes the DOCX template and replaces the keys with values from the JSON data.
Before we go further, note that this isn’t the only mechanism for creating a document using Apryse. The Fluent system also allows you to create more elaborate documents – including those that:
- Contain formatting that is dependent on data type
- Are charts based on the most up to date data
- Use data from sources other than JSON, including XML, SQL Server, MySQL, PostgreSQL, Oracle, MS Dynamics, OData, Salesforce, SharePoint, DB2, and more
- Have different output types, including native Microsoft files, PDF, PDF/A, PDF/UA, HTML, RTF, and images
For now, we are just using JSON data, so Apryse SDK DocGen is sufficient. The data that I’m using has been derived from the World Bank as an example. I did need to modify the layout slightly since DocGen requires values to be strings, while the original data contained numbers.
Document generation isn’t limited to a specific industry type, so you could use it for creating invoices or onboarding documents, incident responses, or indeed anything at all, provided the data is available in JSON format.
Once the data is available, the Apryse SDK replaces the keys in the document with the actual values from the JSON. In the case of tables, the JSON data has multiple records – one for each year. With no extra effort a table is generated.
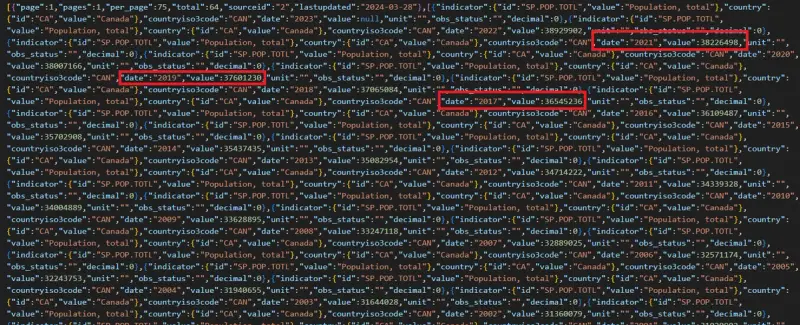
Figure 4 – Part of the JSON data retrieved from the World Bank. You can see how there is data for multiple years. This will be extracted and put into the table.
Creating a single document from a template seems rather pointless, so I added a second button. Now I can create a document that contains data for either Canada or the USA.
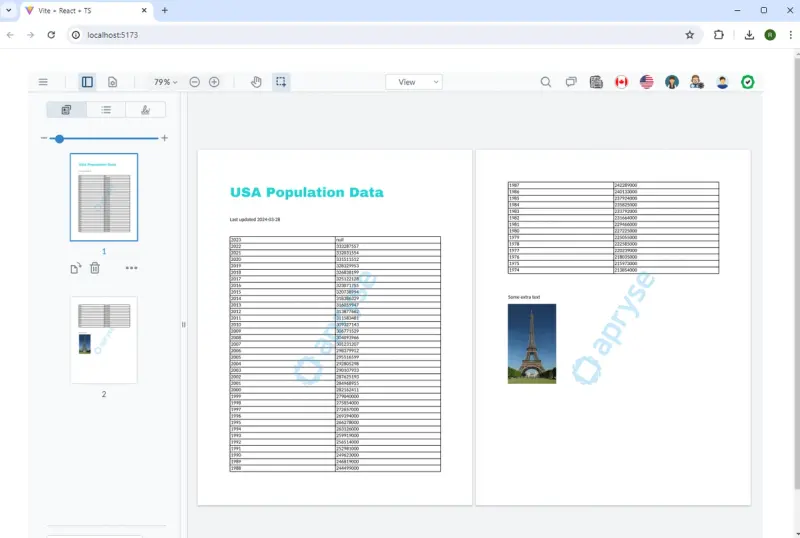
Figure 5 – The result of creating the document using USA data
In fact, WebViewer is so great that I could have set it up to show the two versions side by side. As it is, I didn’t include that in my code sample. So here is the same result comparing two generated documents side by side in the Apryse Showcase.
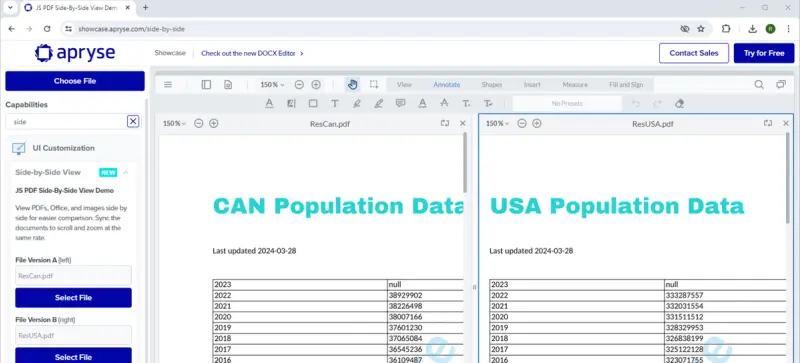
Figure 6 – Two documents created from the same template but with different JSON data
I could take the code a step further, and rather than generate a PDF, use the same template and data to create a DOCX file as the output.
That’s pretty awesome. Generating one document might not seem worthwhile, but now that the template has been created, we can use it to generate hundreds of different documents, using whatever up-to-date data is available. That could save hundreds of hours usually spent manually generating and proofreading such documents.
Step 3: Work with Annotations
As the next step in our workflow, let’s imagine that we have three different users. (The names don’t matter of course – I just used those to match the ones in the Annotation permissions sample).
- Sally is a regular user
- Justin is an admin
- Brian is a read-only user
First, Sally logs in. In this sample, this is done with a simple button click, but you could easily extend the mechanism to have a login window and require a password, or use whatever other credential checking mechanism you prefer.
WebViewer has been configured so that she can add all types of annotation. (We will see in a few moments how the range of available annotations can be controlled.)
Sally can now add a comment and highlight annotations. She could underline things, or even edit the document if that was enabled, but for now let’s just keep things simple.
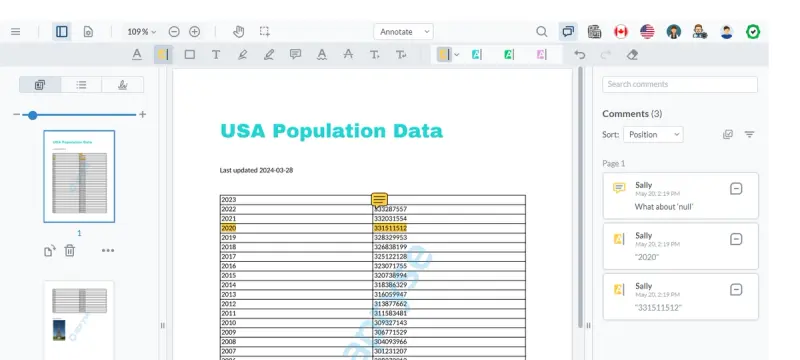
Figure 7 – Sally has added a comment and highlighted some text.
She can now save the document and ask Justin, who is an admin, to review it.
Justin can see Sally’s comments, and can reply to them or remove them. He can also add his own comments and highlight things as he wishes.
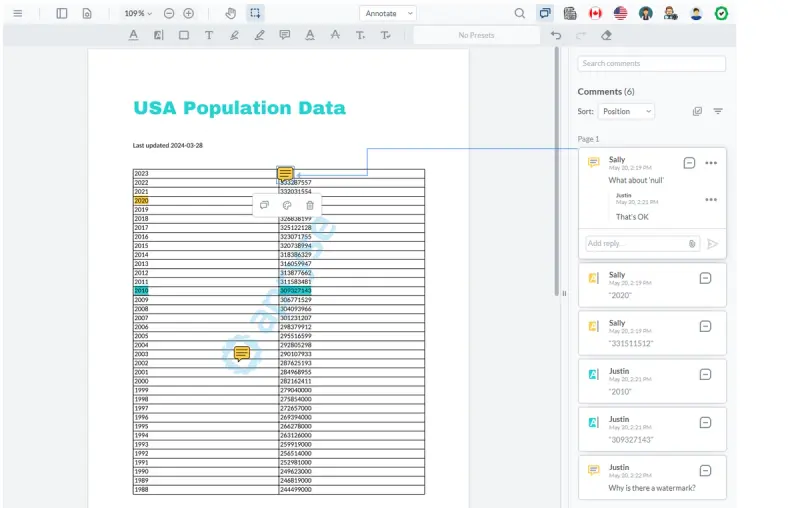
Figure 8 – Justin has edited the document. He has answered Sally's question, added some highlights, and created a comment of his own.
When he is finished, he can save the document again.
Sally then logs in again. She can see her own annotations, see any that Justin added, and even reply to them. She is also able to delete her own annotations, but being just a regular user, she cannot remove those created by Justin who is an admin.
Finally, when she is finished, she can save that document again.
Brian is then asked to look over the document. WebViewer has been configured so that Brian has read-only access. As an example, he is able to see comments, but cannot see highlight annotations.
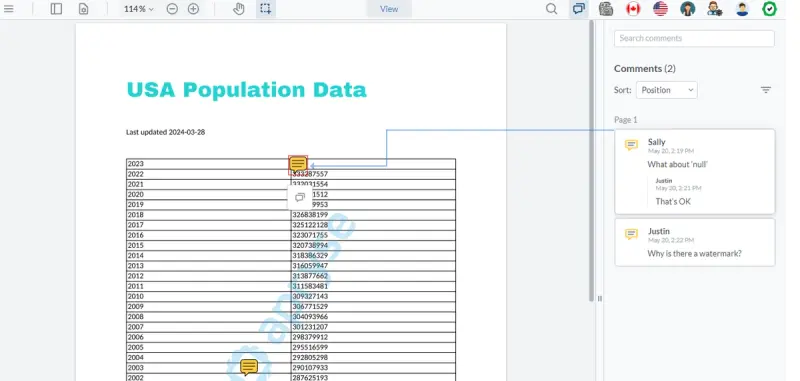
Figure 9 – The document as Brian sees it. WebViewer has been configured so that he can see comments but not highlights, and he cannot add any new comments.
When he has reviewed the document, it is ready for the next stage of the workflow.
The workflow used in this example is obviously rather artificial, solely to keep it simple. WebViewer supports far more complex workflows allowing many different users, each with different permissions. And all of them can use the same document. It is even possible to set up WebViewer so that multiple users can work collaboratively and see annotations as they are created.
Step 4: Add a Digital Signature to the PDF
The final part of the process is to add a digital signature to the document. This is far more than just an image of a signature. In this example, we will add an “Approval” signature which, backed by a trusted certificate, can be used to identify the person that signed the document beyond repudiation. It can also be used to show whether any changes were made to the document after it was signed.
That’s great if you want to know, for example, that an invoice genuinely came from the person that claims to have sent it, and that nobody changed the invoice between it being created and it arriving with you.
Why does that matter? A 2022 FBI report noted that Business Email Compromise scams (which would include falsified invoices), were valued at US$2.4 billion. That sounds like a lot of reasons to take it seriously.
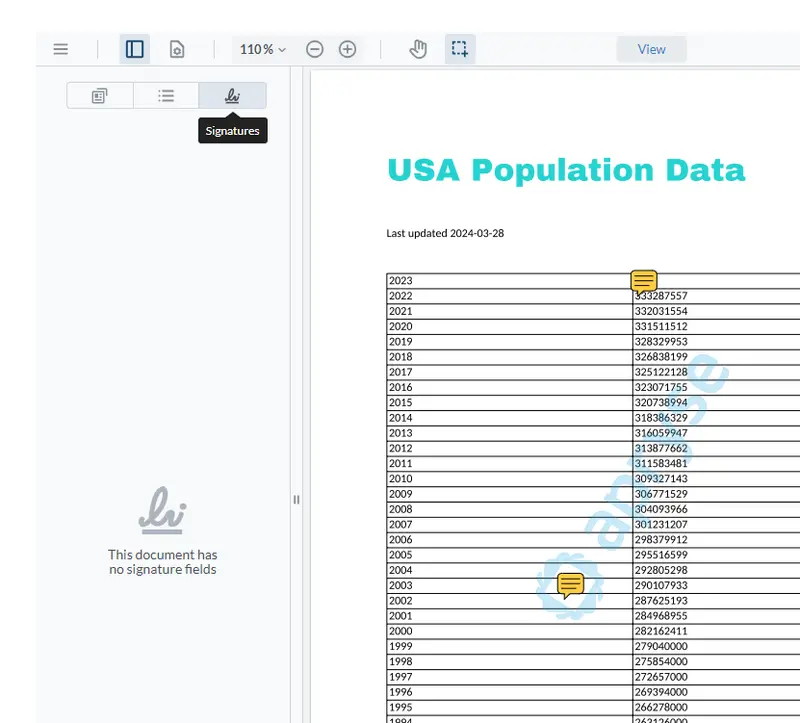
WebViewer has functionality that allows it to show whether a document is digitally signed. Let’s open the Panel and navigate to the Signatures tab.
This shows that the document has no signature field, which is exactly what we expected, since we haven’t added one yet.
Now let’s click on the last custom button. This creates an Approval Signature in the PDF, and then signs it using a digital certificate and its private key. It also adds a visual representation that the document has been signed. In this case it is a tick mark, but it could just as easily be a visual representation of a wet signature.
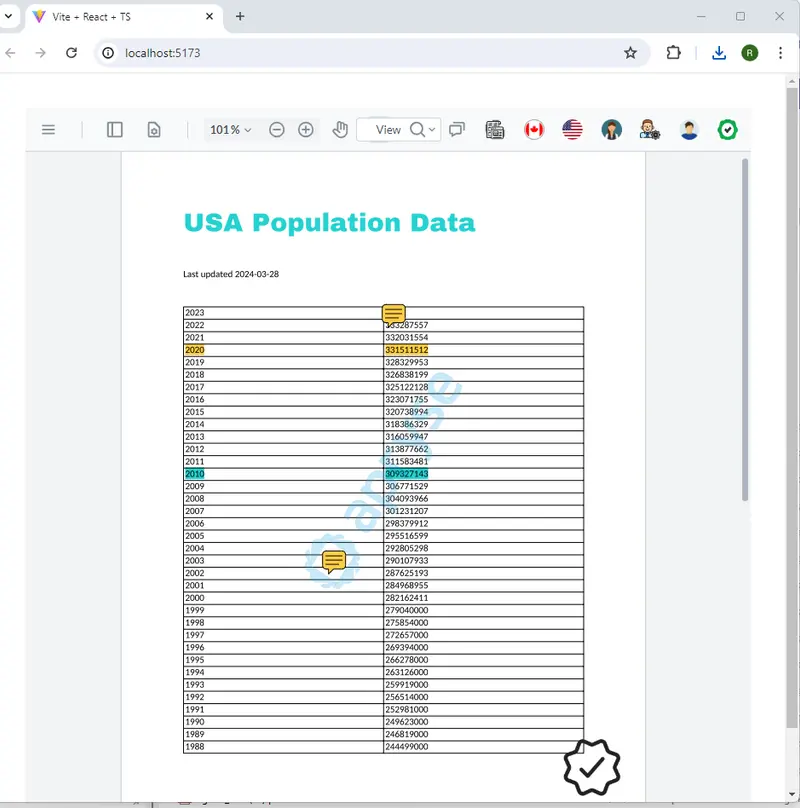
Figure 10 – The result of pressing the Approve custom button. The document has been signed and a visual appearance has been added.
WebViewer won’t allow you to edit the document once it has been signed. However, some other editors are not so restrictive, so changes could potentially have occurred.
If we look at the signatures panel now, it tells us that the document has been signed, that the signature is valid, and that it has not been tampered with.
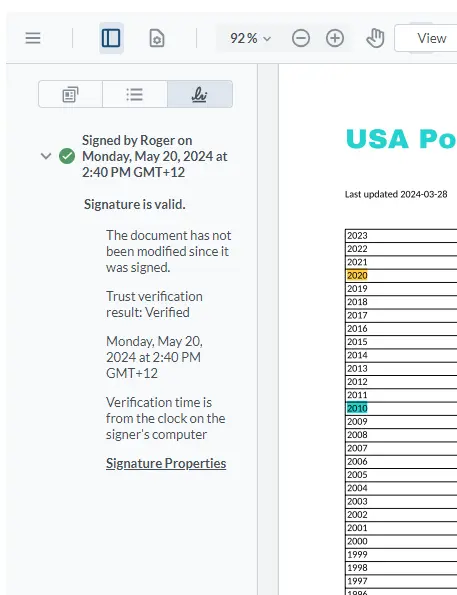
Figure 11 – The signatures panel after the document has been digitally signed
A Word of Warning
Digital signatures are great, and this process can create documents where you can tell if changes have been made.
However, for WebViewer to be able to sign documents it needs access to the digital certificate and its password. Since this is being done in the browser, that information must be available to the browser. This means a malicious user could extract that information and then sign documents with your certificate. That is a significant potential security issue.
If the WebViewer application is just being used on a company intranet, this may be an acceptable risk. If the digital signature was created on a public-facing website, the risk is likely unacceptable.
There are good alternatives though – the digital signature could be performed on the server using the Apryse SDK, or it could be added using an entirely separate cloud-based digital signature solution like Xodo Sign. Or you could store the certificate on a hardware device (like a YubiKey) and ask the user to enter a password as part of the process.
Beyond WebViewer
Everything that we have seen has been performed client-side using WebViewer. If, however, you want to move the processing to the server, check out the Apryse SDK. This allows you to take advantage of more powerful, and faster, processing on a dedicated machine. That SDK is available for NodeJS, but can also be used with C++, Java, Python, and many other languages.
Conclusion
You can see that, using just a single web-based application containing WebViewer, it is possible to start with an empty document, and ultimately create a digitally signed PDF that has a range of annotations and comments. You could achieve the same result using a range of separate applications, but by using WebViewer you reduce the need to learn multiple tools.
WebViewer also has a huge range of functionality that allows you to take what you have learned in this article, and use that as the basis to perform other document processing – like comparing two versions of a document or searching for and replacing text within documents.
When you are ready to get started with WebViewer, there is a lot of documentation available. Just head over to Apryse.com, create a free demo license, and dive in. If you run into any problems, please reach out to us on Discord and our Solution Engineers will be happy to help.