How to Build a PDF Viewer With TypeScript and PDF.js
By Shreyans Kulshrestha | 2019 Sep 03

13 min
Tags
tutorial
typescript
pdf.js
view
Back-end developers love the safety provided by static type checking languages such as Java and C#. Front-end developers, in contrast, have long been stuck with the pros and cons of JavaScript, a dynamic programming language. Writing a JavaScript application for large codebases can be a major hassle due to difficulty testing and predicting behavior.
Enter TypeScript, Microsoft’s open-source solution to some of the drawbacks of dynamic languages. Since introduction in 2012, TypeScript steadily increased in popularity. Front-end developers may appreciate its improved legibility and optional static type checking—to name just two features.
At Apryse, we recognized TypeScript’s advantages as well—so in this article, we go over how to create a PDF viewing app using PDF.js and TypeScript.
For those who may be interested, we’ll also cover how to use TypeScript with two commercial PDF solutions: the open-source wrapper PDF.js Express and the powerful Apryse WebViewer.
Creating the Codebase for PDF.js and TypeScript
The major components for this project include the static HTML file, served with the JavaScript file which is produced by the TypeScript compiler, as well as the PDF.js files and the TypeScript file. So let’s get started using TypeScript and HTML to view PDFs!
We'll use the prebuilt PDF.js files to make things a little easier when working with HTML, PDF and TypeScript.
Let's start with making a new directory called pdfjs-typescript.
mkdir pdfjs-typescript
cd pdfjs-typescript
Within the directory, create a new file in the public folder called index.html. Next, add the following inside:
<!DOCTYPE html>
<html>
<head>
  <meta charset="UTF-8">
  <title>PDF.js Example</title>
  <script src="pdf.js"></script>
  <script> var exports = {}; </script>
  <script src="renderer.js"></script>
</head>
<body>
  <div>
    <span  class="outer">
    <div  class="grey-back">
      <div class="actions">
       <button id="prev" class="action_button">Previous</button>
       <button id="next" class="action_button">Next</button>
      </div>
      <div class="pg_num_display">
        <span>Page: <span id="page_num"></span> / <span id="page_count"></span></span>
      </div>
    </div>
    <div>
      <canvas id="pdf" class="grey-back"></canvas>
    </div>
    </span>
  </div>
</body>
</html>
Don't worry about the missing .js files the <script> tags refer to; we'll add them shortly. The class names have been assigned so you can apply styling later if you wish.
Download the latest stable PDF.js build. Then extract the zip file, and from within the build folder, copy the pdf.js and pdf.worker.js files into the pdfjs-typescript/ folder. We won't be making any changes to these files.
Now, it's time to take advantage of DefinitelyTyped, a popular open-source repository of declaration files that provide type validation for various JavaScript libraries, including PDF.js!
We'll obtain the declaration file by running the following command:
npm install --save @types/pdfjs-dist
Navigate into the node_modules/@types/pdfjs-dist directory and add the following line at the top of the index.d.ts file:
export as namespace pdfjsLib
This will allow us to avoid the require method in the later-compiled .js file. Note that we don't have to add any actual references to this declaration file since it lives in node_modules/@types which makes it visible to other files in the project via the TypeScript compiler (more info about types).
Next, we'll create a new file called renderer.ts. Notice that we have used the .ts extension for TypeScript files; we will be using the TypeScript compiler to create the renderer.js file afterwards.
Inside renderer.ts, add the following code:
const scale = 1;
let canvas, ctx, prevButton, nextButton;
var pdfDoc = null,
    pageNum = 1,
    pageRendering = false,
    pageNumPending = null;

/**
 * Get page info from document, resize canvas accordingly, and render page.
* @param num Page number.
*/
function renderPage(num: number) {
pageRendering = true;
// Using promise to fetch the page
pdfDoc.getPage(num).then(function(page) {
//   const canvas = document.getElementById('pdf') as HTMLCanvasElement;
//   const ctx = canvas.getContext('2d');
    var viewport = page.getViewport({ scale: scale, });
    canvas.height = viewport.height;
    canvas.width = viewport.width;
    // Render PDF page into canvas context
    var renderContext = {
    canvasContext: ctx,
    viewport: viewport,
    };
    var renderTask = page.render(renderContext);
    // Wait for rendering to finish
    renderTask.promise.then(function () {
    pageRendering = false;
    if (pageNumPending !== null) {
        // New page rendering is pending
        renderPage(pageNumPending);
        pageNumPending = null;
    }
    });
});
// Update page counters
document.getElementById('page_num').textContent = num.toString();
}

const loadingTask = pdfjsLib.getDocument("https://pdftron.s3.amazonaws.com/downloads/pl/Chart_.Vector.pdf");
loadingTask.promise.then(function(pdf){
  pdfDoc = pdf;
  document.getElementById('page_count').textContent = pdf.numPages.toString();
  canvas = document.getElementById("pdf") as HTMLCanvasElement;
  ctx = canvas.getContext("2d");
  prevButton = document.getElementById('prev').addEventListener('click', onPrevPage);
  nextButton = document.getElementById('next').addEventListener('click', onNextPage);
  renderPage(pageNum);
});

/**
 * If another page rendering in progress, waits until the rendering is
* finished. Otherwise, executes rendering immediately.
*/
function queueRenderPage(num) {
  if (pageRendering) {
    pageNumPending = num;
  } else {
    renderPage(num);
  }
}
/**
 * Displays previous page.
*/
function onPrevPage() {
  if (pageNum <= 1) {
    return;
  }
  pageNum--;
  queueRenderPage(pageNum);
}
/**
 * Displays next page.
*/
function onNextPage() {
  if (pageNum >= pdfDoc.numPages) {
    return;
  }
  pageNum++;
  queueRenderPage(pageNum);
}
Note: The code snippet above was adapted from the official mozilla/pdf.js github repository.
We can now compile the renderer.ts file to produce the renderer.js file that the HTML page refers to:
tsc renderer.ts
Adding Styles (Optional)
Now that you’ve got a prototype application up and running, let's (optionally) add some styling. We'll create a file called index.css and add the following styles (based around class names in our HTML file):
And finally, we'll add a link to the style sheet inside the HTML file. Add the following line inside the <head> tag of index.html:
body {
    text-align: center
}

.grey-back {
    background-color: lightgrey;
}

.outer {
    display: inline-block;
    border: 2px solid darkgray;
}

.actions {
    display: inline-block;
    text-align: left;
}

.pg_num_display {
    display: inline-block;
    text-align: right;
}

button {
    -webkit-transition-duration: 0.4s;
    transition-duration: 0.4s;
}

button:hover {
    background-color: white;
    color: black;
}

.action_button {
    background-color: grey;
    color: white;
}
<link rel="stylesheet" type="text/css" href="./index.css">
At this point, the project directory should look like this:
Learn how to modify WebViewer's default annotation tools using TypeScript. Read the blog.
Serving Your Application
The node package http-server is often used for preliminary testing of single-folder applications.
npm install -g http-server
Install the latest version of http-server using npm:
This will create a global installation which you can use to test other applications as well.
http-server
Run http-server:
Open a browser and go to localhost:8080/index.html. The styled application should look like this:
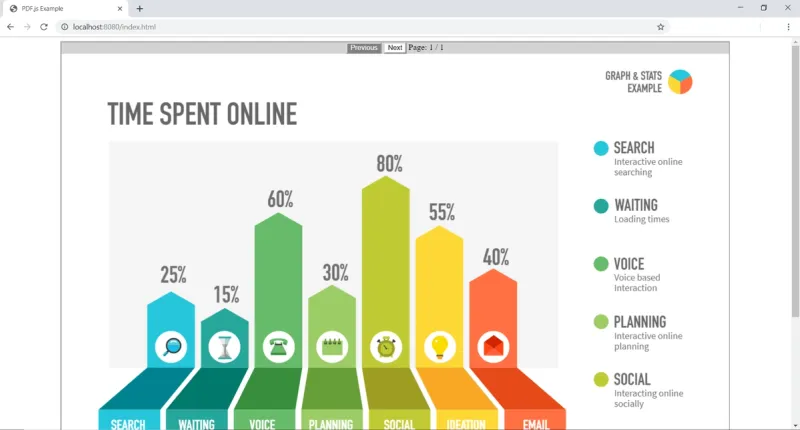
That's it! You should now see your PDF displayed inside the PDF.js viewer.
Alternatives to PDF.js
PDF.js provides an easy way to add a PDF viewer to your app. However, you could run into some rendering inconsistencies or failures when working with some types of PDFs, while performance can be slow on mobile devices or older browsers. Learn more in our guide to evaluating PDF.js.
Additionally, implementing functionality beyond basic viewing such as annotations, signatures, or form fill may prove very challenging and time-intensive as there is currently very little API support with PDF.js.
If you seek to streamline implementation of additional features, you could consider PDF.js Express. Alternatively, if you need a more robust and reliable experience, including for example, editing capabilities, you can consider using the powerful Apryse WebViewer, part of the Apryse SDK.
Want to learn more about WebViewer? Check out our comprehensive guide here.
Implementing with PDF.js Express
PDF.js Express wraps a modern react-based UI around the open source PDF.js rendering engine. It includes out-of-the-box features like annotations, form filling and e-signatures, and the viewer is commercially supported. It also comes with a large set of APIs for easy customization. Check out the demo to see it in action.
This section will walk you through adding a TypeScript declaration file to the PDF.js Express build.
You can download the package and get started exploring the PDF.js Express documentation.
To keep our codebases separate, let's create a new project directory called pdfjs-express-typescript. Once you've downloaded the PDF.js Express package, place the WebViewer folder from inside the .zip file into the pdfjs-express-typescript/ folder.
Next, we'll create a new file called index.html. PDF.js express simply needs a DOMElement to place an iframe containing the viewer, so we’ll put it in the body as follows:
<!DOCTYPE html>
<html>
<head>
  <meta charset="UTF-8">
  <title>PDF.js Express Example</title>
  <script src='./WebViewer/lib/webviewer.min.js'></script>
</head>
<body>
  <div id='viewer' style="text-align: center;"></div>
  <script src="index.js"></script>
</body>
</html>
Now let's make a new declaration file called express.d.ts. This will be where we add our custom TypeScript definitions. Add the following definitions to it. (You can add more definitions later if you wish.)
/**
* Creates a WebViewer instance and embeds it on the HTML page.
* @name WebViewer
* @param {WVOptions} options A set of options required for the contstructor to create an instance properly
* @param {string} [options.annotationUser=Guest] Name of the user for annotations
* @param {string} [options.config] URL path to a custom JavaScript for customizations
* @param {string} [options.css] URL path to a custom CSS file for customizations
* @param {Array.<string>} [options.disabledElements] List of data-elements to be disabled in UI
* @param {boolean} [options.enableAnnotations=true] Enable annotations feature
* @param {boolean} [options.enableAzureWorkaround=false] Enable workaround of the issue in Azure related to range requests
* @param {boolean} [options.enableFilePicker=false] Enable file picker feature
* @param {boolean} [options.enableMeasurement=false] Enable measurement tools
* @param {boolean} [options.enableRedaction=false] Enable redaction tool
* @param {string} [options.extension] Extension of the document to be loaded
* @param {boolean} [options.forceClientSideInit=false] If set to true then when loading a document using WebViewer Server the document will always switch to client only rendering allowing page manipulation and the full API to be used.
* @param {boolean} [options.fullAPI=false] Enable PDFNet.js library functions
* @param {string} [options.initialDoc] URL path to a document to load on startup
* @param {boolean} [options.isAdminUser=false] Set user permission to admin
* @param {boolean} [options.isReadOnly=false] Set user permission to read-only
* @param {string} options.licenseKey License key for viewing documents
* @param {boolean} [options.mobileRedirect=true] Whether the mobile viewer should redirect to a new window or not
* @param {boolean} [options.path='WebViewer/lib']  Path to the WebViewer lib folder
* @param {string} [options.preloadWorker] Type of workers to be preloaded. Accepts `pdf`|`office`|`all`.
* @param {string} [options.ui=default] Type of UI to be used
* @param {object} [options.workerTransportPromise]
* @param {function} [options.workerTransportPromise.pdf] Promise that resolves to a PDF worker
* @param {function} [options.workerTransportPromise.office]  Promise that resolves to an office worker
* @param {HTMLElement} viewerElement A DOMElement that is needed to root the iframe of the WebViewer onto the  HTML page
* @return {Promise<WebViewerInstance>} returns a promise that resolves to a webviewer instance.
* @example // 5.1 and after
WebViewer({
  licenseKey: 'YOUR_LICENSE_KEY'
}, document.getElementById('viewer'))
  .then(function(instance) {
    var docViewer = instance.docViewer;
    var annotManager = instance.annotManager;
    // call methods from instance, docViewer and annotManager as needed

    // you can also access major namespaces from the instancs as follows:
    // var Tools = instance.Tools;
    // var Annotations = instance.Annotations;
  });
*/
declare function WebViewer(options: WVOptions, viewerElement: HTMLElement): Promise<WebViewerInstance>

/**
* @interface WVOptions
* An object from which you can choose options for the webviewer
* instance to be produced using the constructor.
* See our guides and API for WebViewer at https://www.pdftron.com/documentation/web
* @example WebViewer({
* path: 'path/to/WebViewer/lib',  // This contains a default value of `WebViewer/lib`
* initialDoc: 'path/to/local/file OR URL', // (see more options in guides)
* enableAnnotations: true, // Allows you to toggle the use of annotations on the document
* // and many other options to explore
* } document.getElementById('viewer')).then(function(instance) {...})
*/
declare interface WVOptions {
  initialDoc: string;
  annotationUser?: string;
  config?: string;
  css?: string;
  disabledElements?: Array<any>;
  documentId?: string;
  enableAnnotations?: boolean;
  enableAzureWorkaround?: boolean;
  enableFilePicker?: boolean;
  enableOfflineMode?: boolean;
  enableRedaction?: boolean;
  enableMeasurement?: boolean;
  extension?: any;
  forceClientSideInit?: boolean;
  fullAPI?: boolean;
  isAdminUser?: boolean;
  isReadOnly?: boolean;
  l?: string;
  licenseKey?: string;
  mobileRedirect?: boolean;
  pdfBackend?: string;
  path?: string;
  preloadPDFWorker?: boolean;
  useDownloader?: boolean;
  ui?: string;
  workerTransportPromise?: {
    pdf?: (...params: Array<any>) => any;
    office?: (...params: Array<any>) => any;
  };
}

/**
* Creates a WebViewer instance and embeds it on the HTML page.
* @name WebViewer
* @class Main class.
* @param {object} options
* @param {HTMLElement} viewerElement DOM element that will contain WebViewer
*/
declare class WebViewerInstance {
  constructor(options: {
    initialDoc: string;
  }, viewerElement: HTMLElement);
}
Note: This declaration file defines the constructor method which returns a promise to an instance of the main class. We can later add further definitions depending on the use case. In the future, there may also be a complete declaration file for PDF.js Express.
Now we need to create the actual TypeScript file that will be compiled into JavaScript. We also need to be able to refer to this declaration file since this declaration file is no longer in the visible domain. We can do this by adding the <reference path/> tag at the top of our program. Just create a new file called index.ts and add the following at the top:
/// <reference path='./express.d.ts'/>
Anything typed in this file will now be able to use the definitions we previously added. We can then create an instance of the PDF.js Express web viewer in this file using the following:
WebViewer({
  path: './WebViewer/lib',
  initialDoc: 'https://pdftron.s3.amazonaws.com/downloads/pl/Chart_.Vector.pdf' // path/to/local OR URL
}, document.getElementById('viewer')).then(function(instance) {
  // Call all the APIs (which you can also define in the express.d.ts file)
});
The final step is to compile the index.ts file and serve the directory:
tsc index.ts
http-server
This is what the directory will look like afterwards:
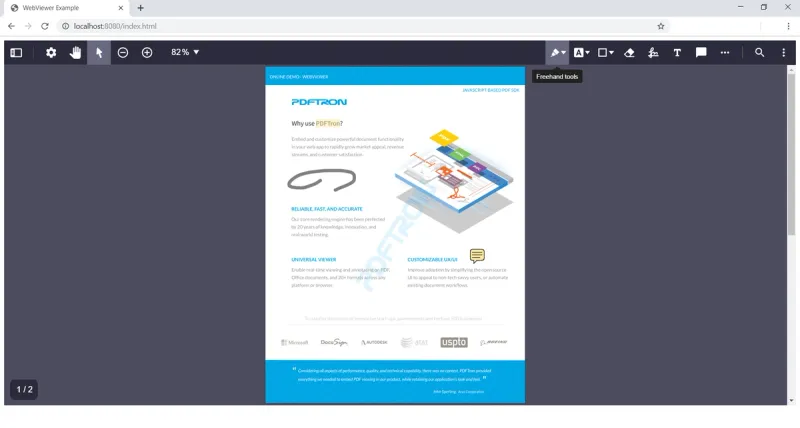
When you serve, you'll get to use a bunch of functionality with the added bonus of being wrapped in a slick UI:

If you are having issues when you serve the PDF.js Express project, clear your browser's cache to get rid of the pdf.js project files.
You can now view, annotate, sign, fill PDF forms, and more!
Implementing in WebViewer
WebViewer is a pure client-side JavaScript PDF library which provides a complete solution to view, annotate, and edit documents. It is compatible with TypeScript and has a complete type declaration file—over 30k lines of definitions! It uses an in-house rendering engine and offers a vast range of functionality far beyond the scope of PDF.js. You can try out the WebViewer demo to get an idea of some of the features available.
The WebViewer declaration file is greatly beneficial to anyone wanting to quickly understand the SDK and what the plethora of classes, methods, and enums bring to the table. Click to download the file.
Once again, let's create a new project directory called webviewer-typescript. Once you've downloaded the WebViewer package, place the WebViewer folder from inside the WebViewer.zip file into the public folder.
Just like PDF.js Express, WebViewer only requires a DOMElement to work its magic, which makes it compatible with all JavaScript frameworks. Our index.html file only needs the following:
<!DOCTYPE html>
<html>
<head>
  <meta charset="UTF-8">
  <title>PDF.js Express Example</title>
  <script src='./WebViewer/lib/webviewer.min.js'></script>
</head>
<body style="text-align: center">
  <div id='viewer' style="height: 700px"></div>
  <script src="index.js"></script>
</body>
</html>
You'll notice that the contents of this HTML file are identical to the one we made for PDF.js Express, so switching between these products is extremely easy.
Download the declaration file and place it inside the webviewer-typescript/ folder. Then, create the index.ts file and add a reference to the declaration file:
/// <reference path='./types.d.ts'/>
Now we can access all of the WebViewer API. Try typing in the following code to see the constructor options brought to you by TypeScript.
WebViewer({
  path: './WebViewer/lib',
  initialDoc: 'https://pdftron.s3.amazonaws.com/downloads/pl/demo-annotated.pdf' // path/to/local OR URL
}, document.getElementById('viewer')).then(function(instance) {
  // Call all the APIs and enjoy the power of static type checking and auto-fill
  // some namespaces from the declaration file:
  var Annotations = instance.Annotations
  var Actions = instance.Actions
  var Tools = instance.Tools

  // the setTheme method can also be used for custom colors with an object input
  instance.setTheme('dark');
});
We can now compile and serve the application:
tsc index.ts
http-server
You can see what the directory will look like after compilation beneath. Just like with the HTML file, the directory structure is identical to that of PDF.js Express!

Since we set the theme to dark mode, we'll get the cool-looking dark UI:
Again, if you are having issues when you serve the WebViewer project, remember to clear your browser's cache and try once more.
Note: The current iteration of the declaration file is in its beta and feedback to improve the definitions is highly appreciated.
Conclusion
It's easy to see how TypeScript enhances the developer experience. Learn more about TypeScript and how it works.
However, you may find adding functionality beyond basic viewing and rendering to be time-intensive.
Towards that end, we provide developers a couple more options:
Those who want to streamline implementation of basic annotations, form fill, and signatures can consider the open-source wrapper PDF.js Express. Alternatively, if the UX needs to be a competitive differentiator, you could use a more robust commercial solution: WebViewer. Apryse’s WebViewer is a JavaScript PDF Viewer that includes hundreds of unique features such as page manipulation, redaction, editing, file comparison, file conversion, and more. If you are interested in integrating WebViewer’s JavaScript library with TypesScript, you can start your free trial and get step-by-step instructions in our TypeScript documentation sections. You can also check out our video on adding PDF viewing and editing in a React app with TypeScript.
The full source code for each of the implementations is available:
If you have any questions about implementing your project or want to learn more about the Apryse PDF SDK, please feel to contact us and we will be happy to help!
Tags
tutorial
typescript
pdf.js
view

Shreyans Kulshrestha
Share this post


