Roger Dunham
Published August 28, 2024
Updated February 27, 2026
4 min
Advanced Options When Converting from HTML to PDF
Roger Dunham

Summary: Apryse SDK tackles the challenge of converting dynamic HTML into static PDFs, ensuring a consistent and visually coherent document that accurately reflects the original website's design, regardless of the viewing platform. It bridges the gap between the fluid nature of web design and the fixed format of PDFs.
Introduction
The Apryse SDK allows you to work with several different document types and gives you the ability to edit PDFs and DOCX files, securely redact file content, or generate documents on the fly. It also offers a host of other capabilities, including the ability to convert various file formats to and from PDF.
In this article, we will look at how you can convert from HTML into PDF, and see the options that are available to allow you to control the content of the final PDF.
Why Converting from HTML to PDF is Hard
We will use two publicly available websites as examples. They are https://en.wikipedia.org/wiki/Main_Page and apryse.com
Let’s look at Wikipedia first, in fact, this is something that I do regularly.

Figure 1 - The Wikipedia main page when viewed on a typical browser on a PC.
It’s a great site, and you can see from the screenshot that two different articles are visible, as well as some options.
However, if I zoom into the page (to 200%), the text gets larger, causing the content to reflow. While you can still see the start of both articles, much of their content, and the options at the right-hand side of the page, have disappeared.
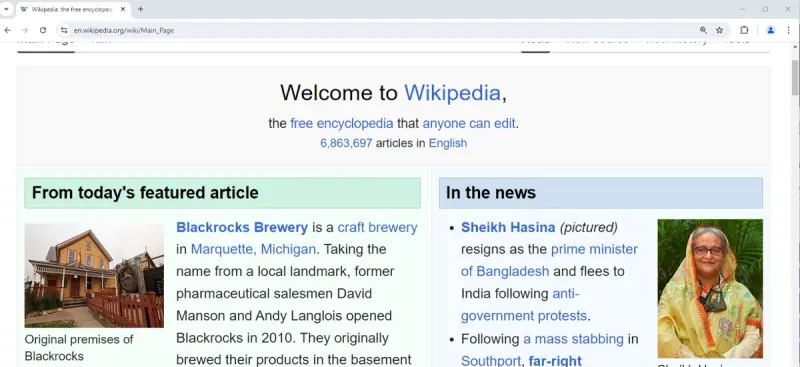
Figure 2 - The same website in the same browser, but now zoomed into 200%.
Similarly, if the browser window was narrower, then the appearance of the page may change again.
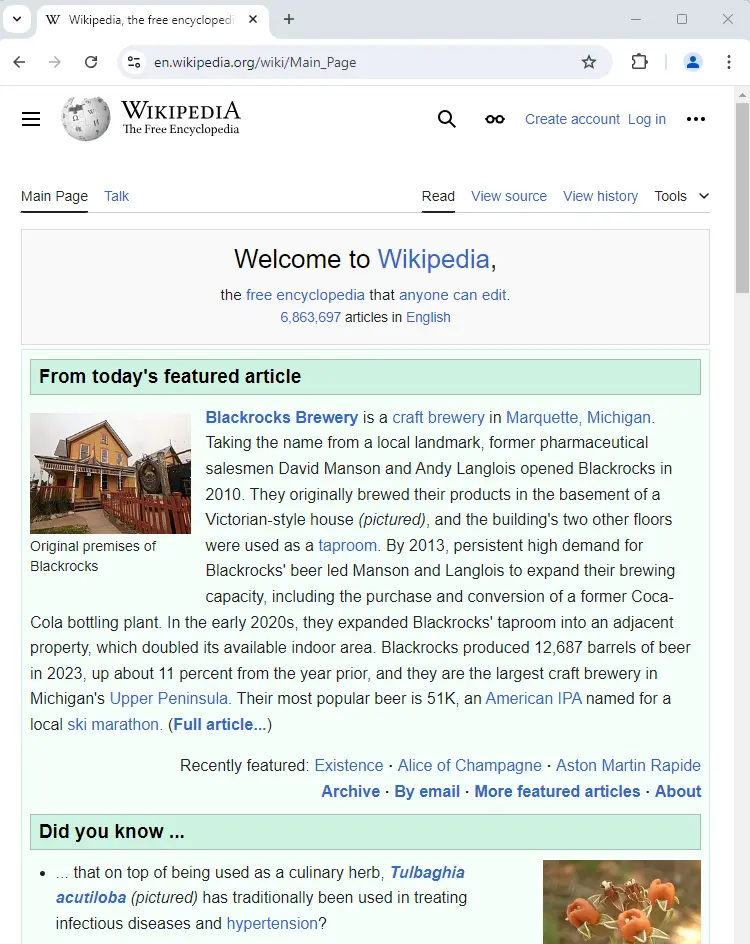
Figure 3 - The same website when viewed within a narrower browser window.
This is a fundamental part of the way that HTML and browsers work - as the browser changes, the website changes, based on rules specified by its designers, to give the best result possible.
That is brilliant for the person viewing the website, giving an intuitive result.
And it’s a real problem when converting from HTML to PDF.
Since the look of the website is not actually a fixed, what exactly should the PDF look like?
Websites are (often) extremely fluid, and their appearance depends on several variables that may change from person to person. PDFs on the other hand are very fixed, designed to look the same to all users regardless of the platform or device on which they are viewed.
Thankfully there are ways to tailor the way that a website is converted into a PDF, and we will look at the that in a few moments.
Before we do that let’s look at how easy it can be to convert from HTML to PDF.
Converting from HTML to PDF at its Simplest
The Apryse SDK, which supports many programming languages and platforms, uses an add-on module, PDF2HTML, to perform the conversion.
If that sounds complicated, don’t worry, once the module is in place, using it from the SDK is seamless.
As an example, if we want to just use default options then we can create a PDF from a webpage using just the following snippet of code.
I’ve used C# in this article, but the Apryse SDK, and HTML2PDF can be used with many languages and frameworks including Node.js, C++, Java and Python. There are minor differences for other languages, but the concept is identical. If you need a hand to get going then contact us via our Discord channel.
There is a little extra work to do with initializing the SDK and telling it where to find the HTML2PDF module, but once that is in place the code can be run, and after a few seconds a PDF will be generated.
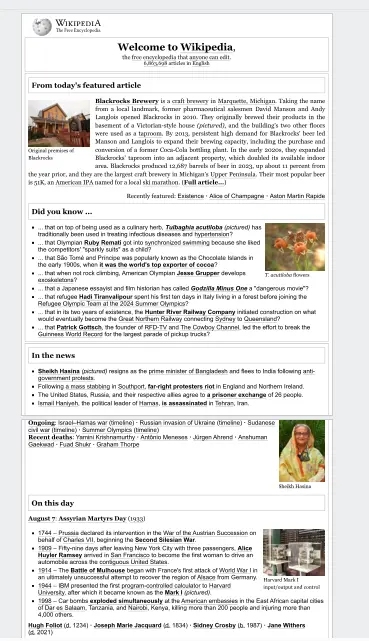
Figure 4 - The PDF created using just default options.
That’s a pretty good start. We can see the content, and it all seems to make sense.
Customizing the Conversion
While the default options often give you exactly what you want, there are two sets of options that you may wish to try out
- Web Page options
- PDF options
We will look at both in turn.
Web Page Options
There are a multitude of options available that are specified using the WebPageSettings object. For now, though, we will just look at two. We will also use a different website, apryse.com, to demonstrate the results.
If we just use default options, then we get a perfectly good PDF.

Figure 5 – The top page (and the start of the second page) of the PDF created from apryse.com using default options.
SetZoom(double)
Setting the zoom level has the same effect as manually zooming into the web page before it is converted to PDF.
The following code uses an instance of the HTML2PDF converter rather than a static method. Which style you prefer is up to you.
Now when we run the code the resulting PDF shows us more of the website on each page.
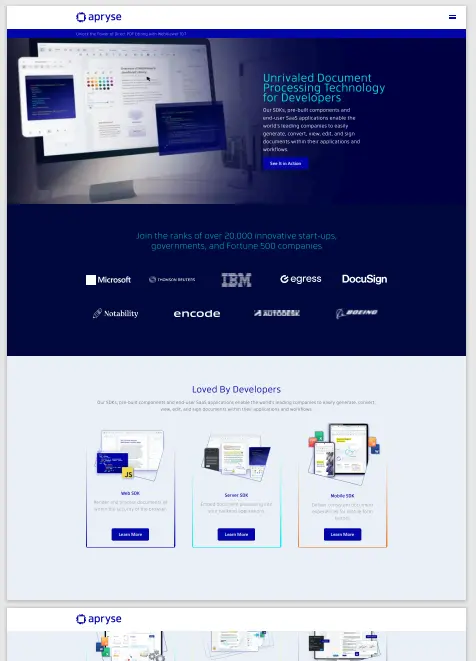
Figure 6 - The start of the PDF having set the zoom level to 50% when converting the website.
You could, of course zoom in, rather than zoom out, the choice is entirely up to you.
Removing Backgrounds
By default, page backgrounds are retained when converting to PDF, and you can see that in the first example for apryse.com.

Figure 7 - The default behavior leaves the backgrounds in the converted PDF.
However, you can easily remove them by using SetPrintBackground to false.
With no extra effort the generated PDF will now have many of the backgrounds removed. Note though, that background images are not removed by this option.
If you need to do so, it is possible to implement that as a post-processing step using the Apryse SDK.

Figure 8 - The result of removing backgrounds. Color has been removed from several parts of the document - but note that the image is still present.
Cool! That’s the WebPageSettings options that you are most likely to use. Now, let's look at the converter options, which allow you to change aspects of the generated PDF.
For these examples we will use https://en.wikipedia.org/wiki/Main_Page.
Setting the Page Size of the PDF
The default page size is 8.5 x 11 inches, which is the Letter size standard, common in North America.
If we run the conversion, using just default options then the generated PDF will be that size.
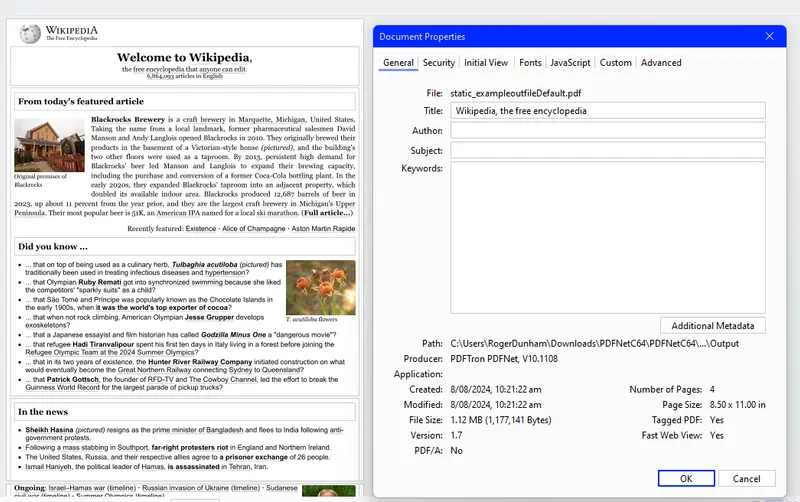
Figure 9 - The default page size when converting from HTML to PDF is Letter size (8.5 x 11 inches).
Elsewhere in the world, though, other sizes are more usual. In the UK, for example, a more typical size is A4 size.
Thankfully, changing the page size is a breeze, via the SetPaperSize function (even though in most cases the PDF will never be used with actual paper!)
Don’t worry, you don’t need to look up what the actual dimensions of A4 paper are, since the Apryse SDK already knows many of the standard sizes. As such you can just use:
converter.SetPaperSize(PrinterMode.PaperSize.e_a4); When we run the code now, the generated PDF has a different page size, which means, in turn, that the amount of text that is contained on the page will be different.
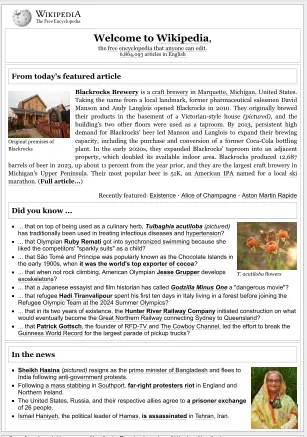
Figure 10 - The result of setting the page to A4.
You are also free to explicitly specify the page size. Since A4 paper is 8.3 x 11.7 inches in size, you use those numbers to specify the width and height and get the same result.
converter.SetPaperSize(“8.3in”, “11.7in”); You don’t have to use inches - supported units are mm, cm, m, in, pica(pc), pixel(px) and point(pt)., so if you prefer to use metric then you could use (for example):
converter.SetPaperSize("210 mm", "297 mm"); Notice that there is a lot of flexibility in the way that you specify the size - there can be, but doesn’t need to be, a space between the number and the units. The system has been designed to be friendly, rather than needing some precise format that is impossible to remember.
You are not restricted to just using ‘standard’ sizes, you can use an entirely different page size if you want, for example the size of an iPhone 6 (71.62 x 147.6 mm).
converter.SetPaperSize("71.62 mm", "147.6mm"); Once again, the text contained on the page will be based on what will fit into the new size.
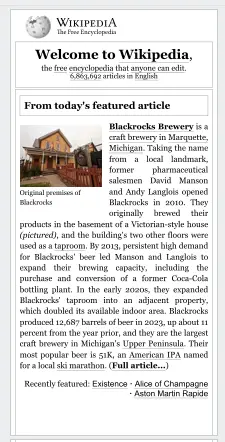
Figure 11 - The result of changing the page to be the size of an iPhone 6.
Choosing Landscape or Portrait
By default, if you just specify a page size from one of the built in options, the output will be portrait. Swapping it to being landscape is a breeze, though.
converter.SetLandscape(true); Run the code again, and the page orientation will have changed.

Figure 12 - By using ‘SetLandscape’ you can change the page orientation of the PDF. In this case the page size was also set to that of an iPhone 6.
Nice!
Setting Margins
Let’s go back to the default page size for our next example.
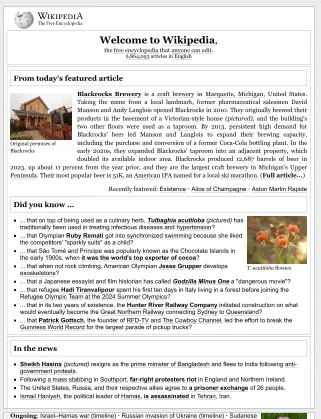
Figure 13 - The default output, which we saw earlier.
Currently the text fills almost the entire width of the document. However, it may be difficult to read text that starts and ends at the edge of the page, it would certainly cause issues with many printers if a paper copy was created.
Adding margins is easy, and the units used are the same as for setting page size - mm, cm, m, in, pica(pc), pixel(px) and point(pt). Different values can be used for each edge and are specified in the order of top, bottom, left and right.
converter.SetMargins("1cm", "2cm", ".5cm", "1.5cm"); Now our document has margins, making it easier to read.
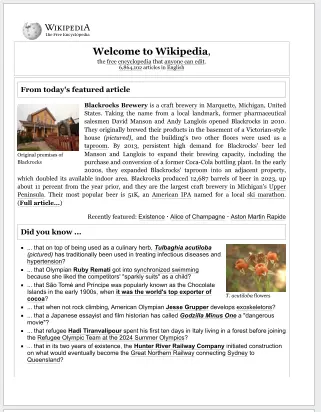
Figure 14 - The result of specifying each border with a different value.
Adding Headers and Footers
The final thing that we will look at is how to add a header and/or a footer to the generated PDF. Once again, the Apryse SDK makes this easy using the converter.SetHeader and converter.SetFooter functions and a block of HTML that should be inserted.
At its simplest, which is always a good place to start, you can use:
string header = "APRYSE HEADER EXAMPLE";
converter.SetHeader(header);
However, unless you also specify the styling this may result in an extremely small font size being used for the header.
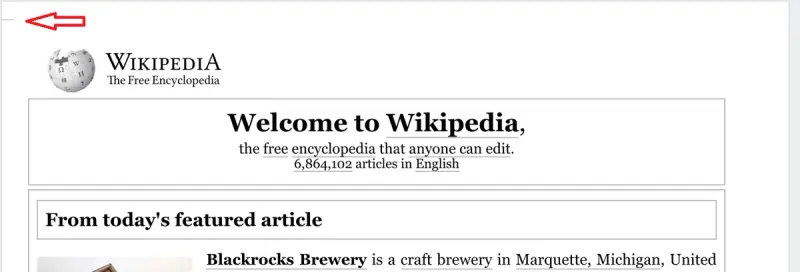
Figure 15 - The default font size for a header (indicated by the arrow) is extremely small.
In reality though, that will not be a significant issue, since you are unlikely to use unformatted text as a header or footer. You would instead specify a block of HTML including inline styling.
This also opens up the possibility to add dates, page number and total page count into the header when it is inserted into the PDF.
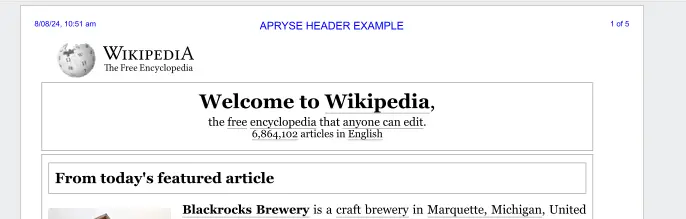
Figure 16 - The top of the first page in the PDF showing the header that has been added.
That’s a great result! We have seen how we can choose the page size, what the margins should be and how to add a custom styled header to each page.
Next Steps
Generating a PDF from HTML might be the end of your process, or it might just be a stepping-stone in your workflow.
The Apryse SDK offers a huge range of functionality for working with the PDF that you have created. You could for example: automatically redact certain information (using REGEX based search functionality); or extract data from the page using IDP; or add a watermark; or indeed perform many other operations on the file.
The Apryse SDK offers you a wealth of opportunities to add value to your data.
We have just seen a fraction of the functionality that is available within the SDK, so dive in and try things out - if you run into any issues reach out to us on our Discord channel.
Learn how to convert HTML to PDF.


