Apryse
Published April 18, 2025
Updated June 15, 2026
7 min
Processing Large Test Sheets and Surveys with Apryse OMR
Apryse
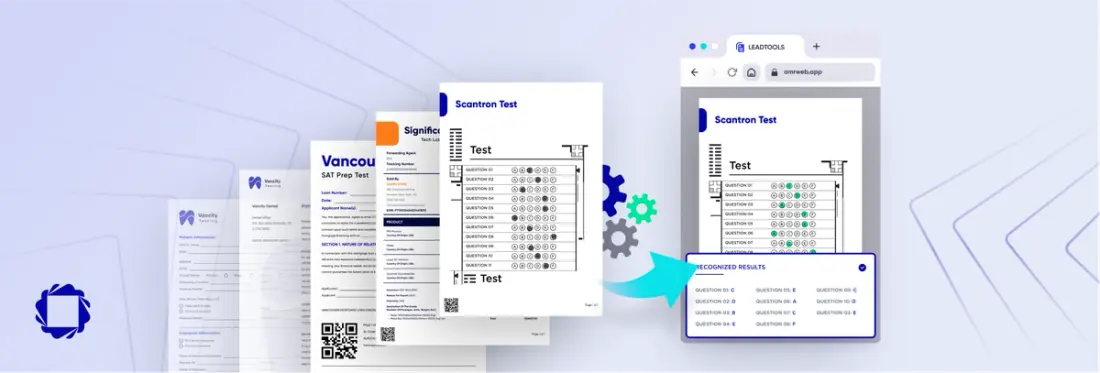
Optical Mark Recognition (OMR) is an important part of forms recognition but can be surprisingly complex. On the surface, it looks easy to detect whether a box is filled or unfilled by just counting the pixels. While that may be true for the small area, how do you handle an image with hundreds of checkboxes like a multiple-choice exam sheet or survey?
Documents filled with numerous bubbles have several unique challenges:
- Setting up a template so the recognition engine knows what bubbles to look for and where
- Assigning proper values to each bubble or group of bubbles
- Processing filled documents that match the template
- Making sense of all that data and handling human error
- Provide analytical confidence reporting
Apryse answers these problems and more with an intuitive and easy to use set of APIs and sample applications for creating and processing large quantities of OMR fields in document images.
Also check out Extracting ACORD Form Data using Template Extraction
Creating the Template
The first, and possibly biggest problem with large sets of OMR data is the hassle of having to set up the master form template. The first iteration of Apryse Forms Recognition included OMR support. However, the main objective in that version was to capture individual checkboxes rather than large groups of them. Since you had to draw a rectangle around each and every OMR field, it was tedious if you wanted to set up a large survey or exam sheet.
Apryse OMR includes a user-friendly click-and-drag interface to create an entire grouping of fields. Once parsed, you select whether it should break down each answer by rows or columns, and the values assigned to each cell. Common answer sets are provided (1-9, A-Z, etc.) along with the ability to assign custom values. You can also tell it to output the data as either comma-separated (useful for multiple-choice answers) or combined into a single string (useful for names and dates).

Imagine drawing a rectangle around each OMR bubble on this form!
Behind the scenes, the interface and dialogs are creating and editing an OmrFieldOptions object. By simply passing the bounding rectangle and a few options, the master template’s ITemplateForm.ExtractInfo method will find and create all the individual sub-fields and take some initial guesses on what the data is. (e.g., direction, values, use an answer key, etc.)
Note: Find the input files for this code sample in our documentation here.
Processing Filled Documents
After the master template is set up, it is time to process filled forms against it. You can choose individual files, or an entire folder to load and compare against the template. If you are processing the results of a test, you can also supply the answer key at this step, along with additional options like a passing grade.
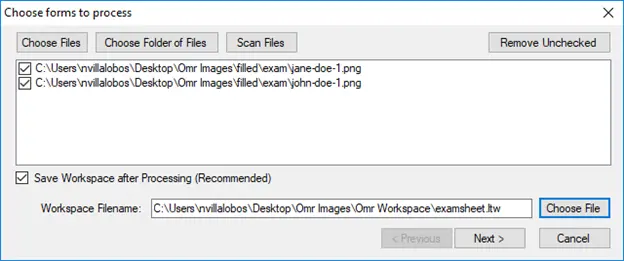
Managing the filled forms to be processed

Selecting and configuring the answer key
Don't let the simplicity of the screenshots fool you, the OMR engine instinctively handles a lot of what's going on under the hood. The automatic preprocessing and alignment algorithms are exactly what make Apryse so special. There are some common imperfections that can occur when scanning documents, such as a slightly skewed angle or black borders. These issues are are handled and resolved automatically by the Apryse OMR Engine. On top of that, Apryse’s rich library of Image Processing provides you with comprehensive tools that are specialized in correcting image defects and deformations. However, less-noticeable issues like different scan resolutions between the master form and the filled form can drastically affect the image comparison algorithms, even with higher quality resolutions. This is because the filled form image and template would have mismatched physical coordinates. Additionally, non-linear deformations from ADF scanners (e.g., vertical stretching in portions of the document) often escape the untrained eye and can also plague processing. Scenarios like these, and many more, are handled automatically by the Apryse Forms Processing engine. That is what makes it one of the most powerful and dependable SDKs on the market.
Scoring and Analyzing the Results
When enabling the option to grade OMR fields in the template, Apryse SDK will match the user’s filled responses against the answer key. On top of retrieving the results, additional statistics will be shown.
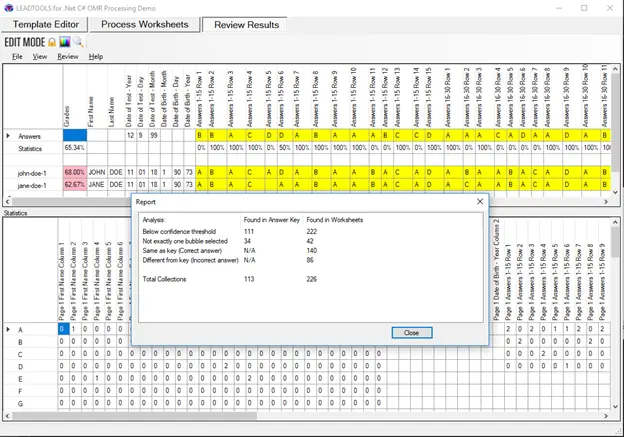
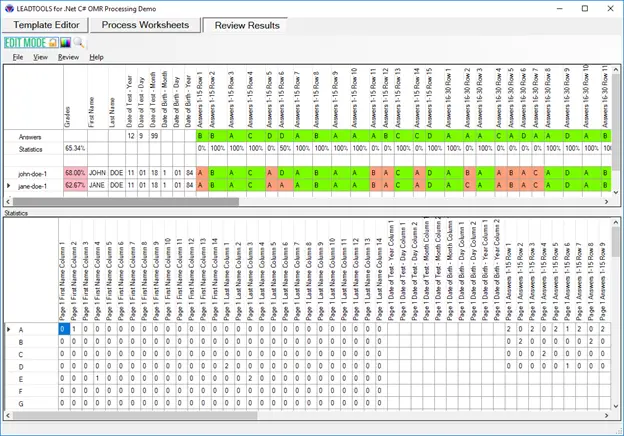
Processed results with answers highlighted yellow for review
After the filled forms are processed against the templates, the user can review the results. Apyse SDK will use its confidence reporting and then categorize the results based on color-codes, correct (Green), incorrect (Red), and needing review (Yellow). Low confidence values generally occur when the bubbles are not completely filled in or filled in with light shading. It is possible to fine-tune the OMR sensitivity when designing the template, but it is usually best to err on the side of low sensitivity since most exams have letters or values inside the bubbles which might cause false-positives. Additionally, the application will notify the reviewer if the field is blank or if multiple bubbles were filled for the same answer.
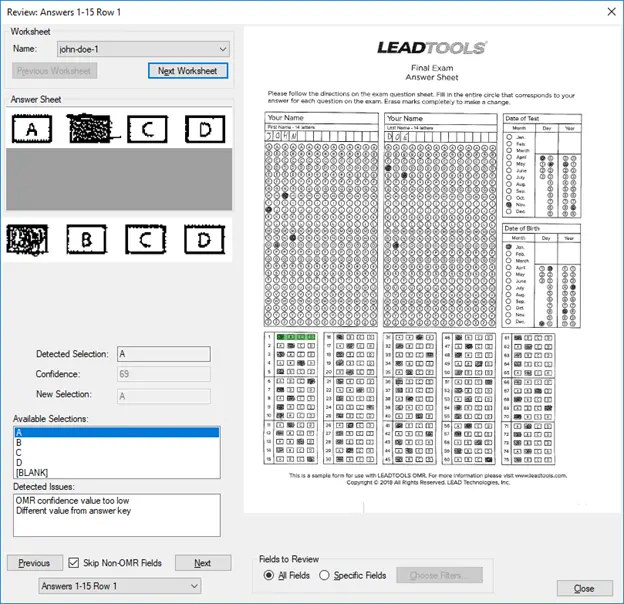
Reviewing an answer
The reviewing pane will show the region from the processed form and answer key for simple verification. If, for example, a partially filled bubble resulted in the engine detecting the answer as blank, the user can change the answer and get the updated statistics. Once the user clicks the “Next” button, it will alter the background color of the cell in the overview indicating that the answer has been reviewed.
You are able to also customize the “Needs Review” criteria either before or after the forms have been processed. This gives the user the ability to filter out the results and then categorize which ones need to be reviewed.

Setting new filters to be reviewed
Reviewed exams with new highlight colors
Apryse OMR SDK goes above and beyond the simple filled/unfilled detection of optical marks on document images. It gives application developers everything they need to design, process, and analyze data retrieved from large sets of bubbles found on exams and surveys.
Conclusion
To learn more about OMR, check out our OCR & ICR capabilities.


