Garry Klooesterman
Senior Technical Content Creator
Published June 12, 2025
Updated May 18, 2026
4 min
How to Implement Full-Text Search in PDFs Using WebViewer
Garry Klooesterman
Senior Technical Content Creator

Summary: Businesses today are looking for fast, reliable, and efficient solutions to help with the many day-to-day challenges they face, including searching for text in PDFs. WebViewer allows developers to easily implement customizable, full-text search capabilities into their apps, ensuring users have the tools they need. This blog discusses how to add search functionality using WebViewer and JavaScript.
Introduction
Businesses face many challenges today, including constrained budgets, tight timelines, and growing demands, and they’re seeking efficient and cost-effective solutions to manage these challenges.
One such solution is full-text search in PDFs. Full-text search enables efficient and accurate search capabilities, allowing businesses to reduce time spent on manual, error-prone tasks. For example, a legal team reviewing hundreds of pages in a contract for a certain clause or a healthcare research team combing through patient consent forms looking for a specific allergy.
Automating the process with enhanced text search tools, such as those built into Apryse WebViewer, enables fast information retrieval and analysis, which helps reduce processing times, eliminate errors, and ensure compliance.
How to Search for Text in PDF Documents
Basic text search is a feature that can be found in practically any PDF viewer and can quickly search for and highlight a specific term throughout a document. But basic search can lack certain features, such as retaining the highlighting when not searching or highlighting different terms in different colors at the same time.
This is where implementing full-text search capabilities into your apps helps deliver more robust functionality your clients need.
How to Search for Text in PDF Documents Using JavaScript
WebViewer UI has a built-in search panel for basic text searches, but it also provides an API for more control and customization. For example, you can implement the following functions to create a more customized text search function in your apps:
- searchText: Search for and highlight the first instance of a search term. It can also be called more than once to search for the next instance.
- searchTextFull: Search for all instances of a search term. This also opens the search sidebar.
- addSearchListener: Add a function that is called whenever there is a match or when finishing a full search.
- removeSearchListener: Remove a search callback function.
These cover the basics of adding text search through WebViewer. See our documentation for more details.
How do I Get Started with Text Search in WebViewer?
WebViewer by default has a powerful search option that can be customized in various ways, such as highlighting a second search term in a different color to display multiple search queries at the same time.
In this blog, we’ll create a basic PDF viewer with a built-in search panel. We’ll use searchTextFull to search the text and adding a searchListener callback to create annotations on top of the results which will remain after clearing the search panel.
Step 1: Set up a local server
- Create a folder for your project. For this example, we’ll use the folder myServer.
- Open a terminal in that folder and run the command:
npm install -g http-serverStep 2: Download and extract WebViewer
Download WebViewer and extract the WebViewer.zip file into your myServer folder.
Note: By default, WebViewer.zip will extract to a folder called WebViewer.
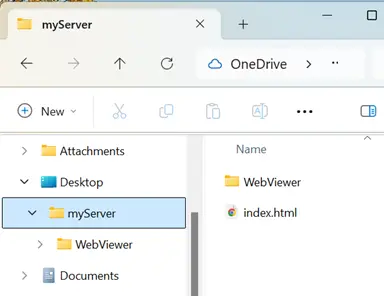
Figure 1: Folder structure.
Step 3: Create the index file
Create an index.html file in the myServer project folder and copy and paste the following code inside:
Step 4: Add scripts
Now add the scripts for this project by adding the following code to the body after the viewer div tag.
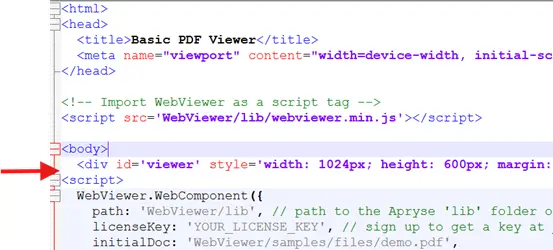
Figure 2: Location to add the script code.
Save the file.
Step 5: Start the server
To start your local server, open a terminal in your myServer project folder and run the command:
http-server -a localhostStep 6: Load the index.html file
Open http://localhost:8080/index.html in your browser.
Note: If you already have the page open, refresh the page.
You should see WebViewer start with a PDF opened. In this case, it will be the demo.pdf file from the sample files included with WebViewer.
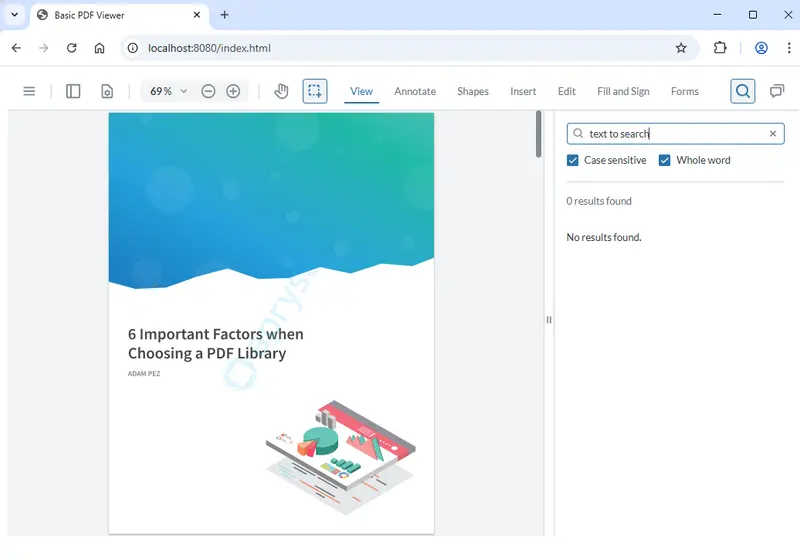
Figure 3: WebViewer open with the demo PDF file.
What’s Happening in the Code?
After the document has been loaded, a searchListener callback function is added, and searchTextFull is used to search the document. When the searchListener callback function is called, it'll process the search based on the searchPattern and options specified and then perform any additional code. In the above example, it creates redaction annotations on top of the matching text that are retained even after the search is cleared.

Figure 4: WebViewer showing the results of the search with a red box added to each item found.
How Can I Customize the Search Functions?
WebViewer has additional methods for controlling the search, including:
- textSearchInit: Start a search or search for the next occurrence of a search term.
- clearSearchResults: Clear the highlighted search results.
- displaySearchResult: Highlight a result and unhighlight the previous result.
- displayAdditionalSearchResult: Highlight an additional result.
- setActiveSearchResult: Go to the search result and highlight it with the active color.
- setSearchHighlightColors: Set the highlight colors for search results.
You can also specify options for the search mode.
- CASE_SENSITIVE: The text must match the case of the search term.
- SEARCH_UP: Search starts on the last page and searches backwards to the first page.
- PAGE_STOP: Search will run the callback function when it finishes searching a page.
- HIGHLIGHT: Bounding box of found term will be included.
- AMBIENT_STRING: Characters surrounding the search term will be included.
- WHOLE_WORD: The text found must match the whole search term.
- REGEX: Regular expressions can be used in the search.
- WILD_CARD: Wildcards can be used in the search.
See the documentation for more details on other customizations that can be done, including setting the color of the active search result to be displayed as a different color than previous search results. This would be an excellent option for searching for and highlighting different clauses in a contract. Each separate clause would be highlighted in a different color and visible at the same time.
Suggested Read:Directory Word Search for Images and Documents
Conclusion
As you can see, ensuring your users have the tailored tools they need by implementing customized, full-text search capabilities into your apps is easy when using WebViewer and JavaScript.
Feel free to check out our demo! You can also get started now or contact our sales team for any questions. And remember to hop on our Discord community for support and discussions.


