Roger Dunham
Published February 07, 2025
Updated May 18, 2026
6 min
How to Validate a Digital Signature using Apryse
Roger Dunham
Summary: Digital signatures offer unparalleled security, verifiability, and tamper-proof authentication for all your digital documents. With Apryse Digital Signature SDK you can ensure that your digital signing process is secure, legally valid, and fully compliant, enabling you to maintain trust in all your digital communications.
Whether you're dealing with contracts, agreements, invoices, or any other type of critical document, Apryse SDK empowers you to sign and verify documents with confidence, protecting both your business and your clients.
Introduction
PDFs are everywhere, used for documentation, invoices, contracts and many, many other things. When working with contracts though, how can you tell whether a “signed” document was really signed by the person that was authorized to do so, and that no changes have been made to the file since it was signed?
The answer is using advanced Digital Signatures solutions, providing a secure, verifiable, and tamper-proof way to ensure the authenticity and integrity of documents.
Learn more about custom digital signatures.
In the previous article in this series, we digitally signed a PDF using a self-signed certificate. In this article we will look at how we can tell whether the signature is valid and see what happens if the document is tampered with after it has been signed.
If we use a generic PDF viewer such as Chrome, which uses PDFium to look at the PDF that we signed in the previous article, then the only obvious difference between the PDF before and after it was signed is that there is an image in the Digital Signature field.
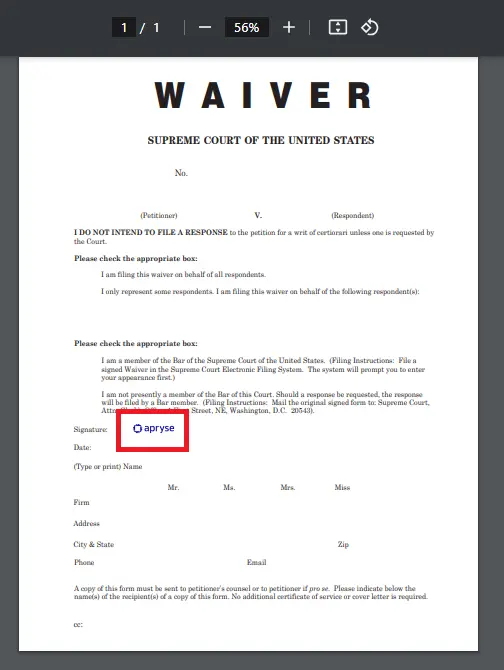
Figure 1 - The signed PDF. If you open it in Chrome, then the only apparent difference is that there is now an image next to the Signature label.
All that effort, and no apparent benefit! But it’s not telling the whole story, and not all PDF tools are the same.
Validating the Digital Signature in Xodo PDF Studio
If you open the same file in Xodo PDF Studio – a desktop tool that works on Windows, macOS and Linux, then you can see that there is extra information presented.
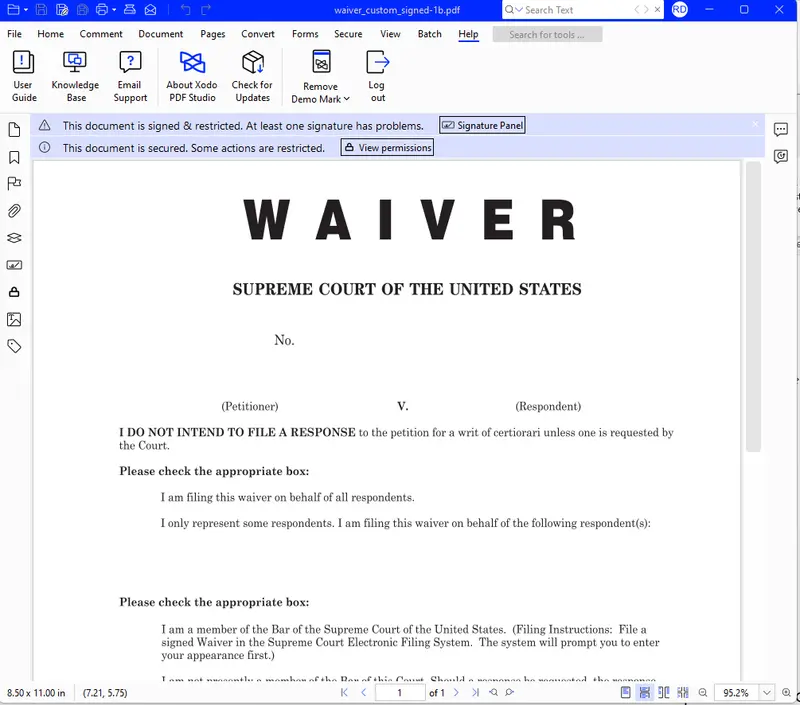
Figure 2 - The same file in Xodo PDF Studio – there is more information at the top of the PDF.
If we zoom into the top of that image, you can see that the application informs us that the document is signed and restricted (preventing users from modifying the document after it has been signed).

Figure 3 - A closer view of the same PDF in Xodo PDF Studio.
But the messages also indicate that that there is a problem with at least one signature.
Let’s find out what the problem is.
Click on the Signature Panel button and you can see more information.
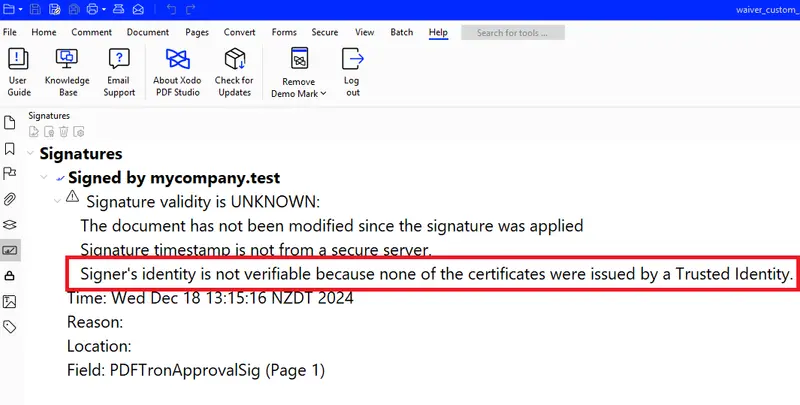
Figure 4 - Clicking on the Signature Panel button shows the problem.
We used a self-signed certificate, which is a cheap and easy way to get started with Digital Signatures rather than having to purchase one. However, since we created that certificate rather than it being issued by a Certificate Authority, Xodo doesn’t know that it can be trusted. Had the certificate been purchased from a Certificate Authority then this wouldn’t have been a problem, as the Chain of Trust would have explicitly linked it back to a Trusted Identity.
A self-signed certificate might, however, be perfectly trustworthy – it depends on who created it. In this case it was us, so since we presumably trust ourselves, that’s OK.
The problem, though, is that since it is easy to create a self-signed certificate, scammers can also do so. As such, if a self-signed certificate claimed to come from the government or your bank, or someone sending you an invoice, then you might want to think twice (or ask for clarification) before trusting it.
Working with Trusted Certificates
With Xodo PDF Studio, it’s easy to add a self-signed certificate to the list of trusted certificates. You should, of course, only do that if you trust the person that created it (bearing in mind that it might have been swapped during a Man In the Middle attack, or via Business Email Compromise).
Within Xodo PDF Studio click on Trusted Certificates.
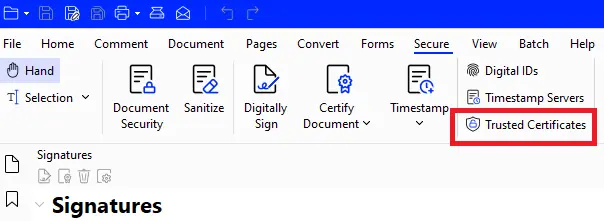
Figure 5 - The Trusted Certificates button in Xodo PDF Studio.
This will display the list of certificates that are already trusted.
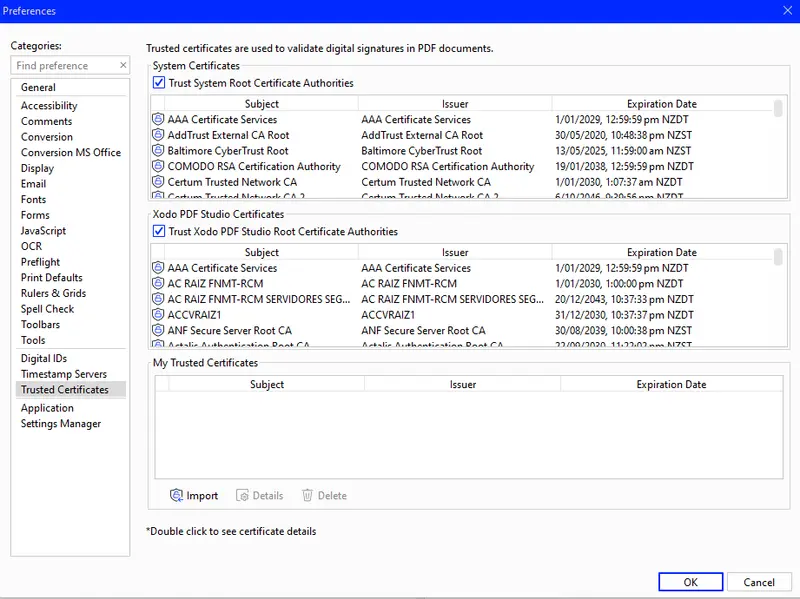
Figure 6 - Xodo PDF Studio will show you which certificates are trusted.
From this dialog we can click on Import which will let you select the self-signed certificate that we created in the first part of this series.

Figure 7 - Adding our self-signed certificate to Xodo PDF Studio.
Once our self-signed certificate has been added to the list of “My Trusted Certificates”, it is possible to open it to see the details of the certificate, including the company name and location that were specified when we first created it (which in this case was for a company called “mycompany.test”).
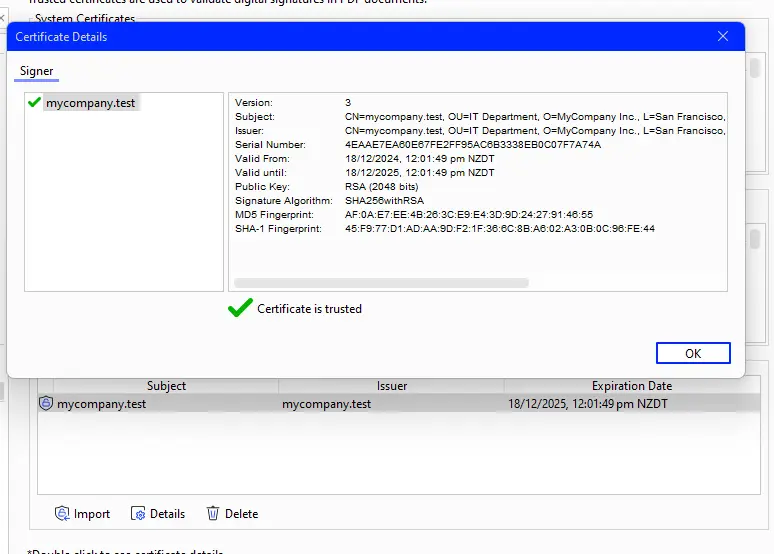
Figure 8 - The details of our self-signed certificate.
Now that the certificate is trusted, Xodo will tell you that all of the signatures are valid within the PDF that was signed using it. A tick mark is even shown to give a visual appearance that everything is correct.
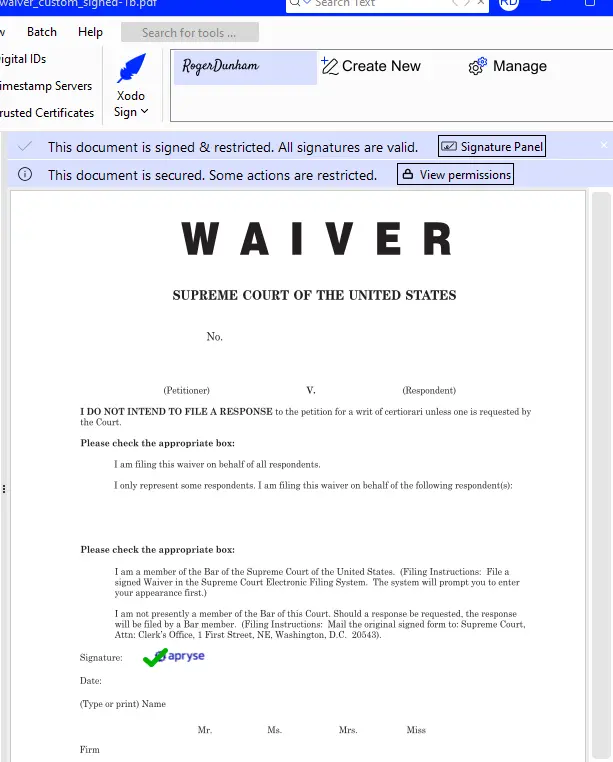
Figure 9 - With a trusted certificate, the digital signature that we created is seen as valid.
It’s possible to use self-signed certificates with the Apryse WebViewer too, but that is a little more complicated and varies between Operating Systems. In reality, you are unlikely to want to do this other than when developing a Proof of Concept since, in production, PDFs will very likely only ever be signed with a certificate that was generated by a Certificate Authority.
What happens if someone tampers with the PDF?
A remarkably simple scam, that has worked on multiple occasions, is to change the recipient details listed on an invoice. The original invoice was correct, but someone alters the bank details and money gets paid into the fraudster’s account. You would certainly want to be able to identify if that had happened.
Alternatively, someone might change one of the conditions of a contract after it has been signed – perhaps changing the amount that you agreed to pay. That could have huge financial and legal repercussions. Once again, you would want to be able to identify if that had happened.
In fact, you are likely to want to know if anything has changed in the PDF after it was signed.
This is where the “Digest” values (also known as the “hashed values”) which were described in the previous article in this series come in.
As an example, let’s try editing the digitally signed PDF that we created.
Most reputable software won’t, in fact, let you edit a signed document.

Figure 10 - Xodo PDF Studio won't let you edit a signed PDF.
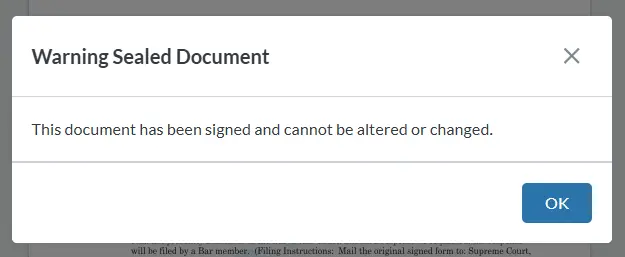
Figure 11 - Apryse WebViewer also informs you that you cannot edit the document.
But there are tools out there that are less scrupulous, and dedicated fraudsters know where to find them and have proven to be extremely motivated to do so.
For now, though, we will use a very simple tool to edit the PDF – Notepad ++. While it is difficult, but not impossible, to change the details of a bank account using that tool, it is easy to edit the metadata associated with the PDF.
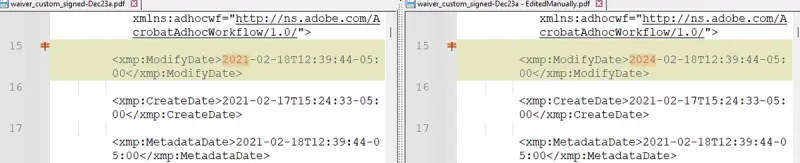
Figure 12 - As a simple example, you can edit metadata within Notepad++. You can see how the date has been changed from the original PDF.
We can then save that file and reopen it within Xodo PDF Studio.
Now there is a message that indicates a problem with at least one signature, and a red cross is shown at that signature's location.

Figure 13 - If the PDF is edited after it has been signed, then many PDF tools will inform you of the problem.
If we open the signature panel, then you can see that the document has, indeed, been modified.
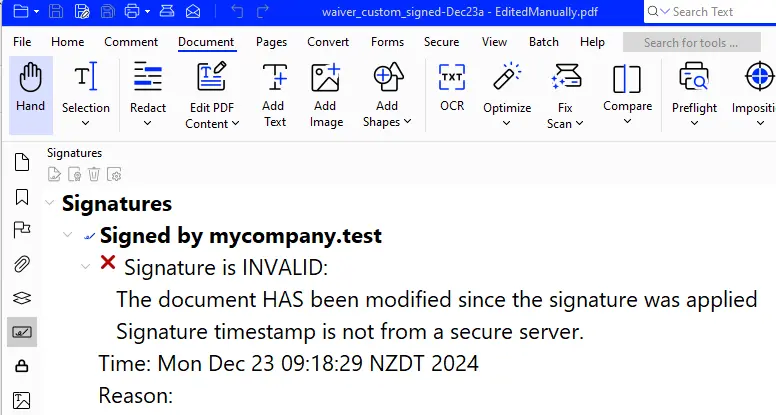
Figure 14 - The signature panel reveals that the PDF has been modified.
Under the hood, what is happening is that the digest is being recalculated based on the current contents of the PDF. Even tiny changes such as changing the metadata (let alone changing the details for a bank account!) will result in the digest's value differing from the one stored in the digital signature, indicating a change has occurred.
If you have both the original and edited document, then you can use “semantic compare” to identify what has been modified.
If the digital signature is valid, then you have a high confidence that the document has not been modified since it was signed.
Of course, if you open the PDF in a simple PDF viewer such as Chrome, then there will be no indication that something has been edited.
Minor changes to the metadata might not matter, but when you find that you’ve transferred money to the scammer’s bank account, which they had edited into the PDF, then using a cheap tool might prove to be very expensive.
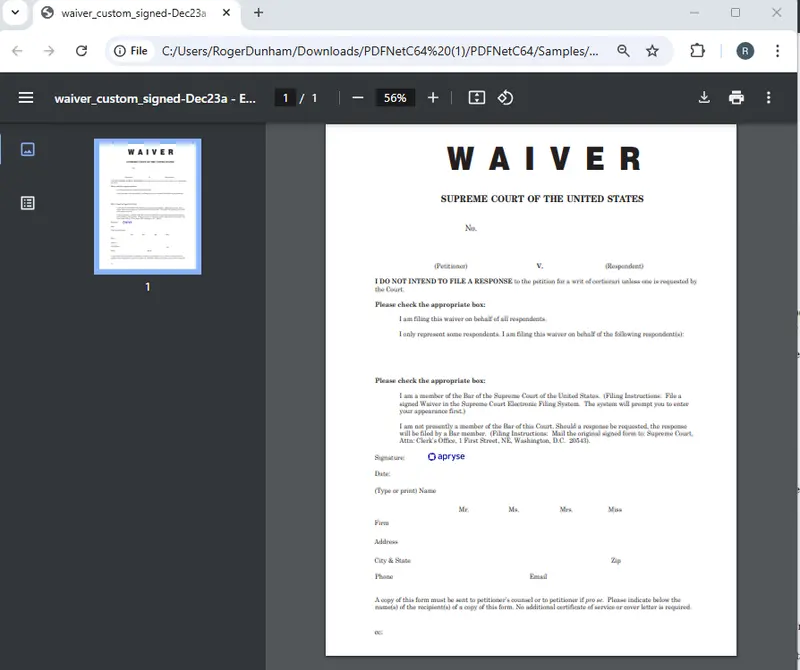
Figure 15 - Simple PDFium based viewers, such as Chrome, give no indication that the PDF that was edited after it was digitally signed.
Wrapping up
In this article, we have seen how we can add a self-signed certificate to the list of Trusted Certificates that Xodo PDF Studio accepts and how having done so the Digital Signature is considered valid.
We have also seen how editing a PDF after it has been signed will result in the Digital Signature becoming invalid, alerting you to a potential problem with the PDF.
Similar functionality is available within the Apryse SDK and Apryse WebViewer, along with a huge range of other functionality, including in-browser PDF and DOCX editing, document redaction, and much, much more.
So, grab yourself a free trial license, download the SDK in whatever programming language you prefer and give things a go. Digital Signatures are complex, so if you need support then please reach out to our team on our Discord channel.
If you decide that signing a PDF within code is not what you require but you still need to sign PDFs, then Xodo PDF Studio offers two other options – you can sign documents directly with a digital ID from within its UI, or else use the UI to start the Xodo Sign workflow.