Logan Bittner
Published November 02, 2018
Updated March 09, 2026
5 min
How to Build a PDF Viewer with Electron and PDF.js
Logan Bittner

Electron is an open-source framework that allows you to create cross-platform desktop applications using web technology. This post will go over how to implement PDF.js into an Electron app to build your own desktop PDF viewer.
You can also watch our video about adding viewing and editing to an Electron PDF viewer.
1. Download and Install Electron
Electron provides a handy starter repo that contains all the boilerplate we need to get started. Get it by running:
git clone https://github.com/electron/electron-quick-start

cd electron-quick-start

npm install
Once these steps are done, you can make sure everything worked by running
npm start
You should see a hello world app pop up on your desktop.
2. Set Up Project Structure
In order to keep things clean, let's clean up the boilerplate a bit. Create a folder called src and move index.html and renderer.js into it.
Inside main.js, change this line:
mainWindow.loadFile('index.html')
to this:
Also, in /src/, create an index.css file that we can use to style our app.
3. Download PDF.js
In the root of your project, create a folder called public. This is where we will put our PDF.js files.
Download the PDF.js files from here and extract them into the public folder. For ease of use, rename the folder it gives you to just pdfjs.
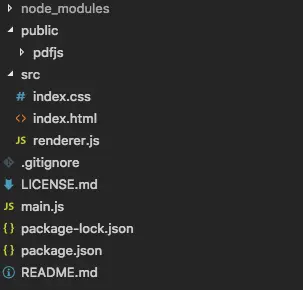
Your folder structure should now look something like this:
You will also need to tell Electron where your static assets are. You can do this by adding the following code to package.json
"build": {
  "extraResources": ["./public/**"]
}
4. Create the Viewer in Electron to Open a PDF
Replace the contents of src/index.html with the following:
This will be the UI for our app. We create a button to show the native file picker, and we create a viewer div to hold our PDF.js viewer. We also link our css styles.
Update src/index.css to the following:
This adds some basic layout for our project, and tells the viewer to fill up as much of the window as it can.
Now, it's time to add our JS logic. Update src/renderer.js to the following:
This code uses the Electron dialog module to open a file picker when the button in our UI is clicked. Once the user selects a file, we create an iframe that points to the PDF.js viewer. We append a query param to the iframe that tells PDF.js which file we want to open.
That's it! Run npm start to run the Electron app in development mode. You should see your UI in a native window.
When you click the button, the native file picker will pop up and allow you to select a PDF file. Once selected, PDF.js viewer will appear with the PDF you selected open.
So far, we are able to use Electron to open a PDF and view the PDF, but that's about it. If we wanted more functionality, such as annotating, PDF manipulation, and opening other file types, then open source software just won't cut it. See our Guide to Evaluating PDF.js to learn more.
That's where you can integrate your Electron app with Apryse’s JavaScript PDF Viewer. It provides lots of features out of the box with no configuration. You can implement it into your Electron app just as easily as PDF.js.
Implementing with WebViewer
To implement the viewer, first start by downloading the WebViewer package and extract the contents into the public folder.
Now we need to require the WebViewer files. In src/index.html, add the following line in the <head>:
This will load WebViewer into the global context for use.
Now we just need to change our button's onclick handler to use WebViewer instead of PDF.js. For the sake of demonstration, we will create a new file called renderer-webviewer.js and insert the following code:
This code is the same as the code we used in the PDF.js step, except it creates an instance of WebViewer instead of creating an iframe.
Now we need to reference the new js file. In src/index.html change this:
require('./renderer.js');
to this:
require('./renderer-webviewer.js');
And that's it!
You can run npm start to start the app. The flow is the exact same, except now you will see WebViewer instead of PDF.js. You can now start adding different features to you electron app:
- Annotations
- Real-time document collaboration
- Viewing / Converting MS Office files
- PDF Generation
- PDF Manipulation
- Digital Signatures
- Redaction
- And much more
Building for Production
The steps involved in building an Electron app for production use varies by system and OS, so please visit this guide if you are interested in doing so.
Conclusion
This post showed how easy it is to get a basic PDF viewing Electron app up-and-running using open source software. We also went over how to create a more feature-packed PDF experience by implementing WebViewer.
Interested in learning more about Webviewer? Check out our comprehensive guide here.
The full source code for this article can be found here.
You can view a full demo of WebViewer here. Feel free to compare it to the PDF.js viewer!
Learn how to build a Windows Desktop PDF app with Electron.
If you have any questions about implementing WebViewer in your project, please feel to contact us and we will be happy to help!


