Roger Dunham
Published May 30, 2025
Updated May 18, 2026
7 min
Getting Started with Python – Beyond Hello World
Roger Dunham

Introduction
If you're looking to build powerful PDF and document processing features into your Python applications, then the Apryse SDK (formerly PDFTron) offers a robust and flexible solution.
In this blog, we’ll explore how to get up and running with the Apryse SDK using Python—from installation to basic usage, and then on to more advance usage – leveraging the DataExtraction module to find key/value pairs in a document, then using the discovered data to annotate the PDF.
A Note on Versions
The Apryse SDK is available for Python 3. (We have ended support for Python 2). You will need:
- Python from 3.5 upwards.
- Pip
This article was written using Windows 11. But the concepts also apply to Linux and macOS.
I won’t use a virtual environment in this article, but you may prefer to do so.
Step 1: Install the SDK
While you can install the SDK directly using pip, we recommend using python -m pip since that guarantees that the correct version of pip is used, even if you have multiple versions of python on your machine. I’ll use just that method in this article, but the choice is up to you.
python -m pip install apryse-sdk --index-url=https://pypi.apryse.comNote that we are also using --index-url=https://pypi.apryse.com. This matters since we use a dedicated location for the SDK, not the default Python Package Index (PyPI). The version of apryse-sdk on the default PyPI has not been updated since 9.5.
Step 2: Get a license key
The Apryse SDK requires a license. However, it is free to get a trial license key for Apryse. There is a different license depending on whether you are using the Web SDK or the Server SDK. You will need to get an Apryse Server SDK trial license.
We will see in a moment how we use the key.
Step 3: Do something simple with the Apryse SDK
You can use whatever code editor you prefer. For this article I will use VS Code.
Create a new file and paste the following code (taken from the Getting started with Python 3 guide) into it. It is very much a “Hello World” type of script.
Implement Your Code
The essential steps are:
- Import the apryse-sdk
- Initialize PDFNet (using the license key)
- Use PDFNet to do the work
- Terminate the SDK
Great. Let’s run the code and be delighted by the results!
With about 10 lines of code, we have created a new blank PDF.
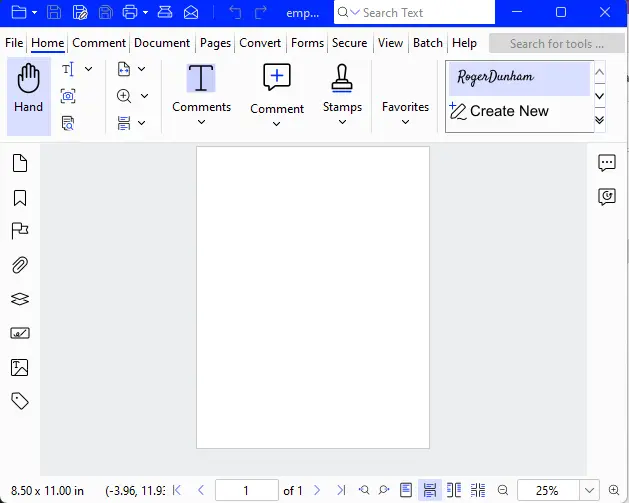
Figure 1 - A brand new empty PDF shown within Xodo PDF Studio.
Using the Apryse SDK to Extract Key/Value Pairs
While it is interesting to create an empty PDF – and it shows that you have correctly configured everything, it’s not very useful, and it certainly doesn't demonstrate what the Apryse SDK can do.
Let’s do something more useful and extract key/value pairs from a receipt.
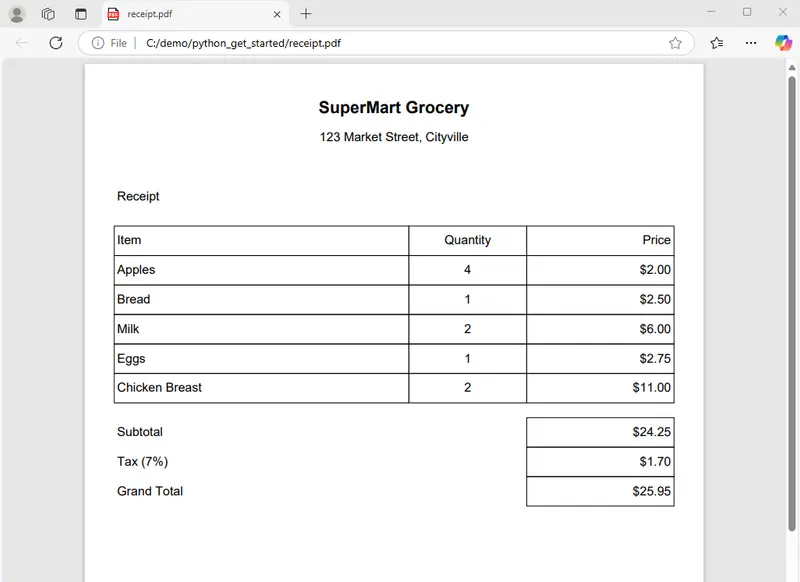
Figure 2 - An example receipt from a grocery store.
It’s a typical receipt with various lines – each showing what was bought, how many, and the cost, then there are three lines for Subtotal, Tax and Grand Total.
As a human we can quickly work out that “$25.95” relates to the Grand Total (it’s on the same line).
We can also work out that “$6.00” was the price for 2 cartons of milk. (which requires both vertical and horizontal lookups).
We have, in fact, quickly identified that “$6.00” is the value that relates to the key “Price”, on the line where the value “Milk” relates to the key “Item”. That’s quite complex, but our brains are good at it, even though we have never seen that receipt before.
It turns out that the Apryse SDK is also good at it.
Let’s see how we can get the Apryse SDK to extract data from that receipt.
Learn more advanced techniques on how to extract text from PDF Python by exploring our detailed Apryse SDK guides.
Installing Add-on Modules
The Apryse SDK offers a lot of functionality straight out of the box – you can merge documents, rotate pages, and find text on the pages of a PDF for example.
Even more functionality is available via add-on modules. These add-on modules include “CAD”, “Conversion to Office”, “Advanced Imaging”, “Barcode Detection” and, of interest for this article, “Data Extraction”.
While it’s possible to install the add-on modules manually, several are also available as a Python package. So, let’s install the Data Extraction module as a package.
python -m pip install apryse-data-extraction --extra-index-url=https://pypi.apryse.comExtracting Key/Value Pairs
We will need to extend our code to use the Data Extraction module – but the essential parts remain the same: “Import the SDK”, “Initialize the SDK with a license key”, “Do the work”, and “Terminate the SDK”.
Most of the code is self-explanatory, so I won’t discuss it. The one line of real interest is:
DataExtractionModule.ExtractData(inputFile, keyValueFile, DataExtractionModule.e_GenericKeyValue)With this one line we are specifying:
- the PDF that we want to analyse,
- the file where the output should be saved,
- what information we want from the file (in this case key/value pairs).
That’s a lot of power in a single line!
In fact, that’s only the start of it – we can use the same line, but if we change the Enum from e_GenericKeyValue to one of the other options, then we unleash other options, including the ability to extract tables, get the document structure, find form fields and so on.
You can find out more by checking out the documentation for DataExtractionModule.
Now, if we run the code, a JSON file will be created that contains information about each of the key/value pairs in the document – where the keys and values were found and the words associated with them.
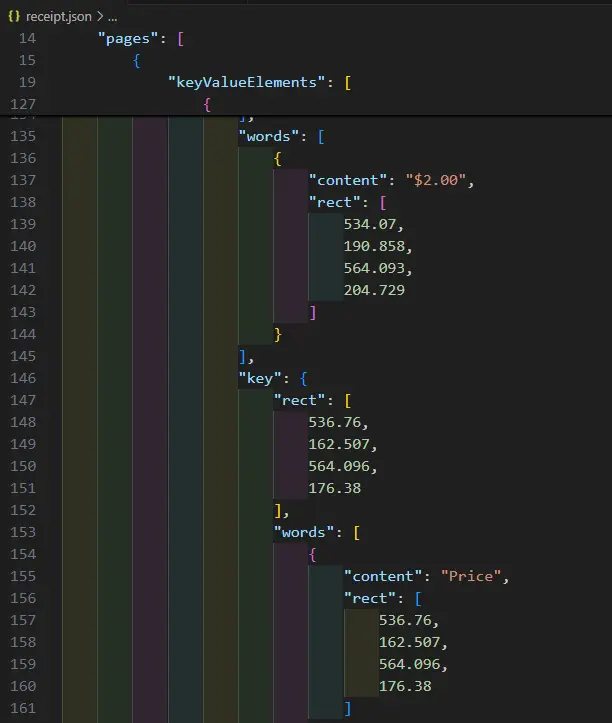
Figure 3 - A small part of the generated JSON file, containing a value "$2.00" and the associate key "Price", along with the location data.
What you do with the data from the generated JSON file is up to you. You could feed it into an LLM; or use it as input for some other data handling process; or indeed use it to solve whatever data processing issue you have.
For this article though, we will use the data to annotate the PDF, so that we can see where the data was found.
Annotating a PDF Using Python
The ability to add annotations to a PDF is part of the standard Apryse SDK functionality – no add-on modules are needed.
Let’s extend our code a little more so that we can take the JSON data from the previous step and use it to mark the locations of the detected keys and values.
We just need to iterate through the JSON, find the keyValueElements then create an annotation (in this case a Square) for the keys and associated values, located at the place that the JSON specifies.
The only real “gotcha” in this code is that DataExtraction records locations from the top-left of the page, but PDFs typically measure the annotations relative to the bottom-left, so it is necessary to adjust the y values. You can do that using:
y1, y2 = page_height - y2, page_height - y1 Learn more about coordinate systems when working with PDFs.
Finally, we are saving the new file as a linearized PDF.
doc.Save(annotated_pdf, SDFDoc.e_linearized) We can then run the code, and we end up with a new PDF based on the original receipt but with the keys and values marked.
We can even extend the code a little more and add lines between the keys and the values (though I haven’t included that code here).
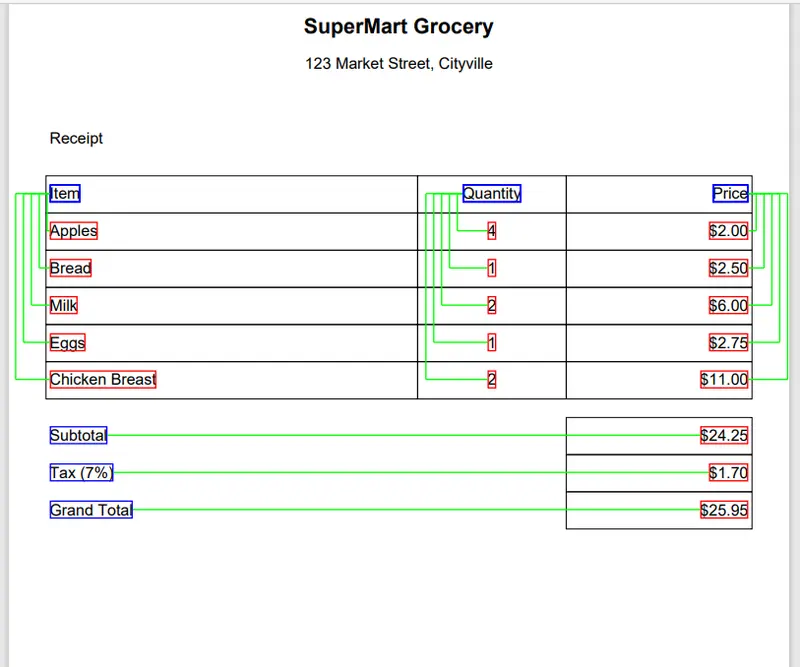
Figure 4 - The PDF with the keys and values shown, and green lines that indicate how the keys and values are related.
That’s awesome! Even without a template, the Apryse SDK has correctly identified all of the values and associated keys on a receipt that it had never seen before.
Explore how to convert PDFs to PowerPoint with Python step by step
Where Next?
We can see how, by using Apryse DataExtraction module, coupled with the Apryse SDK, and the flexibility of Python, it is possible to quickly create a script that allows a whole range of functionality to be added to your document processing workflow.
We’ve only just scratched the surface of what is possible though. Get yourself a trial key, check out the documentation for the SDK, and see how it can quickly let you turn your ideas into solutions, saving you time and letting you get to market faster.
We want you to succeed, so if you have any questions, then please reach out to us on Discord.
[This blog was updated on 13th April 2026 to indicate that Python2 is no longer supported.]