Roger Dunham
Tyler Gordon
Published September 18, 2024
Updated July 02, 2026
4 min
Polygon Redactions Using JavaScript
Roger Dunham
Tyler Gordon
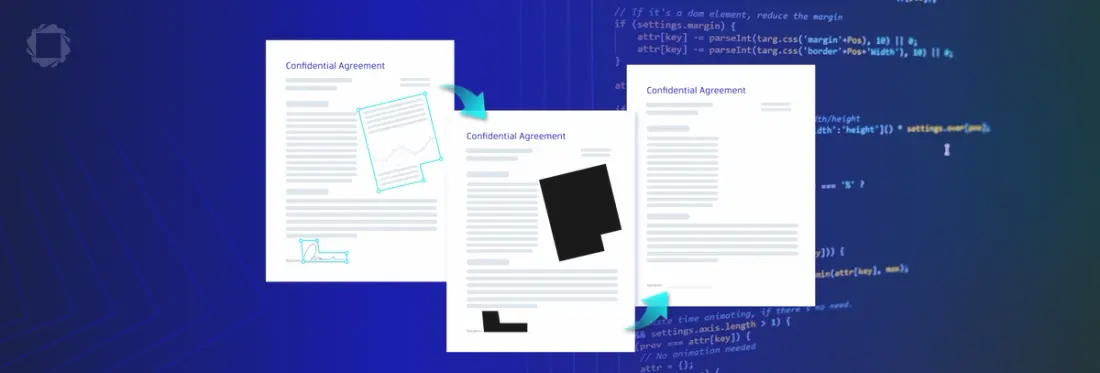
Summary: Companies prefer polygon-based redaction for precise handling of irregular shapes and complex content, ensuring compliance without disrupting non-sensitive areas. Apryse WebViewer offers built-in tools for rectangular redactions, as well as text redaction by search, which you can try via the WebViewer. By cleverly using the WebViewer API, as shown in this article, it is possible to create polygon redactions in WebViewer, allowing you to customize your users' experience.
Introduction
The ability to be able to safely redact information is something that all document-handling software should have, but sadly, many do not.
Some don’t offer anything at all, and others only obscure the content while actually leaving it in the document. That might look OK but runs the risk that prying eyes can find it, potentially causing acute embarrassment or worse.
Read more about when Redaction goes wrong.
The Apryse SDK, on the other hand, has the ability to not just show content as redacted but also to remove the underlying content.
In fact, being able to handle rectangular area redactions or redacting text based on searching is built into the Apryse WebViewer, and you can try it out for yourself right now using the Apryse WebViewer Showcase.
Being able to work with rectangles is a great start, but some of our customers also want to work with redactions that are not rectangular but polygonal.
Why Do Customers Want Polygonal Redaction?
The actual reasons that users want polygonal redaction varies from customer to customer, but typical reasons include:
- Precision and Flexibility: Rectangular redaction is great if things are rectangular. However, some things in documents are irregular shapes, such as signatures, handwritten notes, or diagrams. Having the flexibility to use polygons means that this can be redacted without redacting some areas that shouldn't be, or missing other areas that should.
- Non-text Content: Even if the item is rectangular, such as diagrams, maps, or technical documents, polygonal redaction provides the ability to precisely remove just some parts of the content (perhaps commercially sensitive information in a CAD drawing) without affecting non-sensitive areas.
- Professional Aesthetics: Sometimes, it’s just about how things look, and polygon redaction may blend more naturally into the document, avoiding the jarring look of rectangular redactions.
Whatever the reason for wanting polygon-based redaction, there’s a problem: the PDF specification doesn’t directly support it.
However, the specification does support multiple rectangular redactions, and there is a workaround. Break the polygon into multiple adjacent rectangles that approximate the area to be redacted.
We will look at one way to implement custom code to allow polygonal redaction. You could use alternative algorithms to do so, but this article will still be useful in demonstrating how to interact with WebViewer.
The Example Document
In this article, I’m using a sample file that is shipped with the Apryse SDK, so you may have seen it before. It’s included in the GitHub repo that we’ve put together to use in conjunction with this article, but alternatively, you can get it by downloading the WebViewer as a zip file.
On page 12 of the newsletter, there are slightly rotated images (of newspaper cuttings) and text. We will look at redacting one of the images (marked in blue) and some of the text (marked in red). There’s nothing special about the PDF or those pages, they just nicely illustrate polygon-based redaction.

Figure 1- Part of the newsletter showing the areas that we will redact – marked in blue and red.
Prerequisites
While you can set up WebViewer manually, for this article I am using npm and Node.js. If you don’t already have them then you can download them.
For this article I used:
- npm:8.19.4
- Node.js: 16.20.2
- Windows 11
I’m using Node.js 16 since the sample uses create-react-app which gives errors associated with OpenSSL. You can either work around those or use the code from the sample within a new Vite based app.
I’m also using Windows, but the principles are platform agnostic, so if you are using macOS or Linux, the basic process is the same.
Getting the Sample Code
The sample code can be found at https://github.com/DocRog-maker/WebViewer-polygon-redact.git, and the next part of the guide assumes that is what you are using.
Alternatively, though, you can use one of the getting started with WebViewer samples and drop sample code from this article into it.
Running the Sample Code
Having cloned the repo, navigate to the folder and run:
npm i
npm run start
This will install the dependencies and start the server, allowing you to open WebViewer within your browser, typically at http://localhost:3000/.
With some versions of npm, you may get an error about “digital envelope routines” when you start the project.
Read about how to solve “Npm run” gives a digital-envelope-routines: unsupported error.
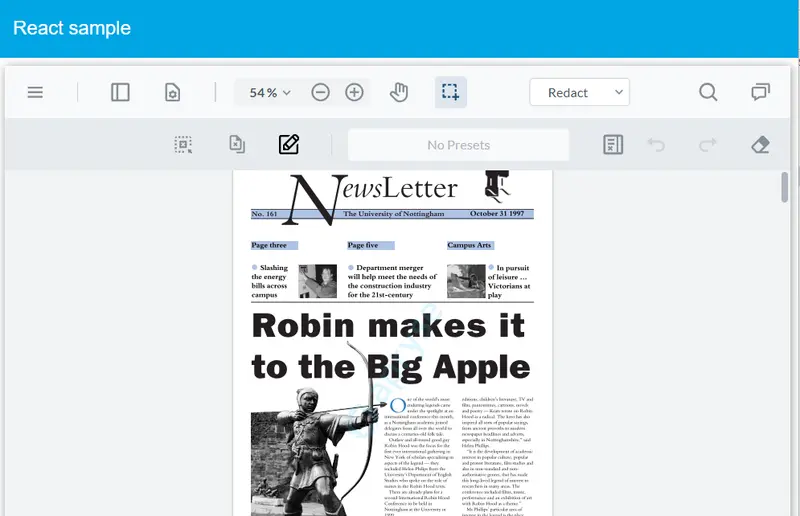
Figure 2 - WebViewer running in the browser, having loaded the default document.
Using the Example
By now, hopefully, you have WebViewer running. If you have used it before then you might notice that there is an extra button available within the redaction tools. This is the one that will allow us to define a polygon.
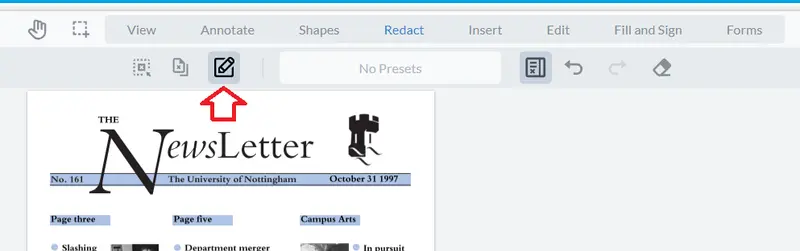
Figure 3 - The polygon redaction tool.
Navigate to page 12 (if you want to follow along with this article), then having selected the new polygon redaction tool, click on the page and draw an outline around the image that you want to remove. Each time that you click the mouse a new line will be created that links it to the previous position.
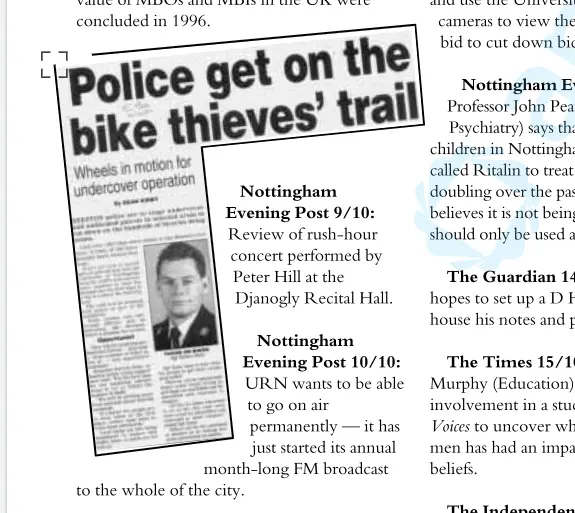
Figure 4 - Specifying the outline of the polygon that indicates what should be redacted.
When you are ready to finish defining the polygon, click in the square near the starting point
After a moment the polygon will fill with red rectangles, and you can see its bounding box. In fact, it behaves just like any other annotation type.
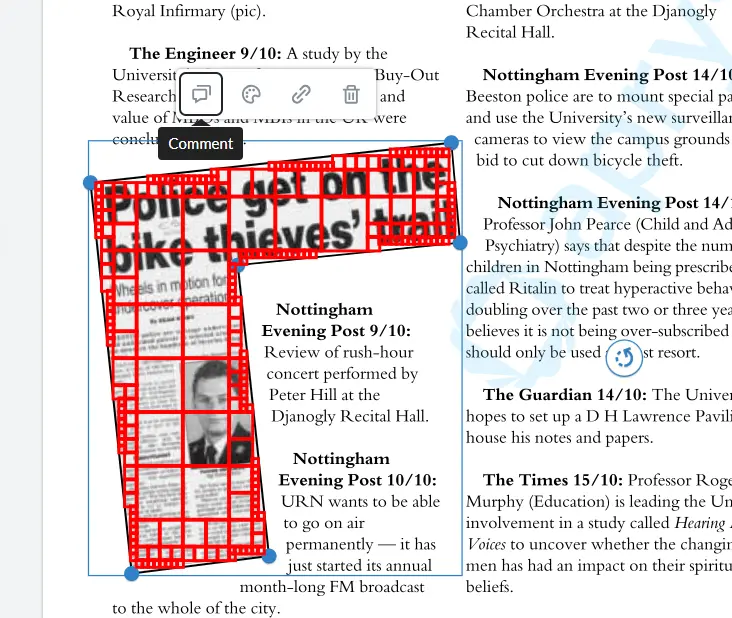
Figure 5 - The polygon is filled with red rectangles.
If you look in the annotation pane, you will also see that the area has been added, and is marked for redaction.
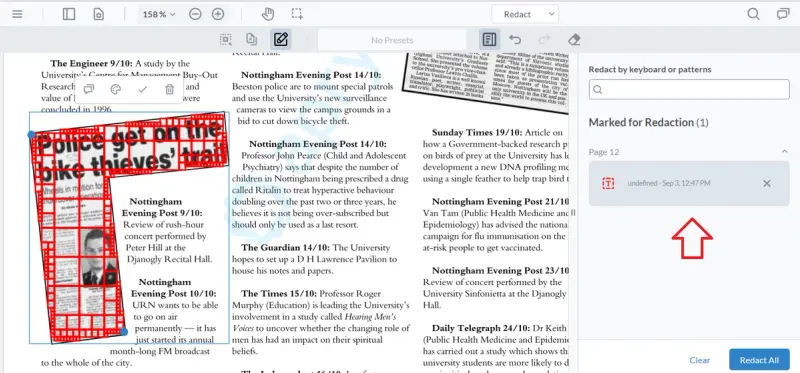
Figure 6 - The annotation pane indicates that the area is marked for redaction.
Note: Redaction is a two-step process. First the area is marked up, then the redaction is applied. So far, we have only marked the redaction, but it has not yet been applied.
Currently, it is still possible to undo the redaction. This comes in handy if you realized you had inadvertently included parts of the document that you didn’t intend to. You can even save the file in this state and come back to it later to review (or have someone else, such as a supervisor review) the area to be redacted before it is applied.
If you want to, then it is perfectly possible to mark and apply the redaction in a single step, and we will see how that can be done when we look at the code in a few moments.
OK, apply the redaction if you haven’t already. The content beneath the selected area will be removed and replaced with black rectangles. That change is permanent and cannot be undone.
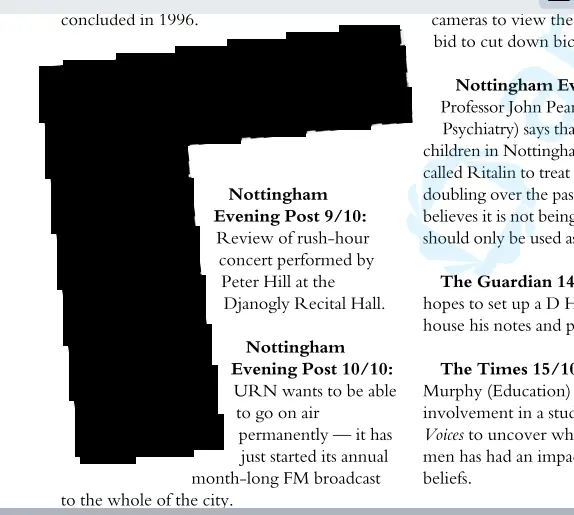
Figure 7 - The area after applying the redaction.
You can do the same process with text, so let’s add a second redaction.

Figure 8 - Applying a polygonal reaction to text.
Once again, apply the redaction. You can at that point save the document and try to extract the text from the page, but the words within the redacted paragraph will have been removed exactly as you would want.
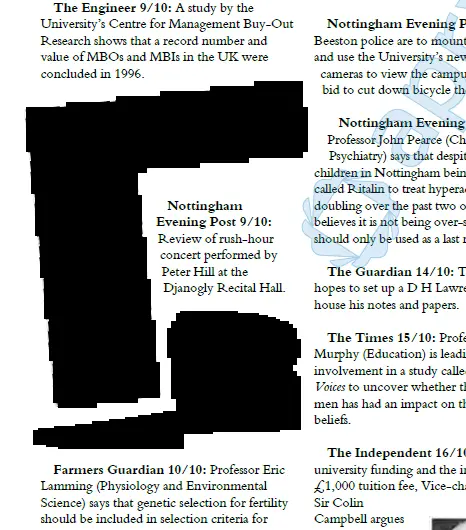
Figure 9 - After the second redaction has been added. The underlying content has been removed and cannot be recovered.
Great – that’s easy to use. Let’s look at how the code works.
How the Code Works
Now, we will look at various parts of the code. There is some initialization code that we will skip over though, since that is code that is required whenever you use WebViewer.
Adding a button to the UI
You saw that a new button had been added to the UI. In this example we are using the classic WebViewer UI, and there are a few simple steps to do so.
A PolygonRedactCreateTool is created, then registered and added it to the Redaction tool bar group.
Read more about customizing header items in WebViewer.
In WebViewer version 10.7 the new Modular UI was released, which simplifies the mechanism for adding buttons and tools to the UI – this would require minor code changes to implement, but the underlying principles of the code are the same.
Add an Event Hander
Next, we add an event listener that will call a function (createRedactedPolygon) when an annotation is added.
  polyRedactTool.addEventListener("annotationAdded", (annot) => {
    createRedactedPolygon(annot);
   })
Implement the Polygon Redaction Creation Code
Now we are getting into the details!
The function takes a polygon, and using the array of points that defines it, iteratively creates a set of rectangles that would just fit inside it. You saw the results of this code in the red rectangles in Figure 8 (and elsewhere).
First, a bounding box rectangle is calculated that just encloses the polygon. However, because the polygon is probably not an exact rectangle, the bounding box also encloses parts of the page that are not within the polygon. Effectively what happens next is the bounding box is broken up into a 64x64 grid (we will see why 64 in a moment or two), and a test is made as to whether each element of the grid is within the polygon.
In reality, the code is rather more sophisticated and handled by the function splitRectangle. We will look at how that is implemented in a moment, but for now it is enough to know that each time a rectangle is found that fits entirely in the polygon, its location is added to the array ‘quads’.
There is an important parameter defined in the method ‘depth’. This specifies the number of times that the rectangle should be sub-divided before the function ends. Greater values will allow a closer approximation of the polygon to be created, but will take more processing time. You may choose to use a different value, but for this example I used a value of 6 (which means that the bounding box is split into 2^6 rectangles, which is why the grid is 64 x 64).
Once splitRectangle completes, the final phase is to create a single redaction Annotation, which contains the array of quads, add it to the list of annotations held by the Annotation Manager, and redraw the UI.
Currently the await annotationManager.applyRedactions([annot]); is commented out. If this is uncommented, then the redaction will be applied immediately.
The SplitRectangle Function
The next significant piece of code takes a rectangle, splits it vertically, then horizontally to give four smaller rectangles, then checks each one in turn to see whether it fits entirely within the polygon.
If so, then, as said earlier, it is added to the list of quads. If not, then it is subdivided again, with the depth value reduced by one, and the process repeats, until the depth reaches zero.
Checking if a Rectangle is Within the Polygon
The final parts of the code use a standard algorithm for testing whether a rectangle is wholly contained in the polygon.
Next Steps
In this article, you’ve seen one example of how to add UI elements and programmatically control the behavior of WebViewer.
You could use a similar pattern to implement custom functionality giving you a way to fulfil your user’s requirements.
As an example, you could create code that, rather than needing a user to specify the area to be redacted via the UI, instead takes the coordinates generated by a different document processing tool, for example Apryse IDP (which can detect document structure), and uses those as the basis of areas to be redacted.
We have also seen the code implemented within WebViewer, but much of the code could be applied entirely on the server side using the Apryse SDK, using a wide range of programming languages.
The options, and opportunities, are endless.
Wherever you decide to go with code customization, check out the documentation and samples for the API. If you run into any problems, feel free to get in touch via the Discord channel.


