Roger Dunham
Published July 05, 2024
Updated March 06, 2026
5 min
Creating a PDF Editor App Using React and Vite
Roger Dunham
Summary: This tutorial is for anyone who wants to use Vite to create a React-based app that allows them to view and edit PDFs and other document types entirely within the browser.
Introduction
React is a powerful JavaScript library for building user interfaces, and Vite is a fast, opinionated build tool that makes the development experience smoother. Combining React and Vite provides a modern development environment that enhances productivity and performance.
In this article, we will walk through creating a React-based application using Vite and then see how we can incorporate Apryse WebViewer to add PDF viewing and editing capabilities.
Finally, we will also see how we can build on that knowledge to easily access further functionality, including redaction, digital signatures, and editing of Office documents.
Learn how to transform your document processing app with powerful PDF Viewing and Editing Capabilities.
If you're more of a visual learner, check out our video that covers everything in this blog.
Prerequisites
You will need to have node and npm (or yarn) installed in order to follow this blog.
For this article, I used:
- node: 18.9.0
- npm: 10.2.3
Other versions may also work.
Setting Up the Basic Project
Step 1: Initialize the Vite Project
Within the console window, create a new app.
npm create vite@latest This will start a process that will lead you through all the steps needed to get everything working.
Step 2: Give the project a name, framework type, and whether to use TypeScript or JavaScript
As part of the Vite initialization, you will be asked how you want to configure your project.
While there are several options that you may wish to explore, for now, we will just use:
- Project name: my-vite-app
- Framework: React
- Variant: TypeScript
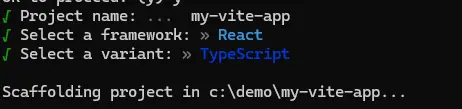
Figure 1 - Specifying the name, framework, and variant for the new project.
This will scaffold the project, creating a new folder that contains everything that is needed.
Step 3: Open the new folder in VS Code
You are free to use whatever editor you prefer, but I like VS Code (and I’m not alone, a recent article suggested that it is the #1 code editor), so navigate to the newly created folder and start VS Code there by entering code.
Figure 2 - Starting VS Code from the command line.
Step 4: Install dependencies
Within the terminal in VS Code, install the basic dependencies for the project using ‘npm i’.
This may take a minute or two to complete, but when it does so it should tell you the number of packages that were added.
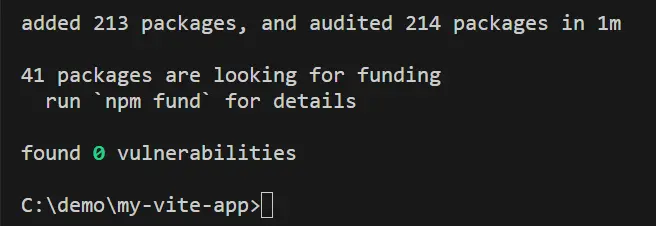
Figure 3 - Typical result shown when the module installation has completed.
Step 5: Verify that the basic app runs
Software development is complex, so before going any further, make sure the new app runs. You can do this by entering npm run dev into the VS Code terminal.
This will start the server and tell you the IP address where the website can be found.
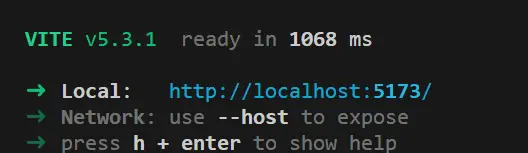
Figure 4 - The output when starting the app within VS Code.
Click on that link, and the app should open within the default browser.
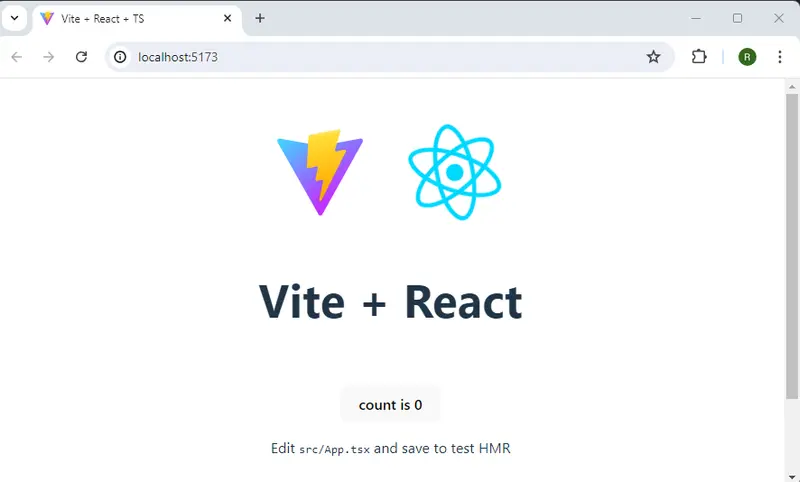
Figure 5 - the default app, shown within Chrome.
Great work – we have created an app that can be used within a Web Browser!
If for some reason you don’t get this result, then work through the steps again and make sure that you haven’t missed something and that your system is correctly configured to work with React. That needs to be resolved before you move on, since there is no point trying to work with the Apryse WebViewer if the underlying project has a problem.
Adding PDF and Document Editing to the Basic Project
Assuming that everything is working, let’s take that generic app and add the functionality for working with PDFs by updating it to include the Apryse WebViewer.
WebViewer 10.3 added support for WYSIWYG PDF content editing which allows you to edit text and images directly on PDF files.
Step 6: Remove the code that is not needed from the project
The default Vite app contains a lot of code that is not needed to work with WebViewer, so let’s remove the unnecessary code.
Within the index.css file remove the line that specifies display:flex for the body.
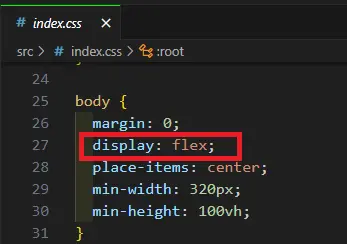
Figure 6 - Part of the default styling. Remove the display:flex line.
Leaving the default styling in place will not stop WebViewer from working but may result in it being too small to be useful. You may later decide to add this style back, but for now, removing it makes for a simpler app.
Now remove everything from the App.tsx file – except for the following few lines.
We will add more code again in a later step.
Step 7: Install WebViewer
Within the VS Code terminal enter npm i @pdftron/webviewer -save
This will install the WebViewer library into the node-modules folder structure.
Step 8: Copy the WebViewer library files from node-modules into our project
Having WebViewer installed to node_modules allows it to be accessed at build time, but we also need it to be available on the client-side at runtime. Unfortunately, that isn’t possible from the location where npm copies the files.
There is a simple fix though, copy the core and ui folders from node_modules into your app’s public folder.
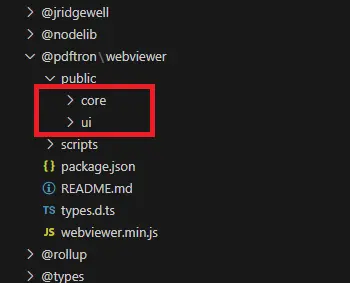
Figure 7 - The location of the files that need to be copied from the node_modules folder.
In fact, you can copy the files anywhere that you want within the public folder – provided that the WebViewer constructor knows where they are.
Personally, I like to create a specific sub-folder called lib and copy them there.
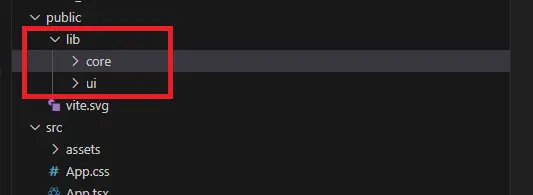
Figure 8 - The location of the WebViewer folders after copying them into the correct location.
While it is perfectly possible to copy these files manually, you can also automate the process by using code from the GitHub samples, and specifying a postinstall script in the packages.json file. That also has the benefit that if you update the Webviewer version then the new files will automatically be used.
Step 9: Add the code for using WebViewer into the App.tsx file
Let’s start to add code to the App.tsx file.
- Add WebViewer as an import
- Create a constant called viewerDiv as a reference to an HTMLDivElement.
- Finally create a new div within the return function and specify a classname (to allow subsequent styling) and a ref to the const that you just created.
Your code for App.tsx should now look like this:
(We’re not actually using the WebViewer import just yet - so VS Code may give you a warning - but don’t worry, we will do so in the next step).
Step 10: Add a UseEffect hook to instantiate the WebViewer
Finally, we need to instantiate the WebViewer.
This is done using a useEffect hook with an empty dependency array. The empty dependency array means that it should run just once when the application initializes.
However, in some development (but not production) environments it may fire an extra time which can be rather confusing and lead to a warning. That problem is easily resolved.
WebViewer is extremely configurable, and there are also lots of options that can be used with the useEffect – but for now we will keep things simple – it needs to know where the WebViewer ui and core files are, relative to the public folder – so set the path value to wherever you copied the files to.
You can also specify the initial file that will be opened. That can be a local file, an external URL, or just left blank and specified at run time.
The useEffect is also the location where you should specify your licenseKey.
WebViewer will run for 7 days without a licenseKey, but after that time an error will occur. To extend the trial you will then need to great a free trial license Key. However, since you will ultimately need a key, you may as well create one and use it as soon as you start using WebViewer.
The useEffect returns a promise. When the promise resolves you can get the WebViewer instance object and use that to customize the behavior of WebViewer. For now, though, we will not worry about that, and just use the default options.
Step 11: Restart the project
Restart the project and navigate to the URL. WebViewer should now appear displaying the PDF specified in initialDoc.
It is likely, though, that the PDF will be rather small as a result of the default styling.
Step 12: Update the CSS
We can solve the styling issue by editing the app.css file and adding something for the webviewer class (or whatever classname we used for the div that contains the WebViewer).
For now, let’s just set the height to be 100% of the viewport height.
The browser should then refresh to show the updated style.
.webviewer{
height:100vh;
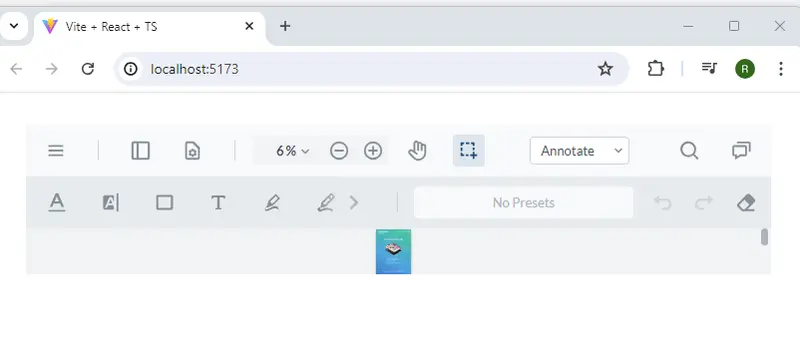
} Figure 9 - WebViewer running in the browser.
Enjoy the Functionality that WebViewer Supports
That’s it.
You now have access to WebViewer, and all of its functionality. You can view and edit the PDF or annotate the document.
As a next step, you can enable the ability to edit the content of the PDF by using the instance.UI.Feature.ContentEdit within the then function.
The browser then lets you change any of the PDF text, including it font, size and style.
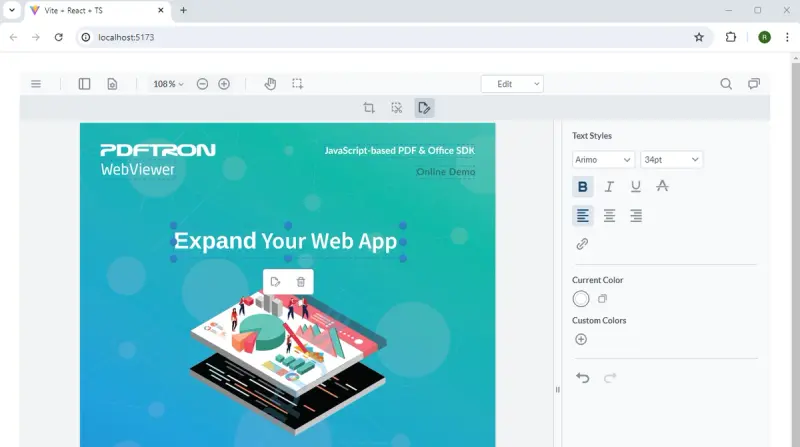
Figure 10 - Content editing can be enabled by building on what you have already learnt.
And in a similar way, you can add the ability to edit DOCX files simply by adding enableOfficeEditing:true within the useEffect.
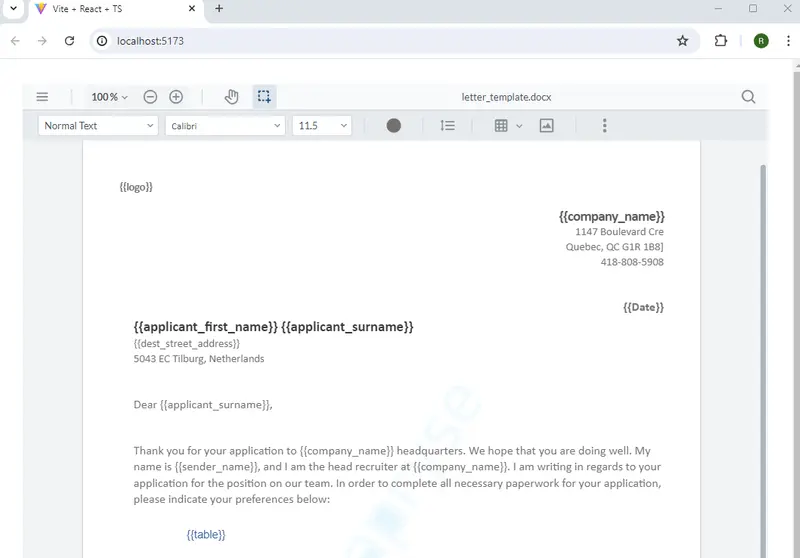
Figure 11 - A small change in the code and you have enabled DOCX editing.
We have only just scratched the surface of WebViewer functionality. Check out the documentation to see all that Apryse can do for you.
Suggested Read: How to Create a JavaScript PDF Editor
What if I Have Problems?
There are a few common issues that people may find when they start to use WebViewer – check out this article on six common problems and how to quickly fix them.
If you are still stuck, then reach out to us on Discord, where the support team will be happy to help.


