Roger Dunham
Published June 13, 2024
Updated May 18, 2026
6 min
Adding a Custom Panel to WebViewer using TypeScript
Roger Dunham
Introduction
The Apryse WebViewer UI is a customizable, fully-featured browser-based viewer and editor for PDFs and other documents.
In an earlier article, we looked saw an overview of How to Modify the UI in WebViewer 10.6.
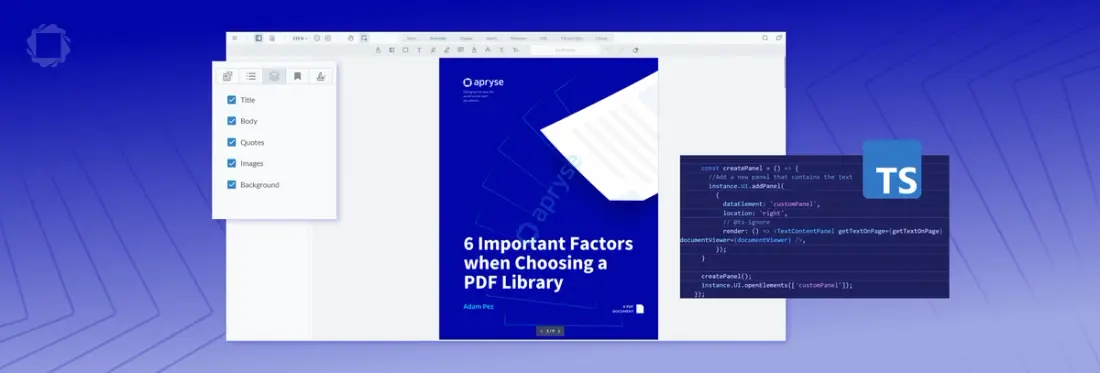
In this article, we will look in detail at how we can add custom functionality – in this case, a panel that shows the text on each page, which updates as the user scrolls.
The Sample Code
The sample code is based on a simple TypeScript and React app. Feel free to use this video about Creating a PDF Viewer using React, Vite, and TypeScript as a good starting point. This video and other examples within the Apryse documentation show how to get started with WebViewer. Typically, WebViewer is instantiated in a useEffect, and placed into a div element on the page.
Many of the samples don’t use the instance object that is available when the WebViewer constructor promise resolves. There’s a good reason for that – WebViewer is self-contained, so if you just want to use it for viewing apps, you can work with the default setup.
However, if you want something more, as we do in this article, instance gives us access to the JavaScript object that encapsulates the WebViewer.
We are going to use it to add a new panel to WebViewer. The code is as follows – there’s quite a lot going on, so we will look at each part in a moment.
How the Code Works
Step 1: Destructure instance to get simpler access to Core and documentViewer
   const { Core } = instance;

   const { documentViewer } = instance.Core;
While this isn’t strictly necessary, destructing instance helps to make the subsequent code easier to understand.
Step 2: Define the function that will produce the content for the new panel
In the sample code, the method getTextOnPage will be used to get the content for the panel.
This method gets the Core.Document object (doc) from the documentViewer. If a document is found, the page number and size of the page selected in WebViewer is looked up. That information is passed to the function getTextByPageAndRect which returns the text that is present in the within the rectangle on the current page.
There is a potential gotcha here: getTextByPageAndRect returns a promise, so we need to await until it returns, otherwise the function will return immediately with an empty string.
If there is no Core.Document object available (which will happen if the document has not fully loaded) then a fall back string “No document” is returned.
Step 3: Define a function to create a new panel
Next, specify what the new panel should look like and where it should be located. In our example the function is called createPanel.
Internally, it uses the function instance.UI.addPanel, passing in the name for the dataElement, the location, and the function (in this case a React component) that will be used to render the panel.
We also need to open the new panel when WebViewer starts. This can be done using:
instance.UI.openElements(['customPanel']); For our panel, we will use a dedicated component (which we haven’t created yet) that will display the text returned by getTextOnPage that we defined in the previous step.
While we are returning a React component within the render function, it is also possible to directly define the output, as follows.
render: function() {
var div = document.createElement('div');
div.innerHTML = 'Hello World, foobar panel';
return div;
}
Step 4: Define the TextContentPanel component
Since we have chosen to use a React component to render the panel, we need to define what it is.
In this example, we are updating the panel when two events occur – when the document loads ('documentLoaded'), and when the page number changes ('pageNumberUpdated').
When those events are triggered, the callback loadText is called, gets the text on the page, then updates the state for the component, causing it to re-render.
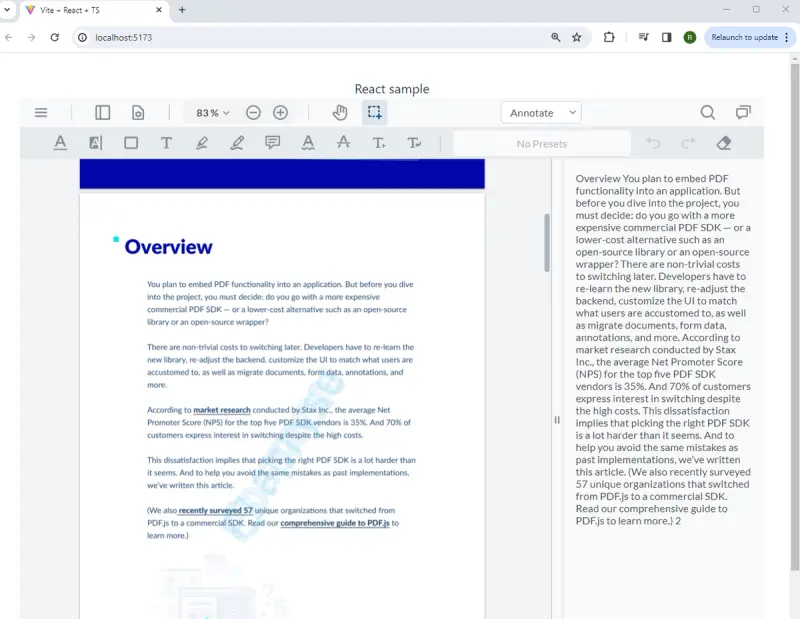
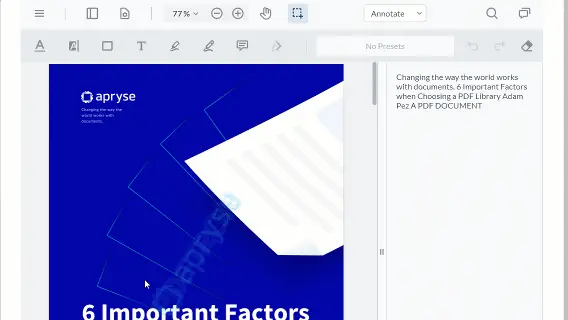
Figure 1 – The final working sample
Where Next?
We have seen a simple example of how to create a custom panel which updates as the user scrolls through the document. Apryse WebViewer offers the ability to do much more.
In this example, we are just looking at the pageNumberUpdated and documentLoaded events, but WebViewer exposes more than 30 other events that you can listen for. You could, if needed, write code to respond to the user zooming or searching, for example.
You could also take this example as the basis for other types of PDF and document processing. At the moment, the code just shows the text for a single page,
However, it would be easy to change what type of text is displayed. For example, you could get the list of layers in the document with the following code.
 const layersArray = await doc.getLayersArray();

const text: string = `${layersArray.map(layer => layer.name).join(" -- ")}`; 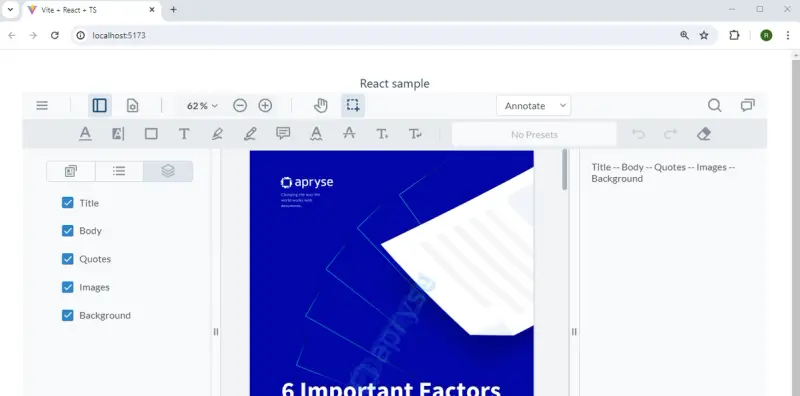
Figure 2 – An example of an alternative use for the panel: providing information about layers
The options this technique gives you are enormous: you could get the links on each page or extract keywords for each page, potentially opening the door to solving many business requirements.
Conclusion
The example in this article shows just one aspect of WebViewer – the ability to add custom panels. It’s a great illustration of what can be achieved with the Apryse Web SDK, but there is even more functionality available. It can also be used to annotate and manipulate pages, edit PDFs and DOCX files, apply redaction, work with digital signatures, and many other options – almost all of which are performed entirely within the browser, offering security.
When you are ready to take the next steps, check out the documentation. If you need help to get going, head over to the Discord channel and ask our super helpful Solution Engineers.