Roger Dunham
Published October 17, 2024
Updated May 18, 2026
4 min
Creating Stamps in PDFs
Roger Dunham
Summary: Apryse WebViewer is a JavaScript SDK with powerful document processing features, including **Stamp Annotations**. Stamps can be placed on PDFs, either as text or images, and are typically positioned in front of the content. For a quick demo, users can try the **pdf-stamps example** in the Apryse Showcase, where image-based stamps can be easily dragged onto the document without any need for coding or downloading.
Introduction
Apryse WebViewer is a fully featured JavaScript SDK that comes with an open source customizable UI and offers unrivaled document processing technology that runs in the browser with no external dependencies. There’s a huge range of functionality available including the ability to create multiple annotation types. One of these types is Stamp Annotation - analogous to using a rubber stamp on a physical document. Being able to do so is one way to maintain control over versions (draft/revised/final) of a document, or conveying that a document is confidential - essential requirements for the legal and finance (and other) industries.
Typically, stamps are placed in front of any existing page content, though technically they can be placed behind. If you are interested in placing text (or an image) behind the page content, then a watermark might be more appropriate.
Learn more about adding watermarks to PDFs.
In this article, we will look at how to use stamp annotations and create new custom ones.
Using a stamp annotation in WebViewer
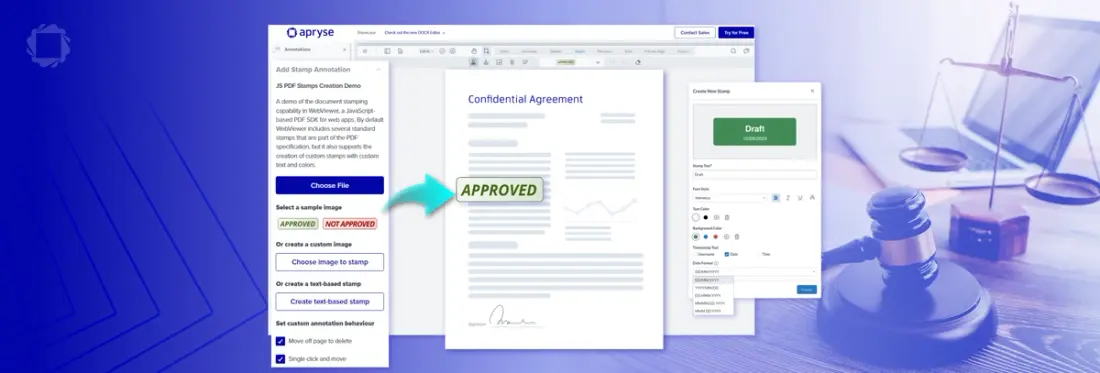
The easiest way to get started with stamp annotations is to use the pdf-stamps example in the Apryse Showcase - that way you can try it without needing to download anything or having to compile and run code.
Stamp annotations can be either image or text based. The Showcase has a couple of image ones available in the side bar, so drag one of those on to the document.
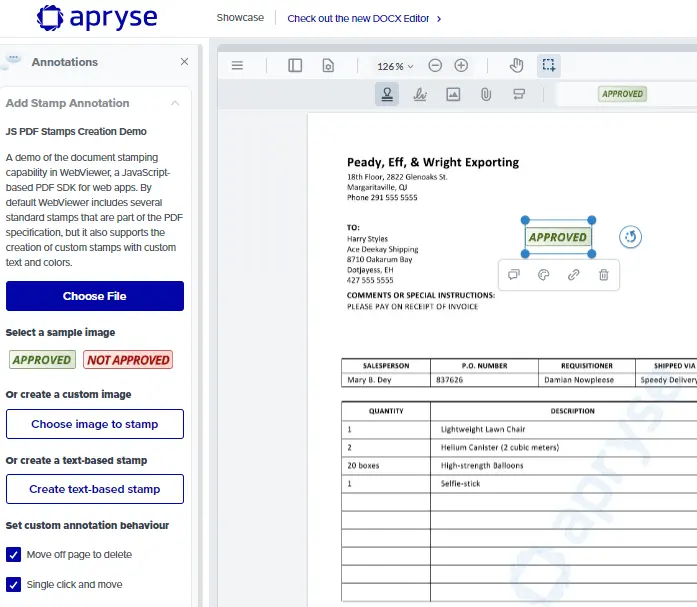
Figure 1- the Apryse showcase stamp sample.
If you then download that file, the stamp will still be present.
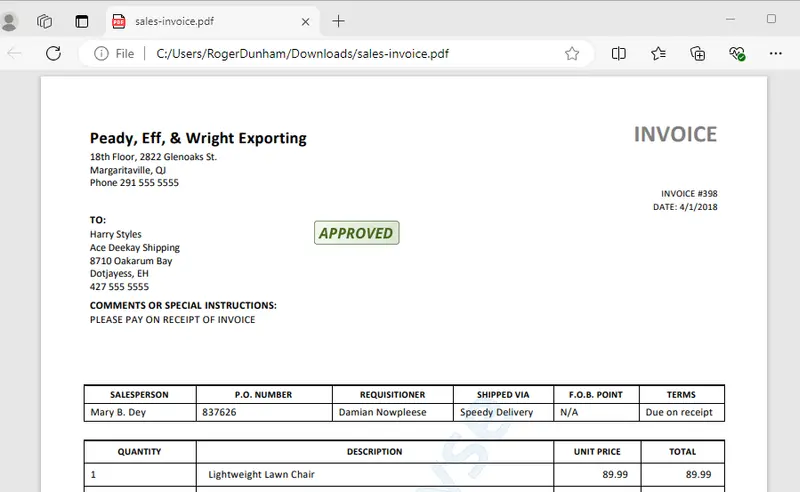
Figure 2 - The PDF showing the stamp annotation - now opened in Edge.
While Showcase allows you to drag the stamp from the side bar, the more usual way to select one would be from the range of stamps available from a dropdown at the top of WebViewer.
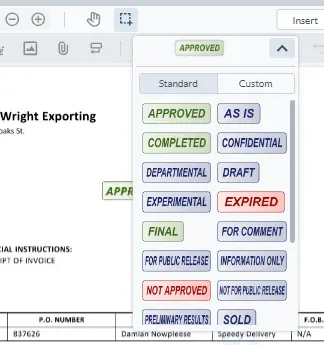
Figure 3 - Some of the standard stamps that ship with WebViewer.
If one of those says what you want, then just drag it onto the page - Job done!
What about Custom Stamps?
Sometimes you will need a stamp that says something different from a standard one. That’s not a problem since it is possible to create a custom stamp that includes whatever text (or image) you require and you have control over the size, color and style of the text, as well as the color of the stamp background.
You can create a text-based stamp from the side-bar of the Apryse Showcase, or from the dropdown at the top of WebViewer.
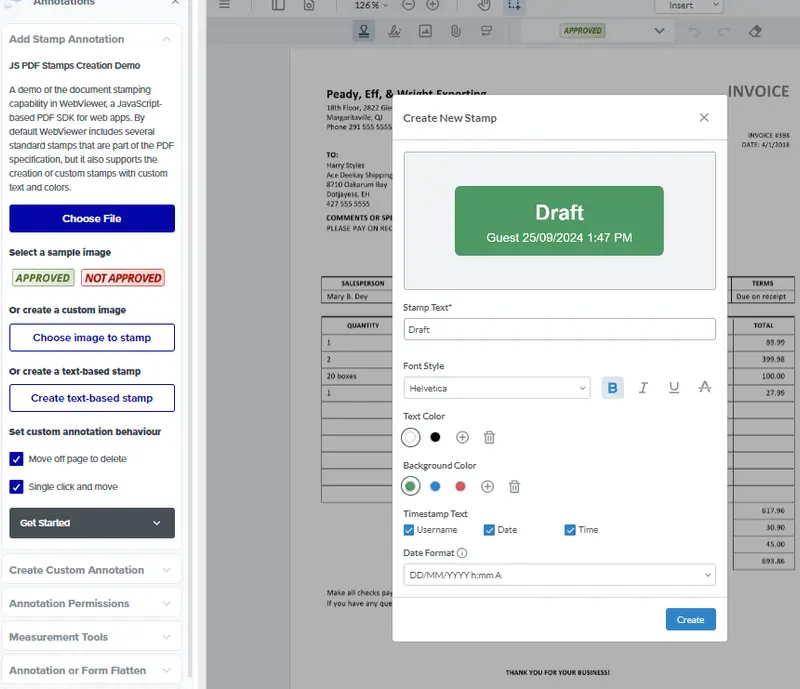
Figure 4 - The dialog for creating a custom stamp.
Let’s change the text to ‘Awesome’ and have white text on a blue background.
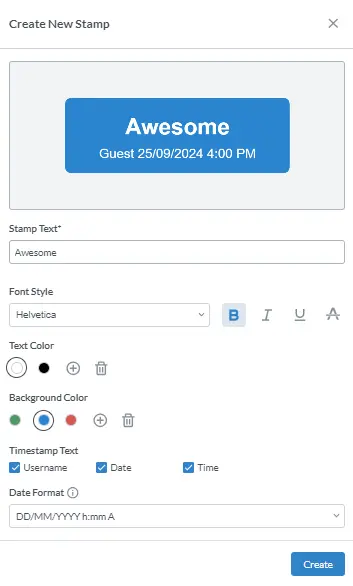
Figure 5 - Updating the text in the custom stamp
Why does the stamp say ‘Guest’?
That’s a great question! It shows the name of the person that is the current annotation author.
Read more about how you can control how specific users can see and work with annotations
As the PDF Stamps sample doesn’t specify the current user, it defaults to ‘Guest”.
As a quick way to see an alternative name check out the Apryse Showcase Annotation Permissions sample. That sample allows you to ‘log in’ as a specific user (for example “Justin”).
If you create a custom annotation within that sample (in just the same way as we have previously done), then you can see who the author is - in this case “Justin”.
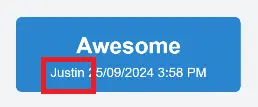
Figure 6 - If the AnnotationManager currentUser is set, then this will be displayed in the stamp.
If you don’t want the author to be shown at all, then it can be removed by unchecking the ‘Username’ option for the custom annotation.
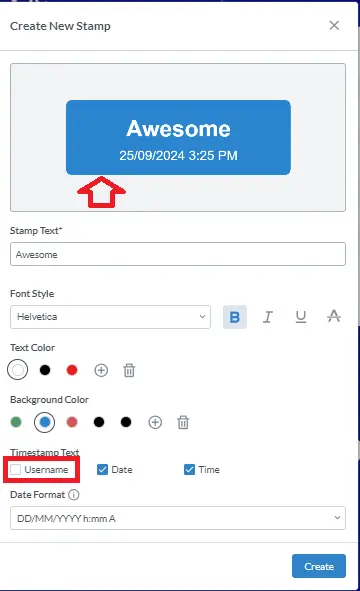
Figure 7 - If you uncheck the Username checkbox then the user name won't be shown in the stamp annotation.
What about options for displaying date and time?
WebViewer allows you to choose whether to include the date, the time, both or neither. If you include the date or time, then you can specify the format used. WebViewer ships with a range of common date time formats, so there are lots of easy-to-choose options.
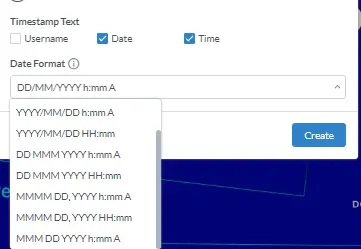
Figure 8 - The default date-time format options.
If you change the select format, then the preview of the new stamp will automatically update.
That’s a huge amount of functionality straight out of the box. But what if you want more?
How do you add a Custom Date Format?
While there are already lots of options for how to format a date and/or a time - it’s quite likely that at some point you will want one that is not available.
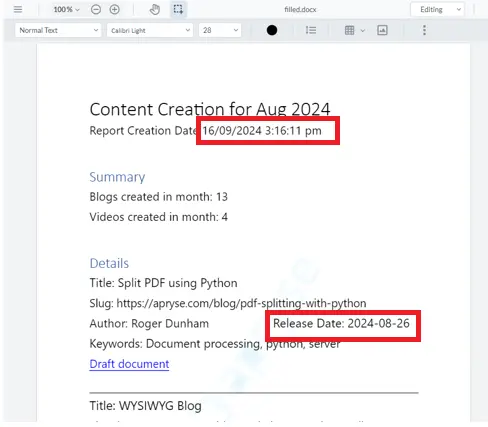
As an example, let’s look at a screen shot taken from an article about automatically generating documents. In that article I wanted to display a date where the “am/pm” text was in lower case, and another date where the year, month and day were separated by hyphens.
Neither of those formats are available, as standard, when creating a stamp annotation, but you can add a custom format.
You can’t easily do that in the Apryse Showcase so you will need to get WebViewer running on your own machine.
If you haven’t used WebViewer before, then check this video on Creating a PDF Viewer Using React, Vite, and Typescript.
You can specify new date-time formats using the instance.addDateTimeFormat API once the WebViewer initialization promise resolves.
The format definitions need to follow the date formatting rules.
In summary, though, the first format specifies that we want the date as Day, Month, Year separated with slashes (“DD/MM/YYYY”), and the time should have the hours in 12-hour format, followed by minutes and seconds, separated by colons, and followed by an ‘a’ for am or a ‘p’ for pm (“h:mm:ss a”).
The timeFirst flag provides a way to say whether the result should have the date, or the time, first. The default is to have the date first, so in this case the timeFirst:false is not really needed, but I’ve included it so that you know that it is possible.
The second format is simpler as it only uses the Year, Month and Day and there is no time included (“YYYY-MM-DD”).
If you refresh WebViewer then the new options will now be in the list.
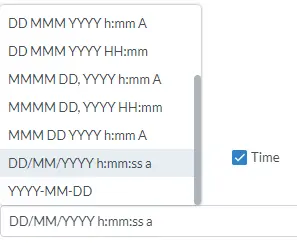
Figure 10 - the list of date-time formats, including the custom ones.
Now you can use your new format for your custom stamp.

Figure 11- The custom stamp with custom time format.
Cool! That’s exactly the format that we wanted in the Document Generation blog. We can now use that stamp wherever we want in the PDF
Can you add custom stamps programmatically?
So far, we have seen how we can create a custom stamp in the UI, but those stamps will be lost when the user refreshes the browser.
An alternative option is to create custom PDF stamps using JavaScript.
WebViewer will then show the two new stamps “Great stuff” and “Reviewed” in the Custom stamps tab.
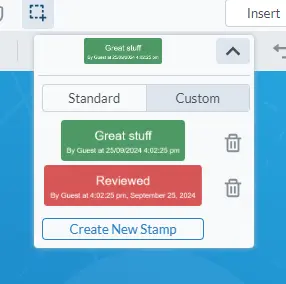
You can select one of those stamps just like any other and apply it to a PDF.
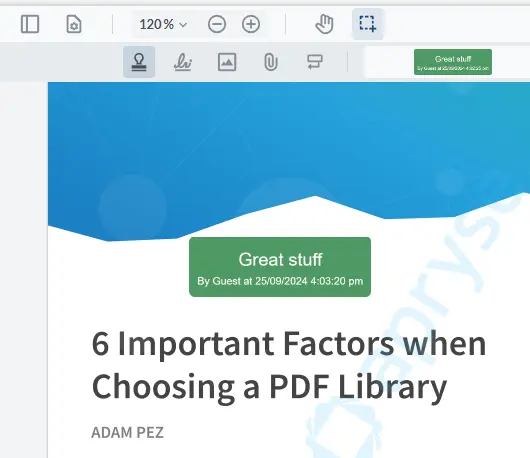
That is, indeed, Great stuff!
Conclusion
WebViewer supports a whole host of annotation types, including stamp annotation. While there are many useful stamps built in, it’s also possible to add new stamps, containing whatever text you require, with the option of including the author name, and with dates and times in whatever format you want. That gives you lots of control over the way that you can work with PDFs.
Don’t take my word for it - there are some great guides to help you get started, then get yourself a free license and try things out for yourself. If you run into any issues, or have any questions, then you can reach out to us on Discord.


