Roger Dunham
Published October 16, 2024
Updated February 03, 2026
4 min
Adding stamps to a PDF Using JavaScript with Stamper
Roger Dunham

Summary: PDF stamps are customizable overlays that can be added to PDFs to indicate their status or handling instructions. They offer more flexibility than watermarks and are commonly used in legal, manufacturing, financial, and healthcare industries. The PDFNet Stamper tool allows you to programmatically add stamps to PDFs, especially in JavaScript environments.
Introduction
Stamps in a PDF are a great way of making it clear to users that a document is “draft”, “confidential”, “approved” or a host of other things – allowing the legal and finance (and other) industries to maintain control over their documents. We’ve seen elsewhere how you can add stamp annotations to a PDF within the browser using the WebViewer UI.
In this article, we will see how we can achieve the same result, by programmatically adding stamps to the PDF using the PDFNet Stamper tool.
What is the difference between watermarks and stamps?
Watermarks can be used to give a similar appearance, but are image based, part of the document content, and generally very hard to remove.
Stamps, on the other hand, can contain an image, but they can also contain text and vectors, and they usually, but not exclusively, go in front of the page content. They are also easier to modify, move and delete.
Read more about using JavaScript to add watermarks to PDFs
As with everything though, the best way to understand a subject is to work with it, and we will do that using WebViewer.
What is WebViewer?
WebViewer is a JavaScript SDK that runs within the browser. It has no dependencies on third party software and can be used in all modern browsers.
It’s awesome, and you can learn about what it does in our blog “Everything about WebViewer”
During this article we will be using JavaScript code based on the Getting Started with WebViewer guide for React. If you prefer a different framework, or just vanilla JavaScript then there will be minor changes needed, but the code is, essentially, the same.
There is nothing special about PDF that I’m using for the screenshots. You should be able to get similar results with your own documents, whether they are invoices, reports, or even CAD drawings.
If you prefer videos to written guides, then have a look at the video for Creating a PDF WebViwer App using React, Vite and TypeScript.
A note on versions
This article was written using WebViewer 10.12 running on Windows 11. There might be minor changes with other platforms, and since WebViewer is being actively developed, the UI may change over time.
Getting started with Stamper
There’s a couple of things in the sample code using the Stamper tool in this article that are different from many of the other samples.
Stamper is a powerful tool that offers advanced functionality, and as such the fullAPI must be used. Furthermore, we need to extract the PDFNet object from the instance.UI when it is available once the WebViewer constructor promise resolves.
If that sounds complicated, then don’t worry - it’s easy to do, and this article will walk you through it.
Creating a text stamp using stamper
Let’s dive straight in and drop this code snippet into the getting started code example which was mentioned above.
If we run the sample, then now we will get something like this.
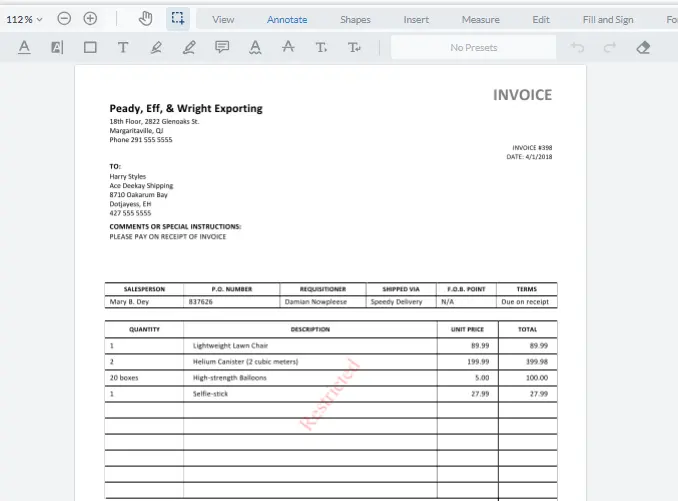
Figure 1 - The text "Restricted" has been stamped onto the first page of a PDF.
We’ve stamped the word “Restricted” into the center of the page and rotated the text so that it is diagonal.
That was easy, so now let’s break down the code and see how it was implemented.
Step 1 - Specify an event when the code should run
   documentViewer.addEventListener('documentLoaded', async() => {
//code
});
The earliest that the code should run is when the document has finished loading - if it runs any earlier then documentViewer.getDocument() will return null so getPDFDoc() will throw an exception.
In this example, the code runs when the documentLoaded event fires, but it could instead occur in response to a button being clicked, or indeed, any other event occurs - provided that the document has loaded.
Step 2 - Get the PDFDocument and lock it
Next, we need to get the PDFDocument from documentViewer.
Since we will be modifying the doc, and we don’t want anything else to change it at the same time, we can use lock(). Once we have finished working with the document it needs to be unlocked While we could free the lock explicitly, in this case PDFNet.runWithCleanup will automatically release the lock when it completes.
Step 3 – Create the Stamper object, specifying the sizing parameter
Stamper has three SizeType options that control the size of the stamp that is created. We will look at the other options later, but to start with, since we will be adding text, we will use PDFNet.Stamper.SizeType.e_font_size and specify the font size explicitly (in this case to 25 points).
const s = await PDFNet.Stamper.create(PDFNet.Stamper.SizeType.e_font_size, 25, 0); It’s worth nothing here that nearly all of the stamper functions are async and return a promise. You will therefore want to specify await to avoid a race condition. (If you are an async guru then you might have a better solution – but that is outside the scope of this article.)
Step 4 – Specify where the stamp should be located
The default location for a stamp is in the center of the page, but it can be explicitly set using Horizontal and Vertical alignment.
await s.setAlignment(PDFNet.Stamper.HorizontalAlignment.e_horizontal_center, PDFNet.Stamper.VerticalAlignment.e_vertical_center); Since both horizontal and vertical alignment have three options, this gives nine standard locations that can be specified.

Figure 2 - The nine standard locations where stamps can be placed
Step 5 - Specify font characteristics
There’s lots of options for the font, color and opacity, but for now let’s say that we want the font to be red, Times Roman font, with 30% opacity.
Note that we don’t specify the font size here, since that was included in the Stamper.Create function. You could, however, if you wish, redefine the size using setSize().
Step 6 - Specify text rotation
By default, the text will placed horizontally, but for now we will create diagonal text, which we can do by specifying a rotation in degrees.
await s.setRotation(307.69) In case you are wondering, the value of 307.69 degrees isn’t random, it relates to the angle between the bottom of the page and the hypotenuse for a page size of 11 x 8.5 inches.
Step 7 - Specify the pages where the stamp should be applied
The stamp can be applied to all pages in the PDF or just to a subset. This is done using the PageSet object.
const pgSet = await PDFNet.PageSet.createRange(1, 1); In this case, the page set relates to just page 1, but it could be a range of pages, or several ranges, possibly filtered to only use the odd or even pages in the range.
Step 8 - Specify the actual text to include in the stamp
The final step is to specify what we want the stamp to say and to apply the stamp. In this case we will use a hard-coded value of “Restricted”
await s.stampText(doc, 'Restricted', pgSet); Once again, while the text in this example is hard-coded, it doesn’t need to be.
If you look at the PDF in the browser, then the new stamp is now visible.
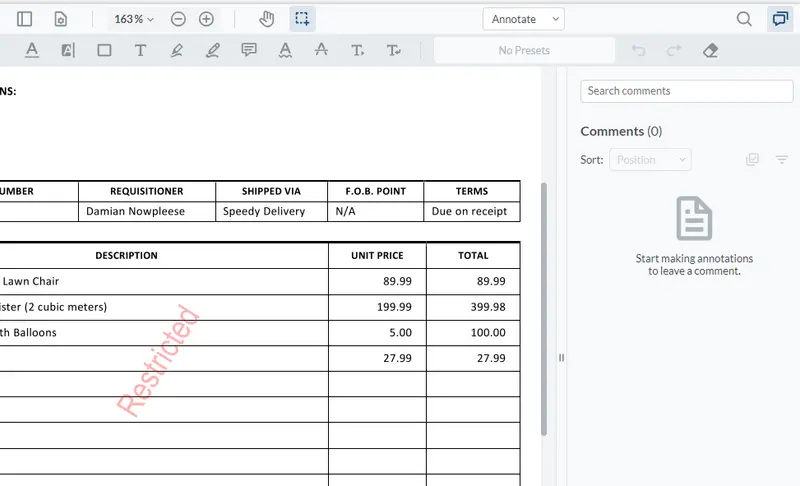
Figure 3 - The PDF showing the new stamp
While the stamp is visible, you can see that it does not appear in the Comments pane – that is because it was not created as an annotation. We will see later in this article how you can create stamps as annotations.
Using images to create stamps
So far, we have just added text as a stamp – but the Apryse SDK also allows you to use images or pages. Let’s look at stamping an image using the stampImage function. For this we will use the second sizing option - exact size - but we could use relative size if that was more appropriate.
As an example, let’s add a picture of a duck to the PDF (there’s no particular reason for using a duck – I just had the image to hand). The location of the duck image is at imagePath.
Just replace the PDFNet.runWithCleanup code from the previous sample with the following.
Now if we run the code, the PDF appears with a picture of a duck in the center.
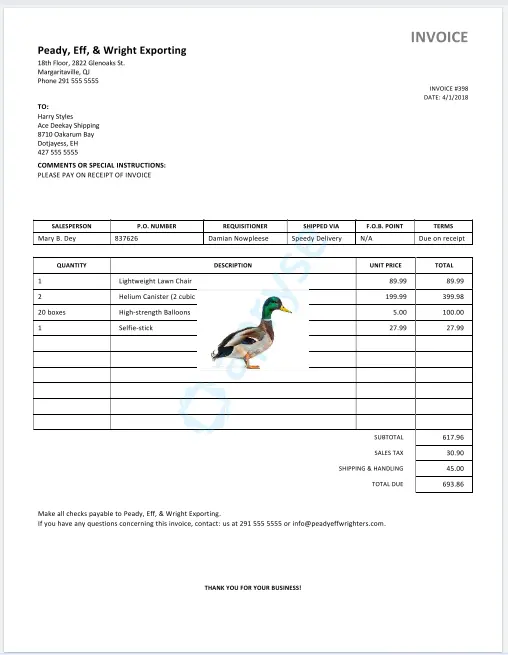
Figure 4 - You can easily stamp an image into the PDF.
There are a few things to note here:
- The default location for the image is the page center.
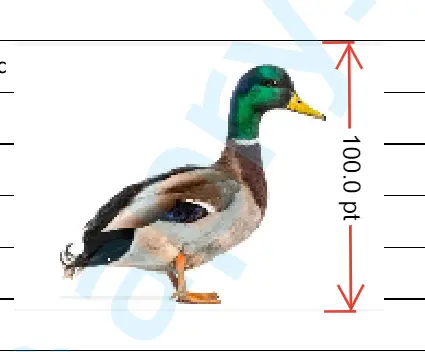
- Although we specified both the width and height of the logo, using PDFNet.Stamper.create(PDFNet.Stamper.SizeType.e_absolute_size, 400, 100), the final size of the image is based on the lesser of the values for width and height (in this case 100 pts).
- There is a watermark that says Apryse diagonally across the page – this is because a trial license key is being used. With a commercial key that watermark would not be shown.
OK, let’s change the location of the image and explicitly place it in the horizontal center of the page and 100 pts from the top. That’s not one of the nine standard locations, but if we use one of the standard locations (top-center) then we can use setPosition to adjust the place where the stamp will be created relative to that location.
Now when we run the code, the image is where we want it.
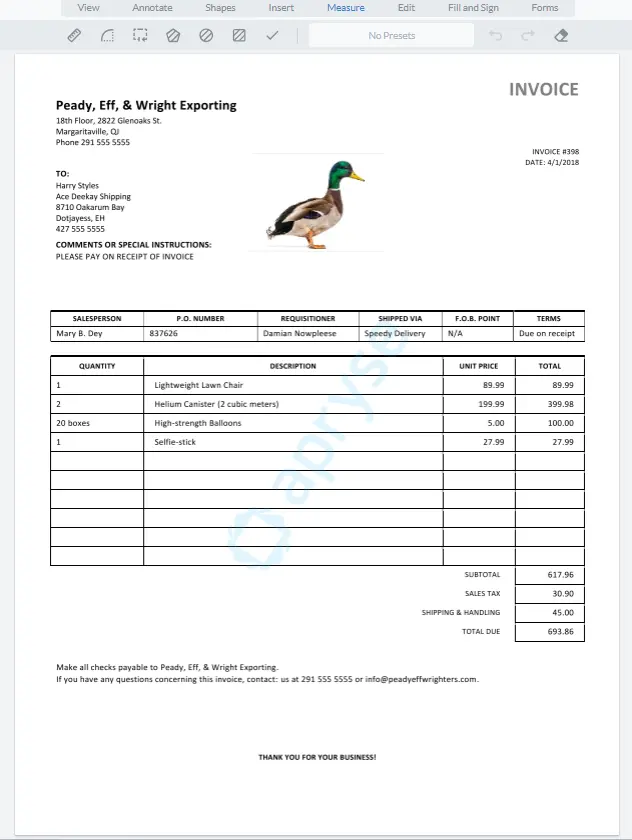
Figure 5 - Adjusting the location of the stamp using setPosition
In this example we’ve used points to specify the location within setPosition, but we could have used a percentage of the page. For example, setPosition(0, 0.15, true) would mean a position 15% of the way down the page.
Adding pages from a PDF as a stamp
The final thing that we will look at is using a page from a PDF as a stamp.
For this example, we will also use the third sizing option – relative scale – although we could have used exact size if we preferred.
We’ll create the new stamp at the bottom left of the document, and scale it to be 30% of the page width.
When the page reloads, we now have a page from one PDF embedded into the corner of a different PDF.

Figure 6 - An example of stamping a page into a PDF.
That’s all great, but let’s adjust the position of the stamp slightly, so that there is a margin around ithe stamped page. We can do that by using setPosition as we saw earlier. In this case we will offset it by 5% of the page width and height.
await s.setPosition(0.05, 0.05, true) That looks great!
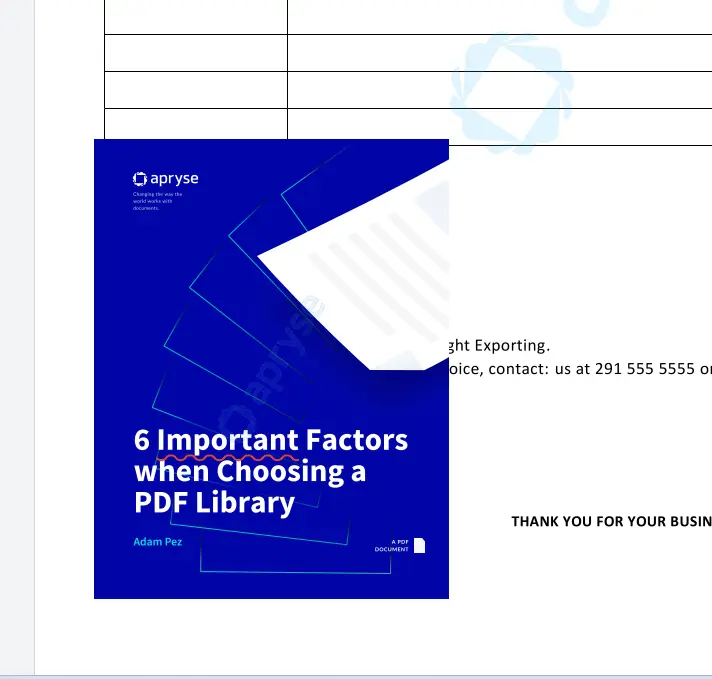
Figure 7 - The page from the PDF has been stamped into the new PDF with a border. It can still be edited in the same way as any other PDF object.
If you click onto the embedded PDF page, you will see that it isn’t an image – it is very much a PDF. You can work with it in just the same way that you would with a regular PDF page.
When specifying numbers in the setPosition API, it can be a little confusing. Positive numbers typically “mean away from the edge”, so if you are using verticalBottom then a positive vertical position is upwards, whereas if using verticalTop then a positive vertical position is downwards.
Detecting the presence of stamps in a PDF
Provided that stamps were not created as annotations (which we haven’t covered yet) then you can tell whether stamps are present in a pageSet by using hasStamps.
As an example, let’s show a dialog that says whether stamps were found on the first page of the document.
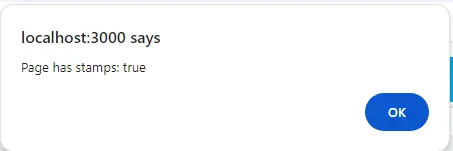
Figure 8 - A dialog is one way to use the result of finding if any of the pages in the pageSet have a stamp.
Deleting stamps
Any stamps present in a pageSet can be removed using deleteStamps(doc, page_set).
Note that this will remove ALL of the stamps in the page_set.
Creating stamps as annotations
So far, we have only looked at stamps that are not annotations. But what if you want to create stamps that are annotations? It’s not an unreasonable request since it is easy to do using the UI.
The documentation suggests that you can do this by adding just one line of code s.setAsAnnotation(true);
If you were to run the analogous code using the Apryse SDK on a server then it would, indeed, create stamp annotations, but if you run that code from within WebViewer then nothing appears.

Figure 9 - Adding stamps as annotations does not appear to work in WebViewer
What is going on and how do we fix it?
PDFNet and the WebViewer Annotation Manager are not the same thing, each has slightly different responsibilities. As such if Annotation Manager, which is responsible for displaying annotations, is to show the newly created Stamp annotations then they need to be exported from the PDFDocument and imported into the Annotation Manager. We can do that with three lines of code.
Now the annotations will appear and be shown in the annotations pane.

Figure 10 - Stamps as Annotations within WebViewer
You can work with those stamp annotations in just the same way as if you had created them directly within WebViewer.
Conclusion
We’ve seen how you can use Stamper to create stamps of text, images and PDF pages within your document using JavaScript and WebViewer. But that’s only a fraction of WebViewer functionality – it also allows you to create and edit PDFs, and their content, apply redactions, create PDF portfolios and work with layers for just a start.
Don’t take my word for it - check out the documentation for WebViewer, get yourself a trial license and try things for yourself.
If you need any help or have any suggestions, then please feel free to reach out to us on our Discord channel.