Roger Dunham
Published March 07, 2025
Updated May 18, 2026
4 min
Digitally Signing a PDF using a Hardware Key – Part 1 – Setting up the YubiKey
Roger Dunham
PDFs are a great and effective way of transferring information, whether that is the manual for a washing machine, an invoice, a contract, or any of a vast range of other uses.
In the case of a washing machine manual, you might not be concerned if someone has edited the PDF after it was created or indeed who the person was that created it.
In the case of an invoice or a contract though, knowing that you can trust the information is essential. Did it really come from the correct person, or did a scammer send you it?
Even if it came from the correct person has anything been changed since it was created, for example have the bank details been altered? If someone had intercepted the PDF invoice with the intention of you paying money into their account rather than the correct one, wouldn’t you want to know?
Digital Signatures are one way to identify when things are wrong with a PDF– offering legally verifiable proof of the originator and the fidelity of the document.
This article is one of a series about creating digital signatures within a PDF using Apryse.
In this article we will look at how to create the digital signature using a digital certificate that is hosted on a YubiKey.
Suggested Read: Digitally Signing a PDF using a Hardware Key
What is a YubiKey and How Does It Verify Identity?
A YubiKey is a small hardware device used for authentication, designed to improve digital security by providing a secure method for verifying identity. Developed by Yubico, the YubiKey is widely used for multi-factor authentication (MFA) and is compatible with a range of services, including email platforms, password managers, and enterprise applications.
While you can use a YubiKey as MFA when logging into a GitHub account, for example, it can also be used to store a digital certificate that can be used to create digital signature.
There’s a whole range of variants of YubiKey available – within this article I’m using a YubiKey 5 NFC.
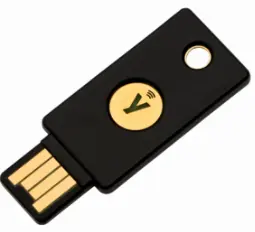
Figure 1 - A YubiKey 5 NFC
Adding a Digital Certificate to the YubiKey
There are several steps needed to set up the hardware side of the digital signature process. We’ll go through these, then look at how we can access that digital certificate from code.
Step 1: Download YubiKey Manager
While there is an SDK available, I will be using a UI based tool- the YubiKey Manager. That tool, which is available for on Windows, macOS, and Linux operating systems, can be used to configure FIDO2 (which allows users to authenticate to online services without passwords), OTP (One-time password) and PIV (Personal Identity Verification) functionality on your YubiKey.
Note: I’m using Windows, on other platforms things might look a little different from the screenshots in this article.
Step 2: Run the YubiKey Manager
The YubiKey Manager is easy to work with and leads you through the process. If you start it without a key being available, then it will prompt you to insert one.
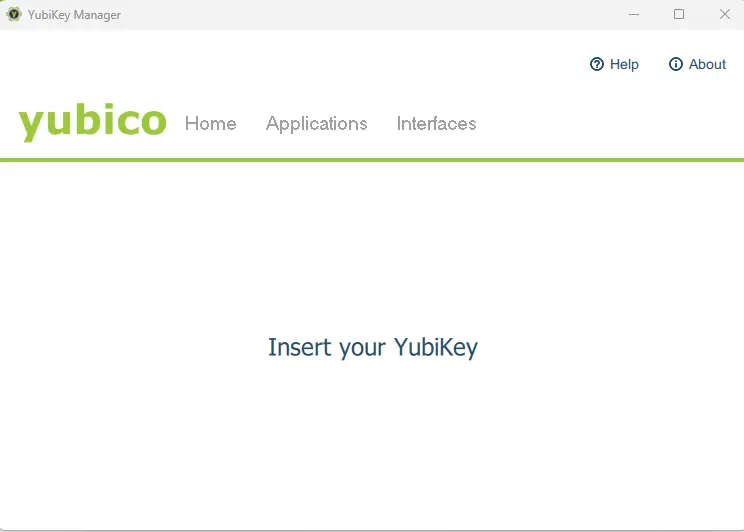
Figure 2 - The YubiKey Manager - if a key is not inserted then it will prompt you to do so.
Once the YubiKey has been detected the manager will tell you the firmware version and show you the serial number of the key.
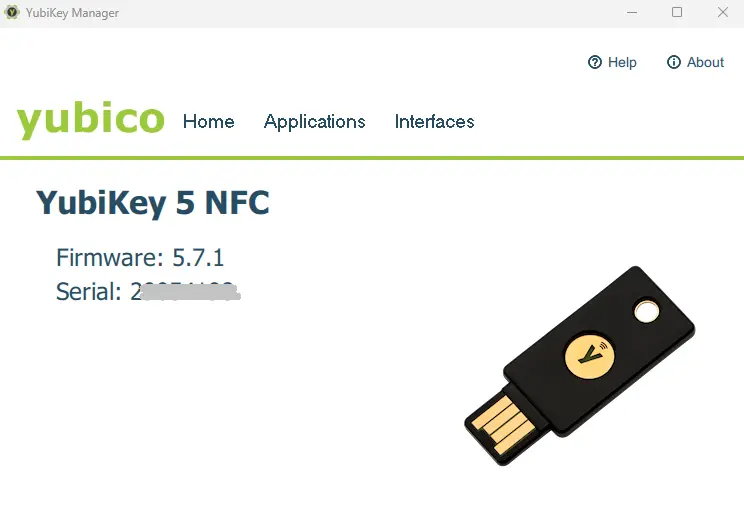
Figure 3 - The YubiKey Manager will tell you the firmware version, and serial number for your key.
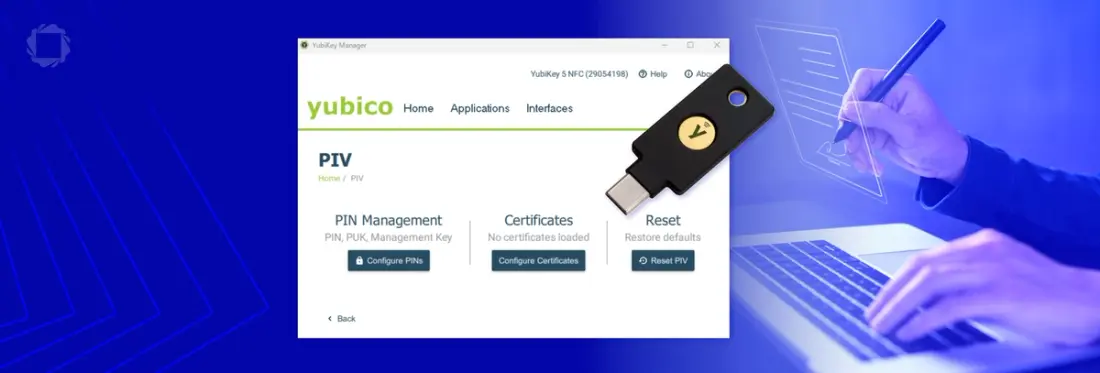
Step 3: Select the Application type that you want to configure
Click on Applications and choose PIV (which stands for Personal Identity Verification and is defined in FIPS 201).
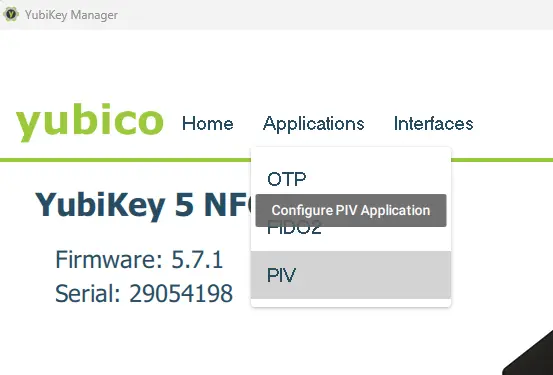
Figure 4 - Selecting the PIV menu.
The PIV menu allows you to set up a PIN, see what certificates are available and restore the PIV defaults for the YubiKey.
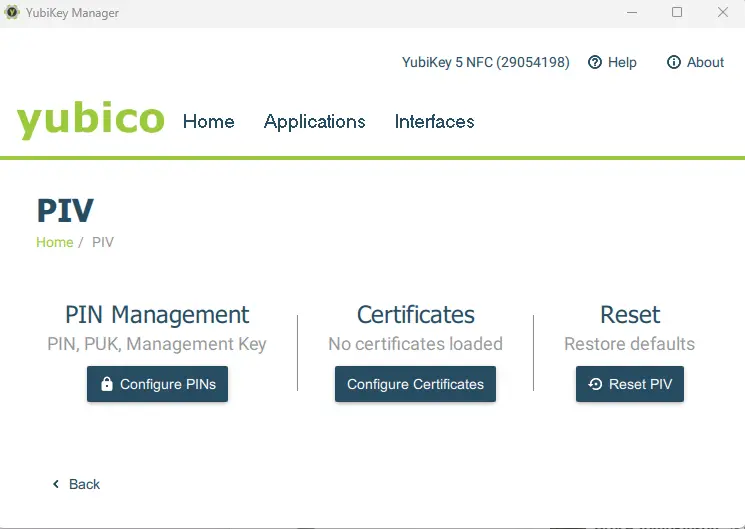
Figure 5 - The PIV menu for a newly installed YubiKey.
Step 4: Setting up a PIN
In a later part of this article, we will access the certificate on the key using software that we will write.
One of the great things about the YubiKey is often you can authentication by touching it, but the FIPS 201 standard doesn’t support that, so we will need to authenticate using a PIN, so we need to set one up
The following default values are used for the PIN, the PIN Unlock code (PUK) and the Management Key:
- PIN: 123456,
- PUK (Pin Unlock Code): 12345678
- Management key: 010203040506070801020304050607080102030405060708
Leaving default credentials in place is a major security risk, so let’s change the PIN.
Click on the Configure PINs button, then Change PIN. You can then enter the current pin and specify a new one.
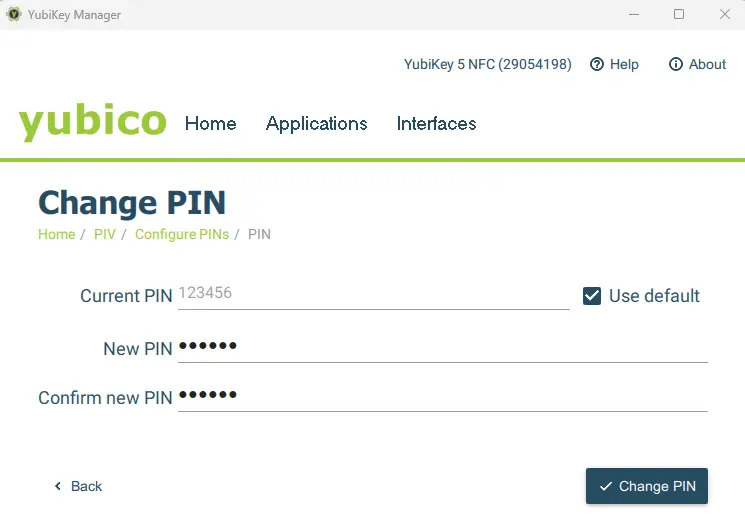
Figure 6 - Updating the PIN for the YubiKey. You can also update the PUK and Management key.
For this article, I’ve set the PIN to 654321, but you should choose a less obvious one.
The RockYou data set contains passwords from 32 million user accounts that were subject to a data breach in 2009 and have become the standard set of passwords for dictionary attacks.
The number one password was 123456, with 654321 coming in at #17.
Many other password lists show the same pattern.
Whatever you choose, write it down (or put it in a password manager) you will need it later.
For now, we will leave the PUK and the Management Key as they are.
Step 5: Adding a certificate
Now click on certificates.
There are four options available that are referred to as ‘slots.”
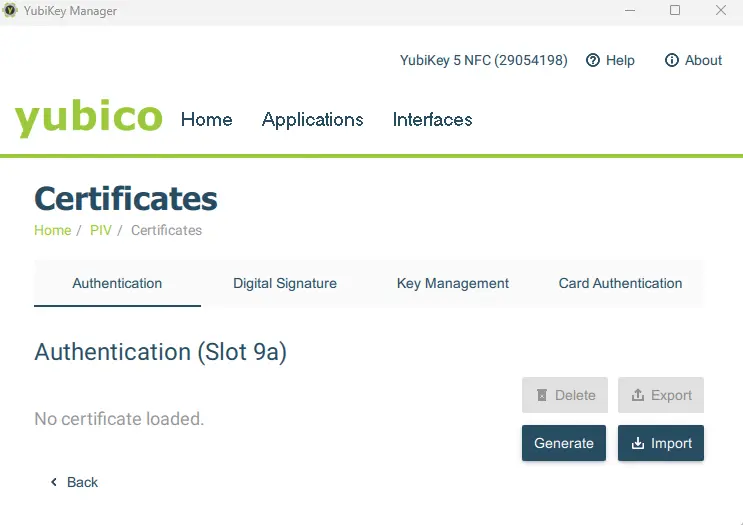
Figure 7 - The certificates tab. We are interested in Digital Signature.
We are interest in Digital Signature which is Slot 9c.
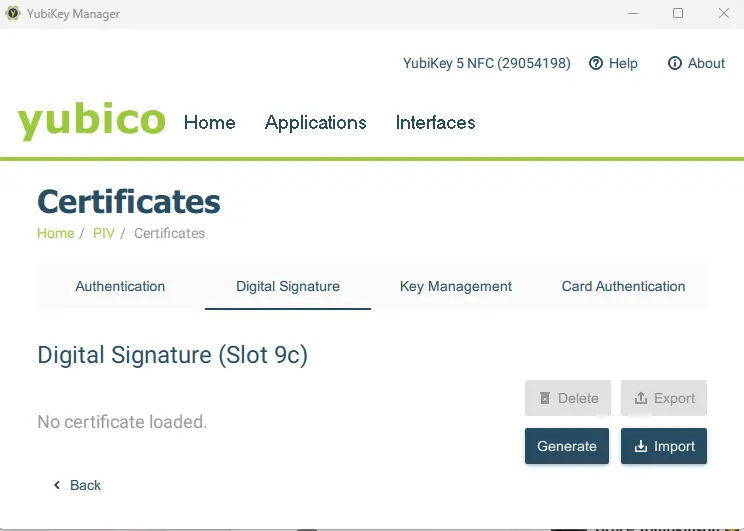
Figure 8 - The Digital Signature page.
There are now two choices, just as we saw with the Azure Key vault. You can generate a new certificate on the key or import an existing one.
We will import the self-signed certificate that we created earlier in this series, and which we have used to digitally sign documents (locally and via Azure0 in other articles.
So, click on Import and navigate to the “Blogcert.pfx” file (which is the certificate that we created in part one of this series).
As part of the import process, you will be asked for a password. This is the password that is needed to access the private key within the “pfx” file. If you have been following this series, then you will remember that we specified this as “9876”. If you bought a certificate, then the value will be something else.
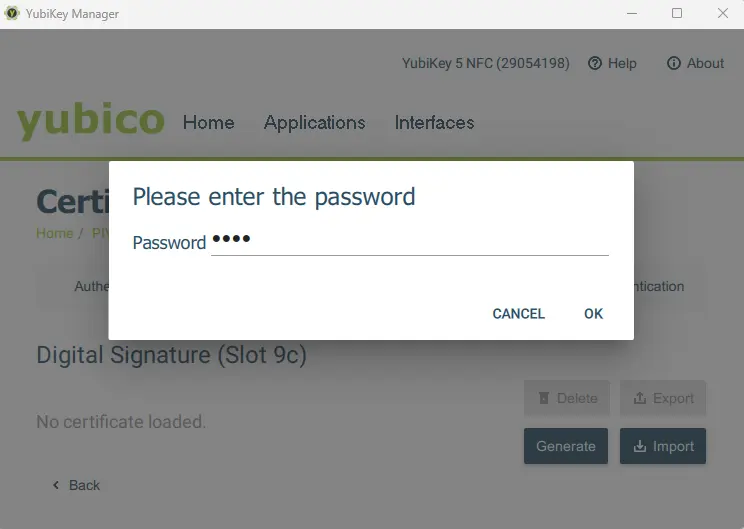
Figure 9 - Entering the Private Key password.
Next, click on OK. You will then need to enter the Management Key for the YubiKey. As we didn’t change that from the default value you can just check “Use Default”, which will populate the value for you.
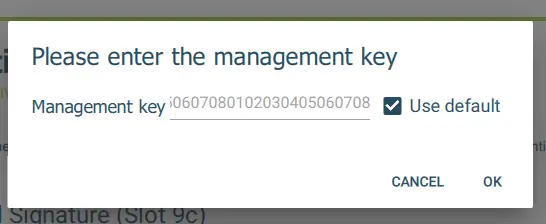
Figure 10 - Entering the management key. This is part of the process of adding a certificate.
Click on OK. The dialog will close, and you will see summary information about the digital certificate.

Figure 11 - Once the digital certificate has been imported you will be able to see the summary information.
That’s it. You now have everything set up within the YubiKey for applying a digital signature to a PDF.
Where next?
In the next article we will use the YubiKey with the digital certificate that we have just installed and use it to digitally sign a PDF using the Apryse SDK. We’ll do that using C#, but the library is available in other programming languages too, including Node.js, Ruby and Python.
The Apryse SDK does much more than just allow you to work with digital signatures. It also offers a wealth of other document processing functionality, which can help to save your business time and money.


