Andrey Safonov
Director of Product
Published July 27, 2020
Updated May 18, 2026
4 min
How to Search Multiple Word & PDF Documents Using JavaScript
Andrey Safonov
Director of Product

In most document management systems, searches only use the title or metadata of documents. But the title and metadata do not always reflect what's inside. As a result, users must open and scan documents manually to find the right content — a waste of time, and a source of frustration!
In this blog, we show how you can save your users time by enabling powerful automated search directly inside documents. We use Algolia for indexing documents, Firebase for storage, and Apryse for document rendering and text extraction.
Algolia and Firebase are easy to get started with and have a free tier. But you can pick whatever alternatives work best with your existing infrastructure. The logic in this guide should work the same, whatever your technology combination.
- Clone the GitHub repository.
- Set up full-text indexed search.
- Configure document storage.
- Configure CORS for uploaded documents.
- Run the application and start searching.
Clone the GitHub repository
To get started, clone the ready-to-go sample on our Github. Next, extract the file, navigate to the folder, and in the terminal, run:
npm install
Do not start the app yet, since we still have to configure a few pieces.
Set up Algolia for Full-text Indexed Search
This application uses Algolia to search and index documents. But Algolia is not the only third-party search provider. You can also consider alternatives such as ElasticSearch.
To get started with this sample, please register a new app with Algolia.
Afterwards, create a new app and navigate to Indices, where we will create a new index called document_search.
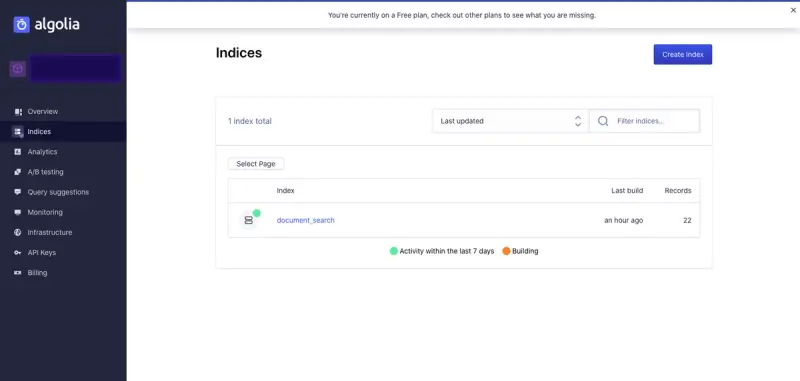
The document_search index
After configuring your app, go back to the cloned GitHub project, create an .env file in the root directory, and enter the following:
REACT_APP_ALGOLIA_APP_ID=your_key_goes_here
REACT_APP_ALGOLIA_API_KEY=your_key_goes_here
REACT_APP_ALGOLIA_SEARCH_KEY=your_key_goes_here
REACT_APP_ALGOLIA_INDEX_NAME=document_search
The above information can be found under API Keys tab in your Algolia Dashboard.
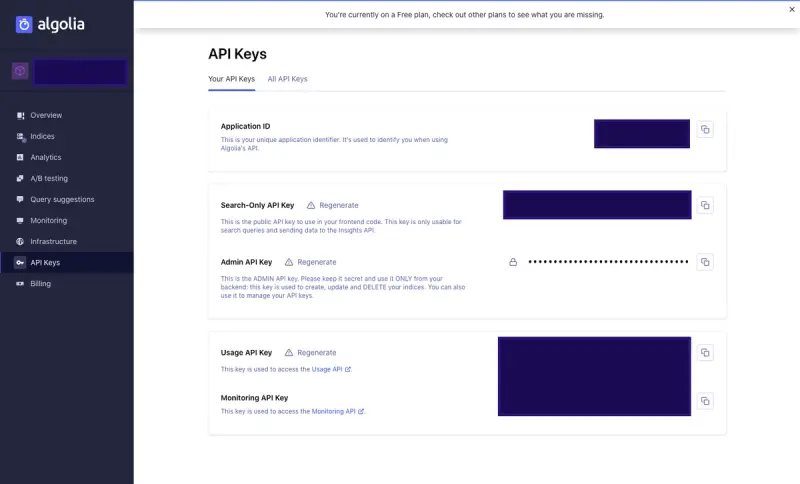
The API Keys tab in the Algolia Dashboard
Configure Firestore for Uploaded Documents
You can also use any other storage of your choice. For this guide, we use Firebase, which you can start with by registering your app here.
Make sure to create a storage bucket and enable authentication for email and Google to ensure only authorized users can upload documents.
If you would like to create applications just with Firebase authentication you can start by cloning this project, which includes the bare bones of what is required.

Template of a cloned project
After registering your app with Firebase, back in the cloned GitHub project, create an .env file in the root directory and place in the following:
REACT_APP_API_KEY=your_key_goes_here
REACT_APP_MESSAGING_SENDER_ID=your_key_goes_here
REACT_APP_APP_ID=your_key_goes_here
REACT_APP_AUTH_DOMAIN=your_domain_goes_here
REACT_APP_DATABASE_URL=your_database_go_here
REACT_APP_PROJECT_ID=your_project_id
REACT_APP_STORAGE_BUCKET=your_storage_bucket
The above information can be found under Settings in your Firebase app.
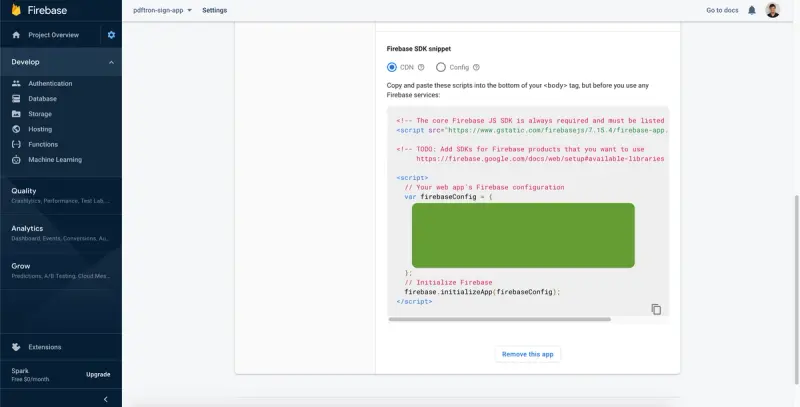
The settings in the Firebase app
Configure CORS for Uploading Documents in Firestore
Next, you will need to set up CORS on your Firestore to allow WebViewer to access files in your bucket. I created a CORS file called cors.json with the following contents:
[
  {
    "origin": ["*"],
    "method": ["GET"],
    "maxAgeSeconds": 3600
  }
]
We used gsutil to update the CORS policy on our bucket created previously.
Run the Application and Start Searching
To run the application we just created, in the terminal or command line, run the following:
npm start
We can now upload documents for indexing and search for page text and document title.
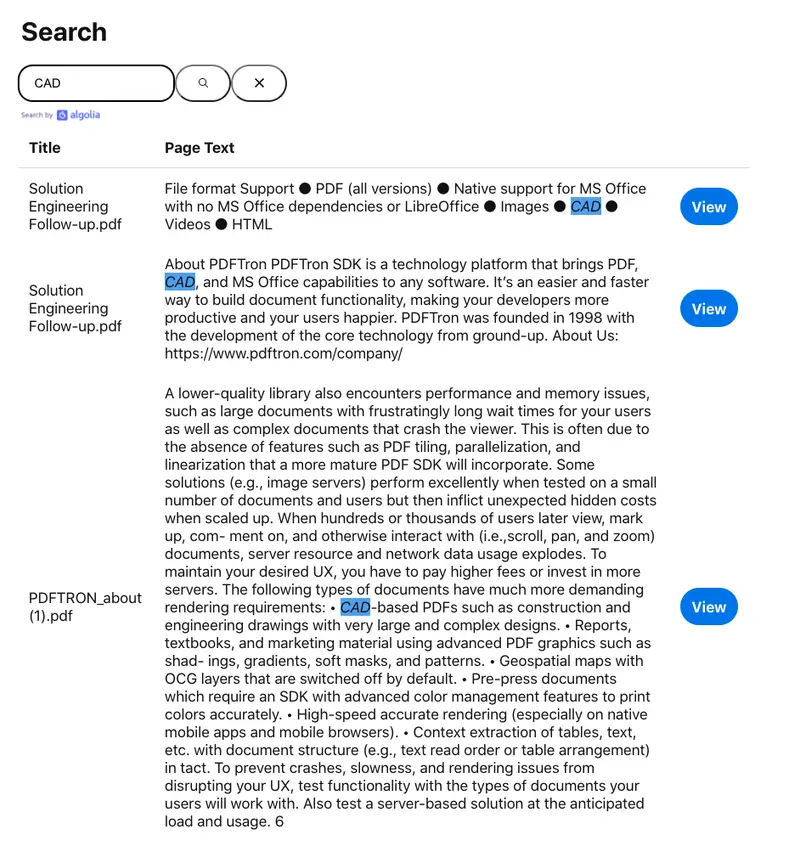
Documents to index and search
It may surprise you that text in a PDF file is not stored how you would typically imagine, according to its natural reading order. Instead, depending on how the PDF is generated, text characters can be in any order. That includes characters at the start of the page! For example, 'Hello' can be first broken into 'H' 'e' 'll' 'o', and each of these characters could be anywhere.
What Apryse does when extracting content is to run through all the characters in the file and reassemble them according to how a user would read them.
For the sample application we just wrote, you can upload PDFs, DOCX, PPTX, and XLSX files. Apryse can load up all these documents in memory, extract text, and render them entirely in-browser — without calling or using any server-side dependencies.
For UI components, I use Pinterest Design Library as well as Algolia’s React Instant Search. Instant Search provides ready-to-go UI components to handle returned results and create highlights without having to worry about character offsets. I also leveraged the ability to pass custom components that match the UI closely with our overall design.
To understand what each component does inside of the app, it is best to refer to the project structure.
According to Algolia’s best practices, it is best to keep your index size small. That is why I separated each index to a page inside of the document, instead of creating a huge index for a single document with many pages nested inside. This approach will reduce your costs and increase the performance of your search.
Conclusion
This sample project gets you started on enabling client-side search across all your documents — not just on titles, but also on their contents! Don't hesitate to reach out to us with any questions you might have or suggestions for improving our sample.