Roger Dunham
Published May 09, 2025
Updated May 18, 2026
Creating a Cross-platform DOCX editor using Tauri and Apryse
Roger Dunham

Summary: This article explores how to build a cross-platform DOCX editor using the Apryse WebViewer within a Tauri-based desktop application. Tauri, a modern alternative to Electron, offers a lightweight and secure framework powered by Rust for the backend and web technologies for the frontend. With no external dependencies or Microsoft licensing required, the resulting editor allows users to edit documents locally—preserving privacy and data control while delivering a fast and efficient user experience.
Introduction
If you have been involved with software for a while then you may have come across Electron – it’s a framework that allows you to create cross-platform apps, built using HTML, JavaScript and CSS, that run on Windows, Linux and macOS.
Back in 2022, a new kid appeared on the block – Tauri. Seen as the language of the next generation of apps, and with a strong focus on security as a central attribute.
In October 2024, v2.0 of Tauri was released, illustrating its ongoing development.
Tauri is an open-source framework for building lightweight, secure, and cross-platform desktop applications. Just as with Electron, it allows developers to create apps using web technologies such as HTML, CSS, and JavaScript, but unlike Electron, it has a Rust-based backend. By separating the frontend and backend, Tauri enables smaller application sizes and enhanced security, making it an ideal choice for developers looking to build fast and efficient desktop apps.
In this article, we will look at creating a cross-platform DOCX editor by leveraging the Apryse WebViewer within a Tauri based app. Sounds good? The DOCX editor that we are going to create has no external dependencies (and doesn’t need a Microsoft license). Better still, the document is edited entirely on your own machine, allowing you to maintain control of your precious and confidential documents.
Getting Started with Tauri
If you have never used Tauri before then you are going to need to install some prerequisites.
- Rust
- WebView 2.0
- C++build tools
- Node
I also used VS code (which is an Electron app) as an IDE.
I’m using Windows 11. There are minor differences if you are using macOS or Linux, or if you are targeting iOS or Android, but the principles are the same.
Check out the official Prerequisites guide for Tauri.
So, let’s assume that you have all the prerequisites in place, now it’s time to create our app.
Step 1. Initialize a New Tauri App
There are several ways to instantiate the app, but I’m using npm.
npm create tauri-app@latestThis will lead you through a set of questions.
Project name. I’m using “webviewer-tauri”, but you can use what you want.
Identifier. We can just accept the default of com.webviewer-tauri.app (which will be different if you used a different project name).
Language for the front end. We will be using TypeScript/JavaScript, but other options exist including Rust and .NET.
Package Manager. I’ll use npm, but you can choose yarn, bun, or one of the other options.

Figure 1 - The choices for package manager.
UI template. The choices here depend on which platform you are using the front-end. Since we chose TypeScript/JavaScript, we have options including Vue, Svelte and React. If instead we were using Rust for the front-end then options would include Yew and Sycamore, and if we had chosen .NET then we could choose Blazor.
I’m going to use React.
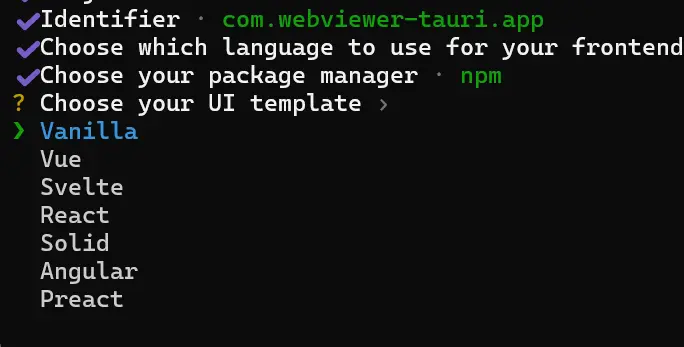
Figure 2 - The UI template options for TypeScript/JavaScript.
UI Flavor
Finally, in our case, we need to specify whether we will use TypeScript or JavaScript, so let’s choose TypeScript.
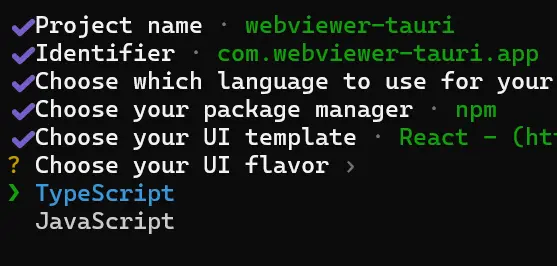
Figure 3 - The UI flavor options.
The project will then be created and will show you how to get started.
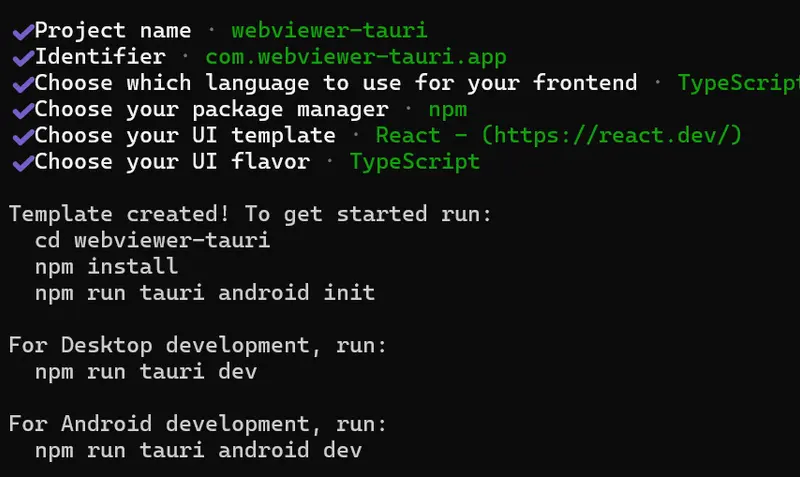
Figure 4 - The template has been created!
Finally, we need to navigate to the newly created folder and run npm install.

Figure 5 - Navigate to the new folder and run npm install.
Step 2. Run the Default App
While you can run the app directly from the command line, I prefer working in VS Code, so for the rest of the article I will have opened the project in that IDE and will be working from within it.
If you are following along, then you can use npm run dev and the project will open in the browser, which is a great way to start debugging, but it’s not yet a Tauri app.
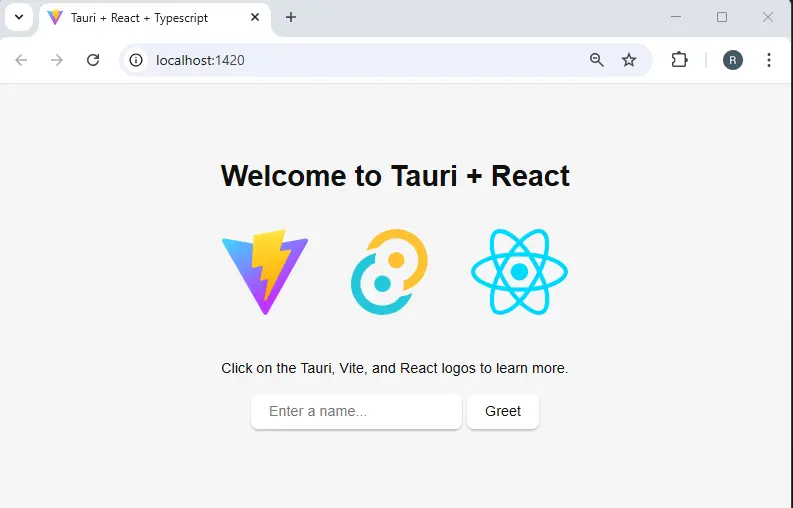
Figure 6 - The Tauri app running in the browser.
If we want to create a standalone app, then we need to call:
npm run tauri devNow packaging will automatically happen, with extra files being downloaded.
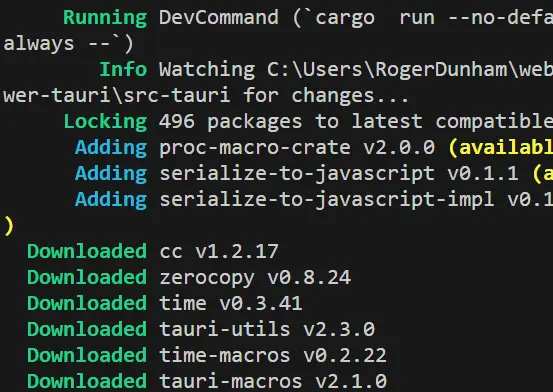
Figure 7 - The first part of the packaging process for development builds.
Once the required packages have been downloaded, the project will be compiled.
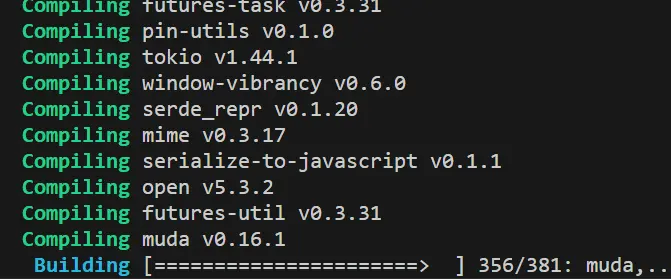
Figure 8 - The project is being compiled.
After a few seconds, the app will now appear within Tauri.

Figure 9 - The default Tauri app running.
While it’s fun to get a Tauri app running, it’s not very useful at the moment. Let’s swap the default code for some that uses Apryse WebViewer.
WebViewer is a JavaScript SDK with an open-source UI. You can install it in various ways, but I will use npm, which we will do in a few minutes.
npm will copy the library into node-modules, but we also need to make the “static” files available for use on the client side at run-time. To do that, the files need to be available in a public folder that the application can access. You could copy the files manually, but let’s create a script to do this.
Step 3. Create a Script to Copy WebViewer Assets
At runtime, the client side will need access to WebViewer static files, which cannot be served from node_modules. There are a number of solutions to this. You can copy them manually, use operating system tools such as xcopy, create a script, or use a plugin such as vite-plugin-static-copy.
In the video that goes with this blog, you can see how to use the plugin, but we will use the script mechanism here.
Create a new folder in the root of the project called tools, and within that, create a new file called copy-webviewer-files.cjs.
Note that if you don’t use the .cjs file type, then you may get errors when you run the project.
Now copy the following code into the file and save it.
It’s fairly straightforward, the script just copies files from the @pdftron/webviewer folder and places them into a new folder called public/lib/webviewer.
Before we use that script, we need to install a couple of dev dependencies, which provide utility methods for copying the files.
npm install fs-extra --save-dev
npm install path --save-dev
Next, let’s provide a way to call our script within the package.json scripts block.
In many of the samples for using WebViewer this would be called automatically as a postinstall script, but it appears that this is not currently possible when working with Tauri. That may change in future releases.
As a workaround, we can create a new named script which will call our file.
"copyassets": "node ./tools/copy-webviewer-files.cjs",You can now explicitly copy the files using npm run copyassets.
For simplicity though, we will run that automatically when we call the dev script. (You might also want to add this to the build script, but I haven’t done that here).
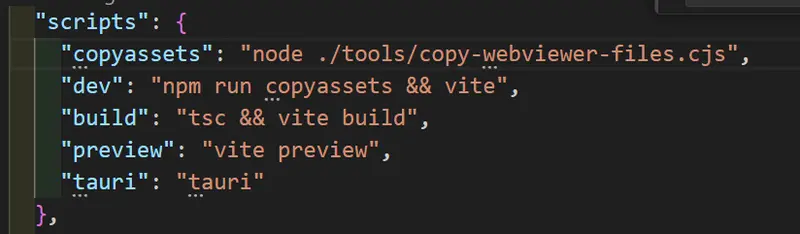
Figure 10 - The Scripts block in the package.json file.
Step 4. Install WebViewer
Now we are ready to install the Apryse WebViewer.
npm install @pdftron/webviewerThis will copy the files into node_modules. However, as we said earlier, we need to copy the static file. If you created the script, which was described in the previous section of this article, then it should happen automatically using:
npm run copyassetsAlternatively, you can copy the files manually. In either case, you should end up with a project that has the WebViewer “core” and “ui” folders in a public folder accessible to the app at runtime.
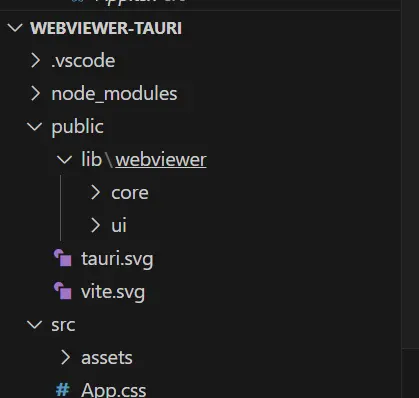
Figure 11 - The WebViewer "core" and "ui" folders need to be accessible at runtime.
Step 5. Add WebViewer Code to Your App
Replace the code in the default App.tsx file.
The key parts of the code are:
- Creating a div where the WebViewer will be mounted. We are also including some styling here – though that could be in a CSS file. Note that if you don’t specify a height, then WebViewer may scroll with its contents.
- Specifying the constructor options for WebViewer (including the path to the folder where the “core” and “ui” folders were copied). We are also including a license key, the ability to choose a document at runtime, and enabling the Office editor.
- Instantiating WebViewer (in this case via a useEffect).
- Handling the instance object that is returned when the constructor promise returns. In this example, we are not using it, but it provides a way to interact with the Apryse SDK.
Note: The reference “instantiated” is a workaround for recent versions of React where a useEffect with an empty dependency array is fired twice in development builds. It could be removed when you are ready for production.
I also had to use a //@ts-ignore to avoid a TypeScript error.
The project can now be run using npm run tauri dev.
Once running, you can select an existing file from the File Picker, then view or edit it. You have a working DOCX editor app with no need to have Office installed!
When you are ready, you can save the document either as a PDF or DOCX file.
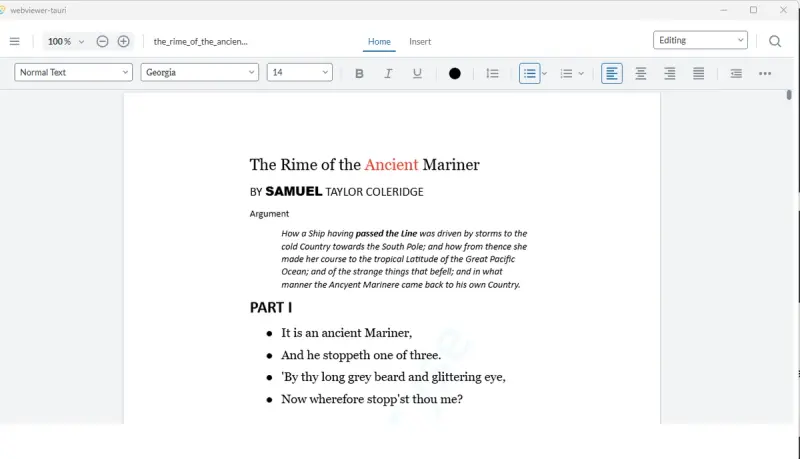
Figure 12 - An example file that has been edited within the WebViewer Tauri app. We have added bullet points and changed font style and color.
In addition to editing existing documents, you could also create a brand new empty DOCX file and add images, tables and text.
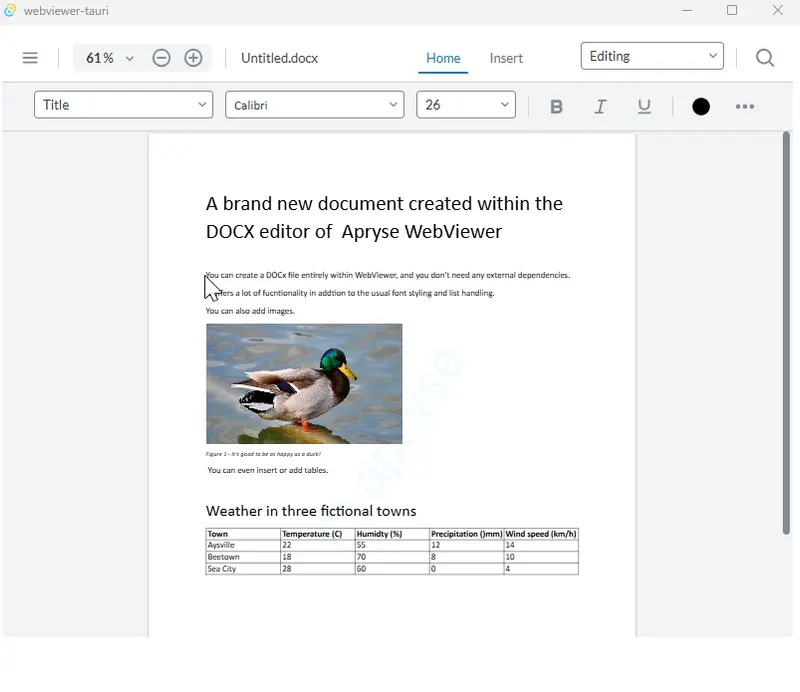
Figure 13 - A newly created DOCX file shown in Apryse WebViewer.
Wow! That is awesome.
Next steps
From a Tauri point of view, the next step would be to create an executable file that you can ship to your customers using:
npm run tauri buildYou will then get a production executable created, and on Windows at least, an installation package.
From a WebViewer point of view though, you are just at the beginning!
While we have created a standalone cross platform DOCX editor, it would be easy to extend this to edit PDF content, or even generate new documents from templates, or apply annotations or redactions. There is a wealth of functionality available, so check out the documentation for WebViewer.
And if that wasn’t enough, WebViewer UI is WCAG2.1 AA compliant.
So, grab yourself a trial license key and try things out for yourself. If you have any questions, then reach out to us on Discord where the great support team will be happy to help.


