Home
All Blogs
Creating an App for Viewing and Editing PDFs Using JavaScript, React, and Vite in 10 Minutes
Roger Dunham
Published April 12, 2025
Updated May 18, 2026
7 min
Creating an App for Viewing and Editing PDFs Using JavaScript, React, and Vite in 10 Minutes
Roger Dunham
Summary: Learn to scaffold React apps with Vite and WebViewer, enabling easy DOCX and PDF viewing and editing in the browser, while avoiding common development pitfalls.
Introduction
PDFs are a formidable document format, with a generally consistent appearance, and viewable in a wide range of readers.
Similarly, JavaScript and React are ubiquitous within Web Development. While create-react-app was the “go to” tool for scaffolding React apps in the past, that is deprecated, and many users would now use Vite instead.
In this article, we will use Vite to scaffold an app that uses the Apryse WebViewer to allow you view and edit a wide range of file types including DOCX and PDF entirely within the browser.
What’s more, WebViewer is so easy to get started with that you should be able to get something working in around ten minutes.
Vite behaves slightly differently from create-react-app and the default scaffolding can lead you down some dead-ends. We’ll look at those as well and see how easy they are to resolve.
A Few Words on Configuration
I’m using Windows 11, but everything that you see should also work with macOS and Linux.
You will need npm and Node installed. I used Node v22 for this article.
Step 1. Scaffold the app using create-vite
In a terminal window, create a new app using:
npx create-vite@latestThis will take you through a series of steps where it will ask you to specify a project name, a Framework (choose React) and a variant (choose JavaScript).
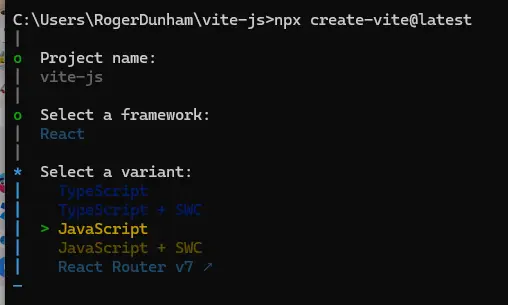
Figure 1 - Working through the steps of creating an app with create-vite.
After a moment or two, the project will be scaffolded, and you will be advised how to get it started.
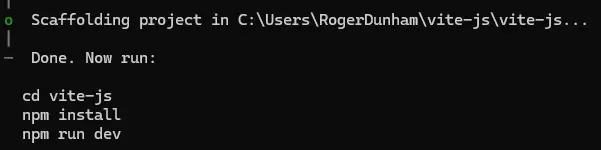
Figure 2 - the end result after a successful project creation.
Navigate to the directory and install the dependencies using npm install.
If you want, then you can run the project at this point. Although it currently is just the default “Vite + React” app, running it will verify that everything is working.
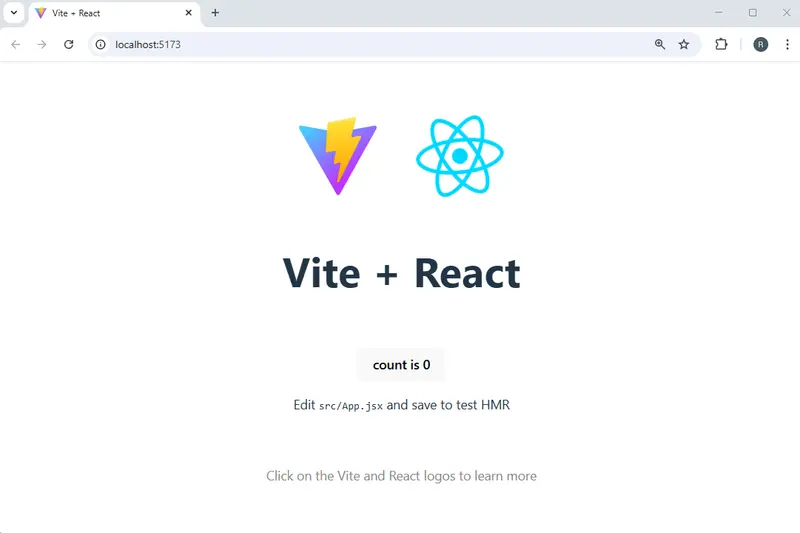
Figure 3 - The default app, running in a browser.
Step 2. Remove the default code
It’s awesome that Vite scaffolds a fully working app, but much of what was created isn’t needed, so let’s remove that.
You could do this from the command line or another IDE, but I’ll open the project in VSCode.
First, delete everything from the App.css file. We will want to add things back in as we move from a prototype to production, but for now we can delete all the contents.
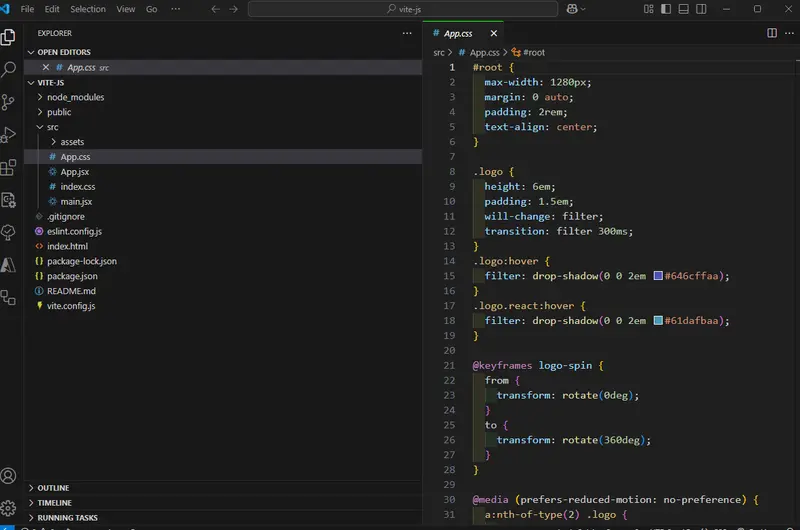
Figure 4 - The default App.css file contains lots of things that we don’t need at the moment. Delete all of the contents, so that we can concentrate on WebViewer.
You could also remove the contents of the index.css file at this point, but we will leave them there for now, as it illustrates how to solve a problem that you are likely to meet if you try using WebViewer in a Vite scaffolded app.
Next remove virtually everything from the App.jsx file.

Figure 5 - In App.jsx, virtually everything can be deleted.
Step 3. Install WebViewer
Great, we have now got to the point where we can start rebuilding. We need to add Apryse WebViewer, which we can do using npm install. Apryse was previously known as PDFTron and rebranded in 2023. As such the webviewer package still uses the name “pdftron” in its title.
npm install @pdftron/webviewerThis will copy the package into node_modules and add it to the package.json file.
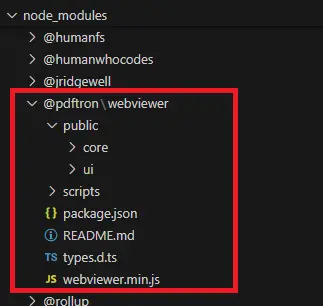
Figure 6 - This will copy the package into node_modules and add it to the package.json file.
Step 4. Copy the Core and UI folders
WebViewer is written using JavaScript and is intended to be used within the browser. As such, we need to make sure that our code can access the files at runtime. For security reasons, React can only access files in the project’s public folder, and it can’t access files from the node_modules folder.
If you search the Apryse GitHub sample repos you will find code that will copy the WebViewer files automatically as a postinstall script. For now, though, we will just manually copy the core and ui folders from node_modules into the public folder.
You could put the files anywhere within that folder, but we recommend putting them into a new folder lib\webviewer in order to keep your project well structured.
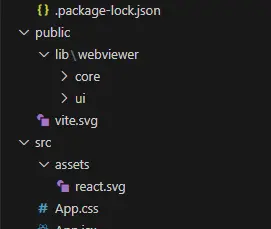
Figure 7 - The WebViewer Core and UI folders need to be copied into the project public folder.
Step 5. Create an HTML element where WebViewer will be mounted
Now within the App.jsx file, add some html to create a div where WebViewer will be mounted. We will specify the element with a useRef.
Your entire App.jsx file should now look like:
Step 6. Instantiate WebViewer
WebViewer is instantiated within a useEffect hook. You will need to specify the options that you want, and also include the element where it should be mounted. I’ll explain that in a moment.
The two important WebViewer options are:
- path: which indicates the location where you copied the WebViewer core and ui folders.
- licenseKey: which includes the trial or commercial license. If you haven’t got one, then it is free to get a trial license for WebViewer.
There are many other options that you can use (check out the WebViewer documentation), but for now we will just use initialDoc to specify the file that should be loaded when WebViewer is created.
The WebViewer constructor is async and returns a promise. When it resolves, you can use the instance object to work with WebViewer. We won’t need that just now for our simple app, but we will create an empty code block so that it is available when you decide to further explore what WebViewer can do.
Your entire App.jsx file should now look like:
At this point the code is effectively complete, so you can start the project using npm run dev.
However, at the moment, WebViewer doesn’t appear. If you look in the browser’s DevTools window you can even see messages about it.
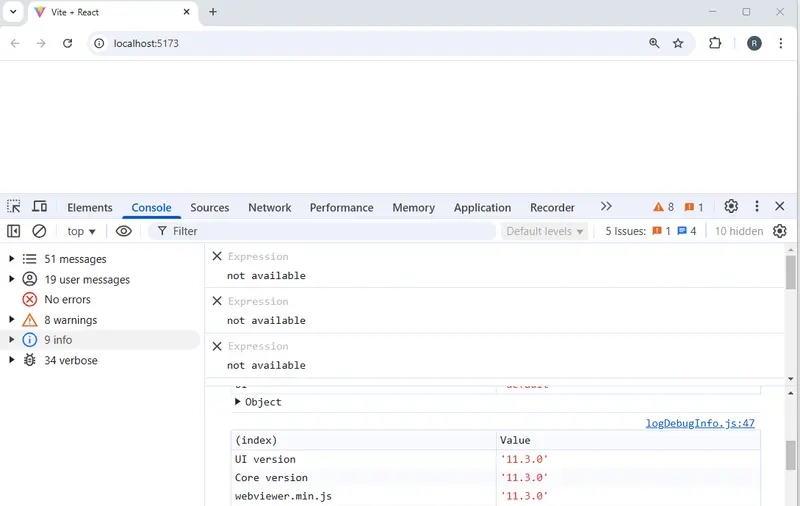
Figure 8 - DevTools indicates that WebViewer is being loaded, but it is not visible.
This isn’t a problem with WebViewer – it’s a CSS issue.
Step 7. Solving issues with CSS
In reality, this is an artificial problem – when you have a real app, you will spend a lot of time carefully crafting the CSS for it.
However, when you start with the demo app that Vite creates, it’s been designed to look good for displaying a couple of logs and buttons, but that isn’t doing what we need. In fact, you can take everything out of index.css apart from a little CSS for the body tag (though you could style that via a different mechanism if you wished). At the same time, we will add some styling for the webviewer class (yes, that styling should probably be in App.css, but this is just a Proof of Concept).
As such, replace the entire contents of index.css with:
Now when you reload the page you can see a fully functional WebViewer. Awesome work!
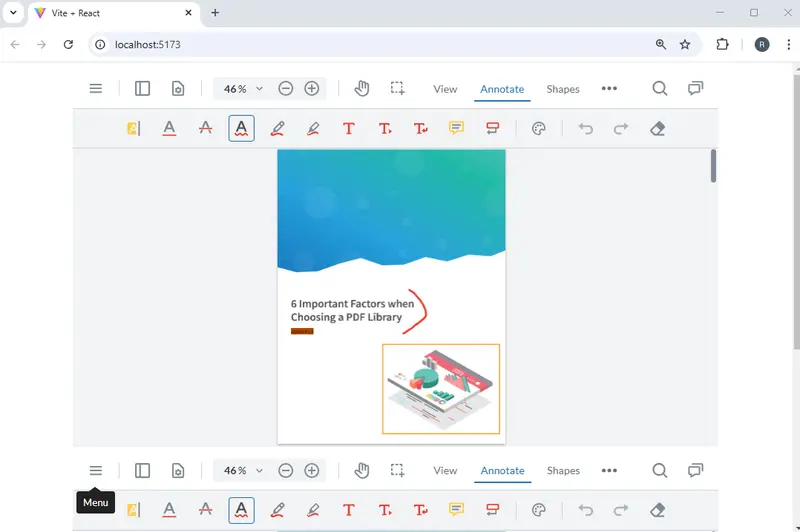
Figure 9 - WebViewer running within the browser, displaying a PDF.
Step 8. Solving issues with Strict Mode
There is still one problem.
Figure 9 shows WebViewer running in the browser, but there is a second WebViewer instance present!
Again, this isn’t an issue with WebViewer, it’s caused by recent versions of React. Prior to React v18, a useEffect with an empty dependency array would fire just a single time when the page loads, and this is used to construct WebViewer.
However, since React v18 if StrictMode is specified (and Vite does so by default), then the useEffect will fire a second time in Development builds. This isn’t an issue with Production builds though – so it’s an artificial problem.
A simple way to solve the problem in a Development build is to remove the StrictMode tags.

Figure 10 - The StrictMode tags are responsible for the useEffect firing twice.
Removing StrictMode isn’t a great solution though, after all, it was implemented as a way to find memory leaks. That might not be a problem in a proof of concept, but you would definitely care about them in a more complex project.
The better solution (which you could remove when you are ready for production) is to add another useRef constant, that records whether WebViewer has been instantiated, avoiding it happening a second time.
You can now run the project again, and have just a single WebViewer even in dev builds.

Figure 11 - You can now run the project again, and have just a single WebViewer even in dev builds.
Learn how to build a custom PDF editor with our SDK
Where Next?
Getting WebViewer running within a browser is just the beginning. With a huge range of functionality built in, you can now unleash the ability to work with PDFs and a range of other file types including DOCX files which can be edited directly within the browser with no need for Office to be installed. If you are building applications using .NET technologies, you can also learn how to add WebViewer to a Blazor application.
Don’t just take my word for it though – try it out for yourself. Get a trial license and see what you can do. If you have any questions, then you can reach out to us on our Discord channel.