Roger Dunham
Published July 12, 2024
Updated May 18, 2026
5 min
Creating a Document Processing App using Node.js and Express: Part 1
Roger Dunham
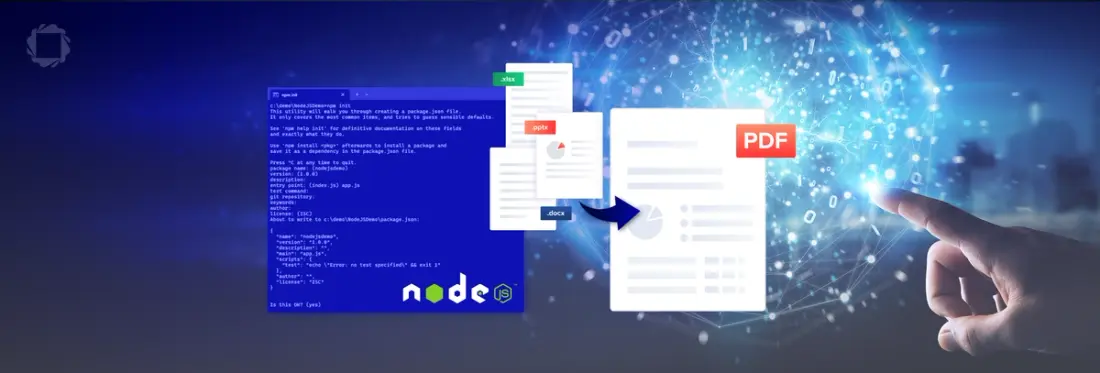
Summary: Looking to work with PDFs and other documents in your browser but don’t know how to get started? Over the next three articles, we teach you how to set up a Node.js and Express server, convert documents to PDF, and then perform a range of tasks with PDFs.
Introduction
This is the first part of a short series that will guide you through the steps needed to set up a simple server that uses the Apryse SDK to convert documents from one type to another.
The Apryse SDK is a powerful library that allows you to own the full document and data lifecycle by deploying your app on your own infrastructure without worrying about third-party server dependencies.
We will see just a fraction of its functionality as we progress through this series and learn about:
- Creating a simple Node.js server using Express
- Converting documents into PDF using Apryse SDK
- Adding further functionality to the server
Creating a Simple Node.js Server
If you are already familiar with how to get started with Node.js and Express, feel free to skip to a later part of this series.
I’ve said that we will use Express, but what is that?
Express (also known as Express.js) is described as a flexible framework for building web apps and APIs, as well as the de facto standard server framework for Node.js. Leveraging Express and Node.js together enables devs to add powerful back-end functionalities to their web and mobile applications and rapidly create feature-rich user experiences.
One report says that, in 2024, hundreds of thousands of websites are based on Express. Clearly, it is a technology that is worth getting to know.
Let’s dive in and create a simple Node.js and Express based project.
Prerequisites
We are going to use npm and Node.js, so if these are not installed yet, follow this link to download and install Node.js and npm.
npm and Node.js are both really popular, and as a result, they are being actively developed. That’s great, but it also means that their behavior may change between different release versions. If you run into problems, feel free to contact us via our Discord channel.
I should add that for this article, I’m using Windows 11, npm 10.2.3, and node 18.19.0, but the process is essentially the same for macOS and Linux.
Step 1: Create a folder for your project
Open a terminal window and create a new folder, then navigate into the new folder.
Step 2: Initialize the new project
npm init This will lead you through the steps needed to initialize the project. You can use all defaults, but I set the entry point to app.js, not index.js, just because that is my preference.
You might also want to set up a git repository and various metadata (for example, a description), but I’m skipping that for now.
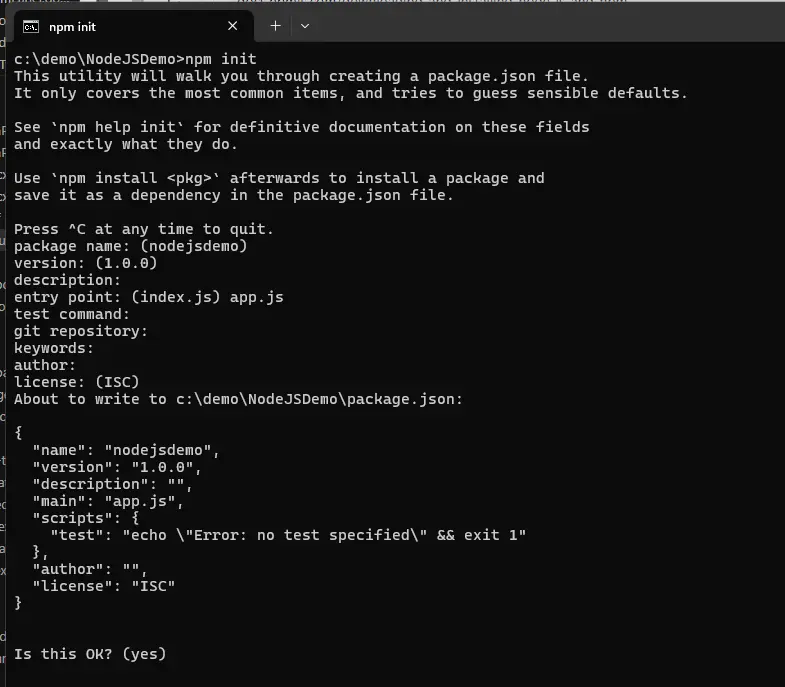
Figure 1 - using npm init to set up the package.json file.
Provided that everything looks OK, click on return, and the information will be copied into the package.json file.
Step 3: Open the project in an IDE
You could do all the rest of the steps directly in the terminal window, but I like working in an IDE, specifically VS Code, so the following steps and images assume you are using that. VS Code is not installed by default, so you may need to download it.
Once downloaded, it can be started from a terminal by entering:
code . VS Code will open, and you can see that our project so far holds just the package.json file.
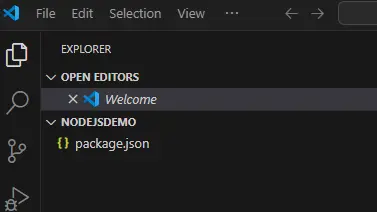
Figure 2 - Our project so far just has the package.json file.
If “code .” does not work, then you can just manually open the folder in VS Code.
Step 4: Add basic dependencies
We need to add a couple of dependencies that our project will use.
Open a terminal window in VS Code and install Express:
$ npm install express --save Next, we will install nodemon, which enables hot reloading of the server when we make changes to our code. In versions of Node.js since 18.11, there is a watch feature that allows hot reloading without relying on nodemon, but for this article, we will continue to use nodemon since watch remained experimental until Node.js 22, and currently the highest support version of Node.js is 18.
$ npm install nodemon --save Step 5: Add a start script in package.json
Next, add a start script into package.json. Add the following under script:
"start": "nodemon app.js"
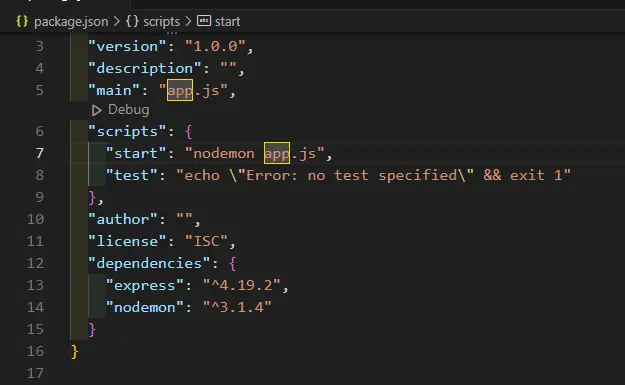
Figure 3 - Adding the start script to package.json.
Step 6: Create the file that will be our entry point
We have specified in package.json how to start the application, but we have not yet created a file for it to use, so create a new file called app.js (or whatever filename you want for your entry point).
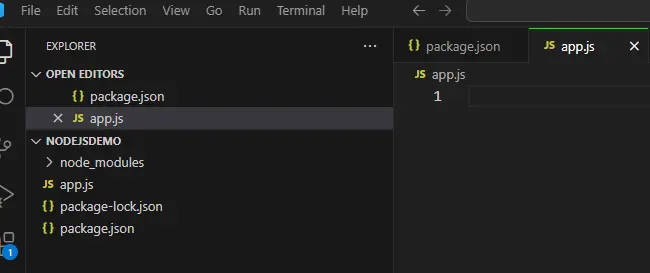
Figure 4 - The project in VS Code after creating the file for our entry point.
Step 7: Add content to the app.js file
If we start the app at the moment, then there wouldn’t be an error, but we also won’t see anything since nothing is defined, so let’s add some content to the server.
We can create a simple Express.js Server with just a few lines of code.
Note that, in this example I am using port 4000 for the server, but you may want to use a different port.
Step 8: Start the server and navigate to the URL
Great! We are now ready to start the server, so do so by entering npm start in a terminal.

Figure 5 - After starting the server it will inform you of the port that it is listening on.
Then navigate to the specified path http://localhost:4000
You should see the server running but since we haven’t created any endpoints yet, there will just be the strange looking message Cannot GET/. That is expected and we will solve that shortly.
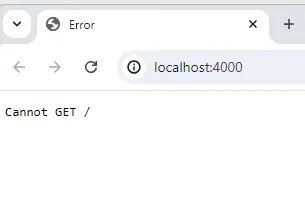
Figure 6 - Currently the server has no endpoints specified - so navigating to the URL gives an unhelpful message.
If you see something else, or run into any errors, check your project, and make sure that you haven’t made a mistake.
Step 9: Add a simple end point
Let’s add an endpoint that will allow us to verify that the server is giving us something.
If you navigate to the server now you will see:
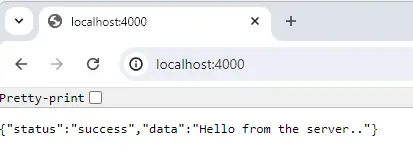
Figure 7 - The output of our first endpoint. This verifies that our server is behaving as expected.
Step 10: Show a listing of files
That’s a great start, now let’s get our server to provide us with some information that it looks up, rather than just returning a static string.
Create a new folder directory called files within your project and drop a couple of files into it. It doesn’t matter what they are.
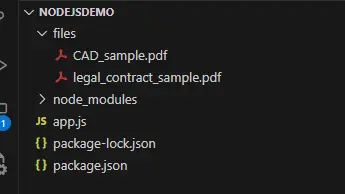
In my case I have added a sample legal contract, and a sample CAD file, but the files that you use are entirely up to you.
Now add a new API endpoint to the app.js to return a list of files in JSON format.
This code reads the contents of the /files/ folder (relative to the current working directory) and returns the list of files.
We can now see the names of files that were found in the files folder. If you want then you can add more files to the folder, reload the page and verify that what you see agrees with the files that you know are in that folder. Fantastic!
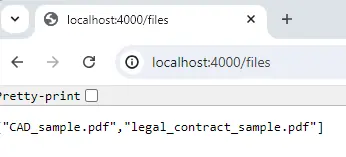
Figure 8 - The new endpoint shows the names of the files in this folder.
A Slight Aside: MIME Types
You will see in the code for the latest endpoint that we set a header for Content-type. This tells the browser what kind of file to expect. In that code it will always be application/json but other types are possible – these are generally known as MIME type (it stands for Multipurpose Internet Mail Extensions, but you don’t need to know that).
In the next step of the project, we will be working with lots of file types so we will use a file that maps various file extensions to the Content-type string.
Create a file called mimeType.js as a sibling of app.js and copy the following code into it. This is just a subset of available MIME types – but it will be enough for now.
Step 11: Returning one of the files
As the last step in this article let’s add one more endpoint, and have the server return the file that we specify in the browser.
Express takes the part of the URL that follows ‘files’ and stores it in the request params (via the object req.params) as filename. The code then extracts the filename, reads the specified file, looks up the MIME type based on its extension and returns the file contents.
Head back to the browser and navigate to http://localhost:4000/files and add the name of the file that you want to download, for example: http://localhost:4000/files/legal_contract_sample.pdf
The server will send that file to the browser for it to display based on its Content-type.
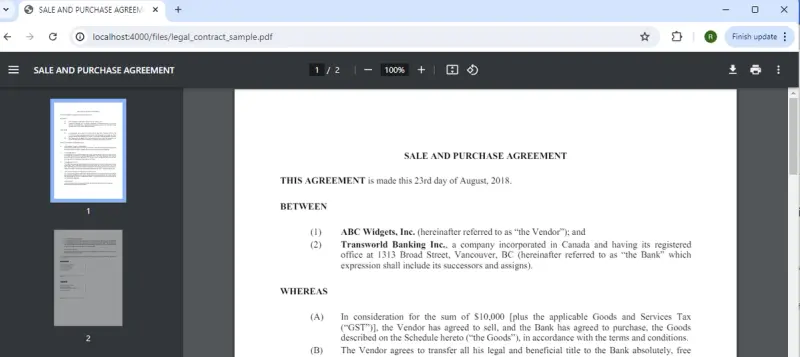
Figure 9 - We now have a server that will return the file that is specified in the URL.
A word of warning – the code that we have created allows the user to enter a filename and have that file returned.
In practice, though, you should sanitize user inputs and restrict exactly what can be returned to prevent this becoming a potential security loophole.
For more information, check out this article about best practice security with Express.
More to Read:
Wrapping Up
That’s it. Although in this case it was a PDF that was loaded, if we had specified a Word document, or a text file, or an image or a sound file then the browser would have done its best to render that file. Awesome!
Our code might need refactoring to tidy it up, but we have a working server that lets us list whatever files are in a specific folder, then request the browser to display any of them.
In the next part of this series, we will look at how we can do more than just display files that we already have. We will see how we can use the Apryse SDK to make changes to the files before they are returned to the browser – allowing you to add value to the information that you have stored.
If you can’t wait to read that article, then check out the Apryse SDK Node.js documentation and start using it today.


