Roger Dunham
Published May 10, 2024
Updated May 18, 2026
8 min
How to Implement WebViewer for Semantic Text Comparison Support Using React
Roger Dunham
Summary: Spotting changes in PDFs can be a tedious task. Apryse WebViewer simplifies this process by providing an intuitive way to compare two PDFs, effectively highlighting additions, deletions, and modifications. This article delves into the comparison process and even explores extending it to DOCX comparisons.
Introduction
Here’s the problem: You have two versions of a document.
The document might be a contract, a technical specification, or even an invoice. It doesn’t really matter – the issue is that you want to be able to tell what, if anything, has changed, including additions, deletions, and modifications.
Apryse WebViewer makes this process easy. In this article, we will look at how to compare two PDFs, then learn how we can extend this to compare DOCX files.
Why Simple Isn’t Necessarily Best
There are plenty of free tools out there that let you extract text from a PDF. Once you have the text for both documents, you can then easily compare the text on a character-by-character basis using tools like Notepad++.
It’s a simple idea, which is good. However, if there are many differences it could soon become overwhelming.

Figure 1 – A raw text extraction from two related documents compared character by character
Another comparison method would be to convert both documents into images and then overlay one on top of the other, then perform a pixel by pixel comparison. For some things that is great, but even a minor change in layout – changing font size for example – can result in many pixels being different.
The smarter solution is to use semantic text comparison. That allows you see which words have changed rather than which characters.
Read our overview of semantic text comparison.
Let’s look at how to implement semantic text comparison using the Apryse WebViewer.
However, if you're ready to dive in, head on over to the Apryse Showcase which has a fully functioning sample available.
Implementing a Side-by-Side Semantic Text Comparison Tool
For this walkthrough, I am using Vite and React – and starting with basic code that creates and displays a WebViewer as described in this video on creating a PDF viewer.
Whether you’re using either that video or the React sample, what’s important in that code is that it creates a div, then uses the id of that div to initialize a WebViewer constructor within a useEffect.
Similar examples are available for other frameworks, including Vue, NextJS, and Angular, so if you are using those frameworks, you should be able to follow along. In that case, you will need to tweak the code snippets to work with your specific framework. If you get stuck, please reach out to us on Discord.
Once you have a basic WebViewer sample working, replace the contents of the useEffect (or equivalent) block with the following code:
Now, save the file and start the server (which, for a Vite-scaffolded app, is done using npm run dev). This will result in WebViewer opening with two side-by-side panels visible.
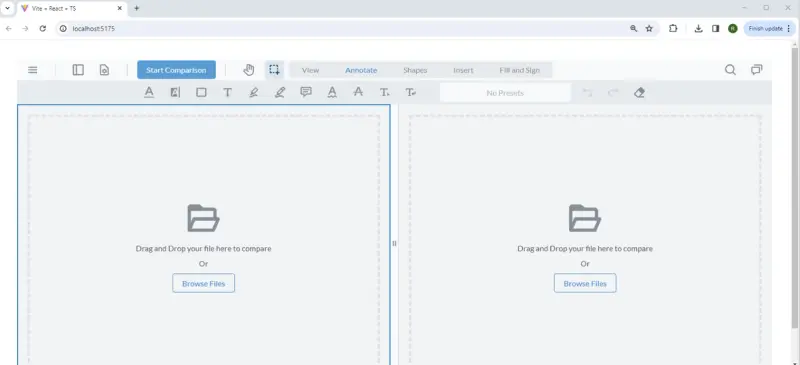
Figure 2 – Side-by-side view in WebViewer
Next, select the files that you want to compare by clicking the Browse Files button, once for each panel, and click on Start Comparison.
That’s it – the UI will then highlight the difference between the documents.
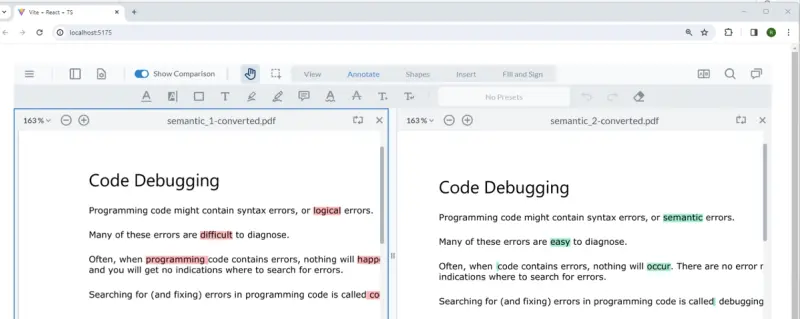
Figure 3 – Semantic text differences shown in the side-by-side view
That was super easy!
WebViewer actually provides three ways to identify the semantic differences between two documents:
- Visually within the side-by-side view (as we have just seen)
- Within the Compare Panel available in the UI
This is enabled by clicking on the Compare Panel button.

Figure 4 – The location of the Compare Panel button in WebViewer
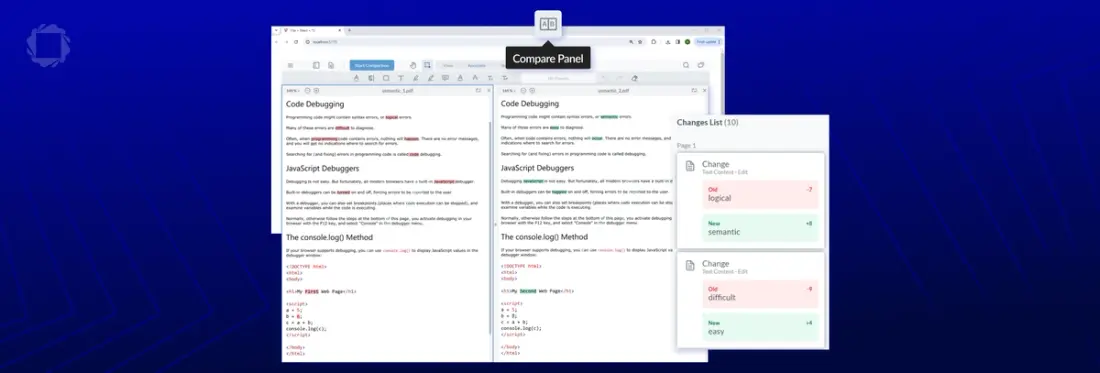
At which point, a panel will appear showing all the differences in the old (left) and new (right) documents.
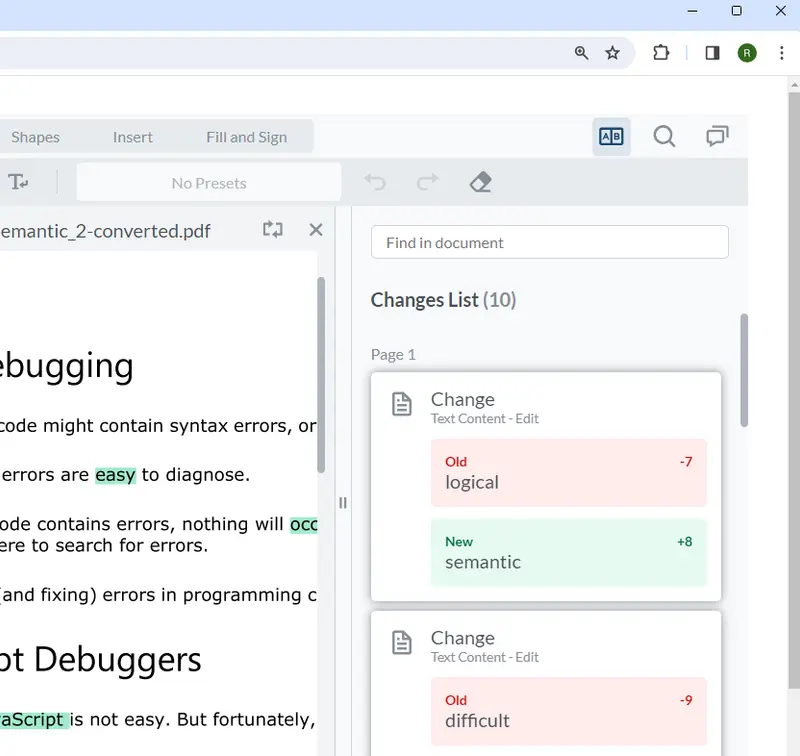
Figure 5 – The panel that shows the changes between the two documents
3. As programmatic output
This can be done using the output of the method startSemanticDiff(). The ability to get programmatic output isn’t available out of the box, but there is a great sample for showing how to programmatically get semantic text differences. That sample also shows how you can change the way differences are marked in WebViewer.
startSemanticDiff() returns three objects – an array of the differences in the first document, an array of the differences in the second document, and a count of the differences.
Being able to easily access that data opens up a wealth of options for how you can consume it.
Important Parts of the Code
fullAPI: true
WebViewer’s standard API provides document viewing and basic PDF manipulation APIs, but doesn't provide support for more advanced document processing. Semantic text comparison requires more complex processing, so fullAPI must be set to true.
Read more about the Full API for WebViewer.
UI.Feature.ComparePages
Semantic text comparison is primarily controlled by the feature UI.Feature.ComparePages. When enabled it causes a Start Comparison button to be shown in WebViewer.
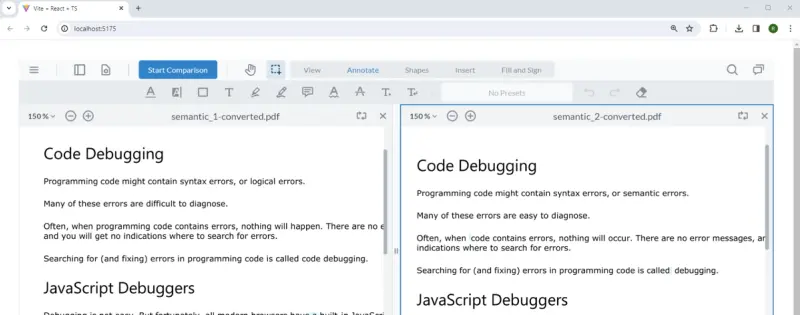
Figure 6 – The Start Comparison button in WebViewer
Clicking on that button converts it to the Show Comparison slider and makes the Compare Panel button visible.
Sliding the Show Comparison slider to “on” shows the differences between the two panes.
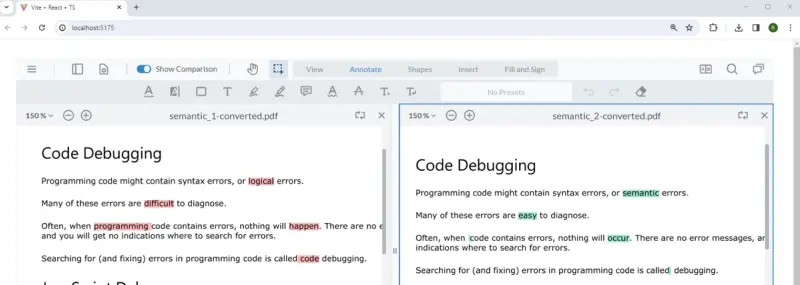
Figure 7 – WebViewer showing differences when the Comparison Slider is enabled. The Changes List is not visible because the compare button has not been toggled.
Clicking on that Compare Panel button results in a panel that displays the Changes List as we previously saw.
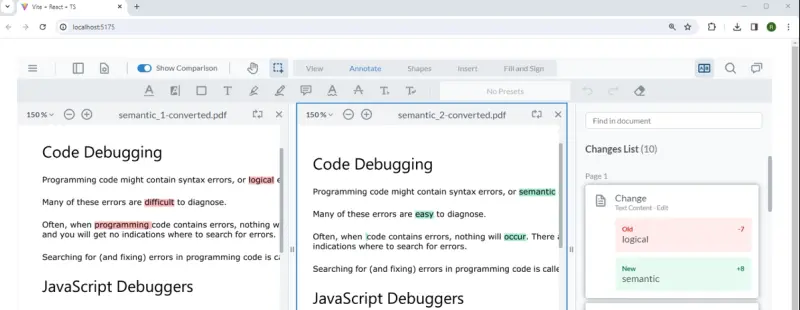
Figure 8 – WebViewer showing changes in both the side-by-side view and Changes List
Sliding the Show Comparison to “off” will stop the differences being shown in the two panes, but will not hide the Changes List panel where the differences are still visible. To hide that panel as well, you need to click on the toggled Compare Panel button.
Showing the Side-by-Side Panels
By itself, UI.Feature.ComparePages being enabled is not enough for comparisons to be shown. One of two options is needed to actually show the side-by-side panels:
- UI.Feature.SideBySideView
- UI.enterMultiViewerMode();
Let’s look at each.
UI.Feature.SideBySideView
When enabled, this adds an option to the View Controls that allows side-by-side panes to be toggled on and off.
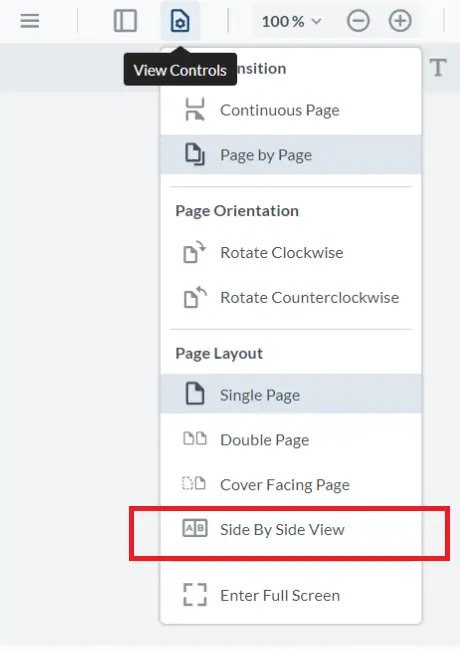
Figure 9 – The side-by-side viewer option in the View Controls menu. This is only available if UI.ComparePages is enabled.
In fact, the ability to see differences is built into the side-by-side functionality and will work even without UI.Feature.ComparePages being enabled.
However, if UI.Feature.ComparePages is not enabled, the Compare Panel will not show. Furthermore, it will not be (easily) possible to have two files open without seeing the differences between them – which could be very frustrating if you just want to see two completely different files at the same time.
UI.enterMultiViewerMode();
Calling UI.enterMultiViewerMode() will programmatically open the side-by-side panes when WebViewer first loads (this mechanism was used in the sample code used in this article).
If you are using this mechanism, you may also need to use the function exitMultiViewerMode() which will return the viewer to single document mode.
Deprecated Function – UI.Feature.MultiViewerMode
Prior to WebViewer version 10.5, compare functionality was implemented using:
instance.UI.enableFeatures([UI.Feature.MultiViewerMode]); This single line created the side-by-side view, added the compare button, and added a Compare Pages option to the View menu.
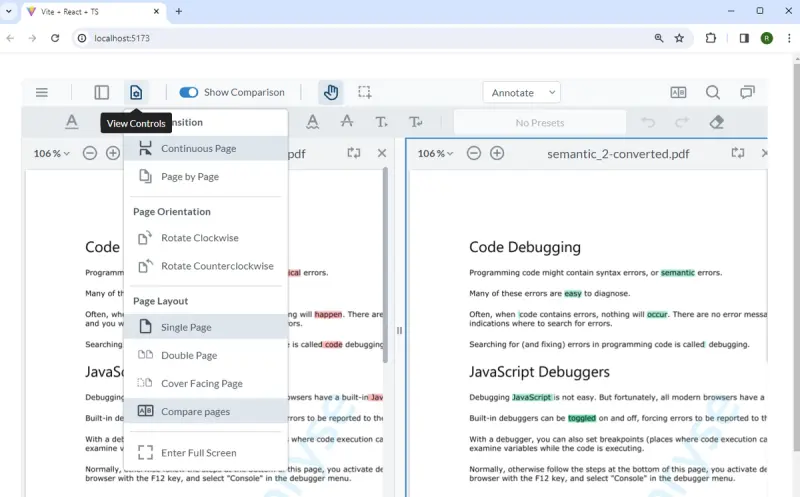
Figure 10 – The View Controls option with the deprecated MultiViewerMode enabled, showing the Compare Pages menu option
While this allowed document comparison to be implemented with less code than the new method, it made it difficult to use the side-by-side view for anything other than document comparison.
As such, MultiViewerMode feature was replaced with SideBySideView to only display the button, and enterMultiViewerMode was added to activate multi-viewer mode, addressing the inability to separately enable the button without entering the mode.
MultiViewerMode is now deprecated and will likely be removed by the end of 2024.
Working with Word Documents
Out of the box, semantic text compare functionality only works with PDFs. While you can view PDFs and other documents like DOCX files side by side, the Start Comparison button is disabled if both files are not PDFs.
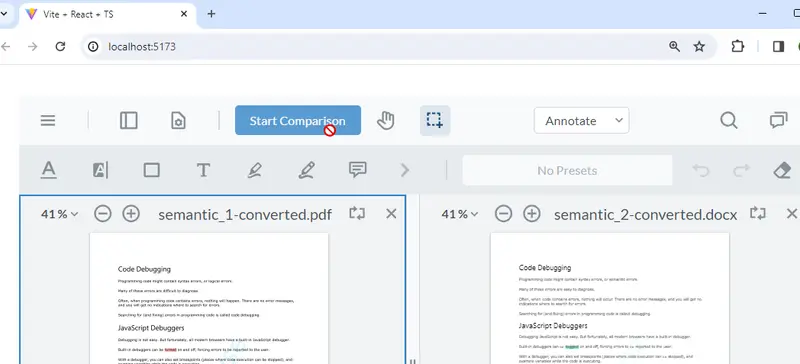
Figure 11 – If Start Comparison is not clickable, it's probably because one of the documents is not a PDF.
Thankfully, extending the sample code to work with other document types is easy, since WebViewer can convert many document types to PDF on the fly.
Adding loadAsPDF: true to our code is all that is needed to support comparison of other document types. (Note: fullAPI is also needed for on-the-fly conversion, but that was already set to true for this sample.)
Now if a DOCX file is selected it will be seamlessly converted to PDF, and the differences between the selected files will be visible within WebViewer.
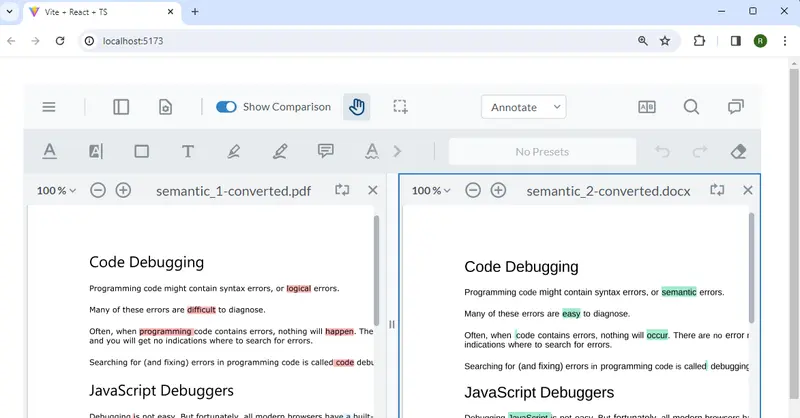
Figure 12 – By using loadAsPDF, PDFs and DOCX files can be compared.
Conclusion
Apryse WebViewer makes it easy to implement semantic text comparison, allowing you to understand not just where changes occur but also the context of those changes within an entire document. It is also extremely easy to implement.
But WebViewer also offers more functionality than just a comparison tool. We have seen how it can convert Office documents to PDF (without the need for an Office license). It can also be used to annotate and manipulate pages, edit PDFs and DOCX files, apply redaction, work with digital signatures, and many other options – almost all of which are performed entirely within the browser, offering security.
All this is backed up with the Apryse SDK that provides powerful server-side functionality to take your document processing even further.
There is a wealth of documentation available, but you can also reach out to us on Discord If you prefer.