Roger Dunham
Published October 03, 2024
Updated May 18, 2026
4 min
Getting started with WebViewer in Salesforce
Roger Dunham
Summary: Learn to integrate Apryse WebViewer with Salesforce for a streamlined document management experience. Edit and sign PDFs directly within the platform, enhancing productivity.
Introduction
Salesforce describes itself as “cloud-based CRM software” that “makes it easier for companies to find more prospects, close more deals, and connect with customers in a whole new way, so they can provide them with amazing service at scale”.
But if you are reading that article then you probably already knew that.
So, if Salesforce is so great, why would you want to use Apryse WebViewer within it?
Well, WebViewer allows you to view, interact with, edit and digitally sign PDFs, and other documents, entirely within the Salesforce UI. That means you don’t have to download the document into another app to use it, saving time and making your data more secure. And if that wasn’t enough, it will even let you automate document generation using data from Salesforce.
Sounds good?
In this article we will look at how to use a simple GitHub repo to create an app that contains WebViewer, deploy it to an org, and see it running within the Salesforce UI.
In another article in this series, we will then see how we can make some basic changes to the app – illustrating the way that you can configure WebViewer to work, and look, the way that you want, while having to perform very little coding yourself.
Read more about What is WebViewer.
We are going to look at this in three parts.
- Creating a WebViewer App that you can use in Salesforce
- Uploading the app to Salesforce
- Using the app within Salesforce
Prerequisites
- A dev account with Salesforce
- Salesforce CLI
- Node and NPM
- git
- This article was written with the following versions:
- Windows 11
- Npm 10.8.2
- Salesforce @salesforce/cli/2.54.6 win32-x64 node-v18.19.0
- git version 2.46.0.windows.1cls
Creating a WebViewer App that you can deploy to Salesforce
Apryse has created several samples that demonstrate the functionality that WebViewer offers.
For now, we will just look at a simple one that allows us to view, annotate and redact files within WebViewer. It is available from a GitHub repo and contains everything that you need to get started.
Step 1: Create a new folder for your app
In my case I will call it salesforce-app.
Step 2: Clone the repo
Navigate to the new folder and clone the repo into it.
git clone https://github.com/ApryseSDK/webviewer-salesforce.git 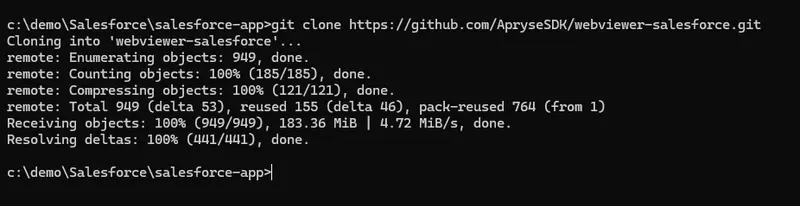
Figure 1 - The typical result after successfully cloning the repo.
This creates a new folder called webviewer-salesforce, so navigate into that and you will see that there are lots of files present.
Included in the GitHub repo is a set of “optimized” WebViewer files – these files are not necessarily the latest ones that are available, but we will see in the next blog in this series how to update the version of WebViewer that you are using.
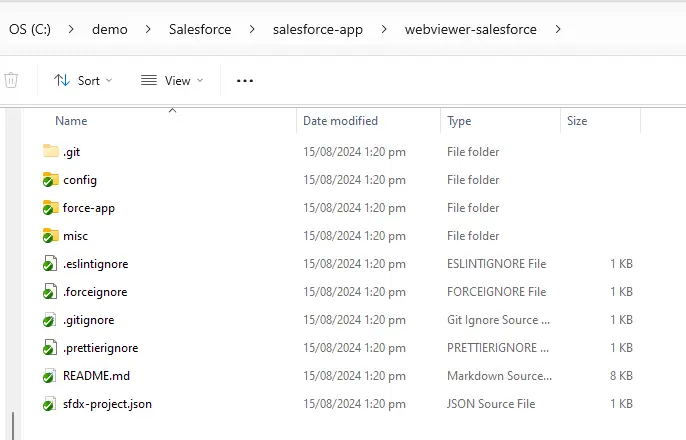
Figure 2 - Folder contents after cloning the app.
You could, if you wish, make changes to the files at this point, but let’s just deploy what we have, and make changes later on.
Deploying the Project
I’m assuming that you will deploy to a scratch org, but the project can be deployed to any org, so you may wish to skip some of these steps if you are doing that.
Step 3: Authenticate with your hub org
There are various authentication methods available. In this example though, I will authenticate via the browser.
sf org login web --alias devHubThis causes the browser to display an authentication form, so enter your username and password.
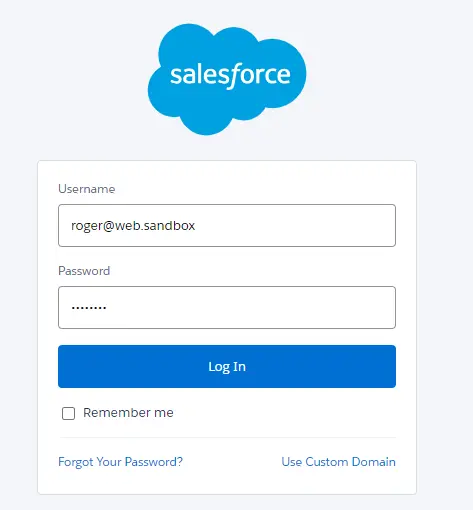
Figure 3 - If authenticating via web then you will need to enter your account details here.
Once you have been authenticated, you can return to the console window.
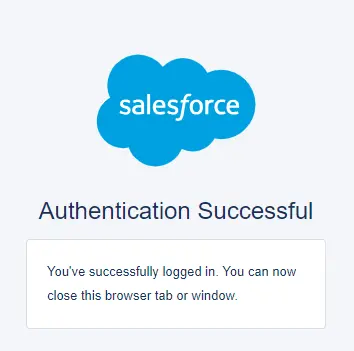
Figure 4 – The dialog showing that it was a successful authentication. At this point you can return to the console window.
If you have not previously done so, then you will need to Enable Dev Hub.
Step 4: Create a scratch org
In this example I used ‘myScratchOrg’ as an alias (it’s not essential to use an alias, but it is more friendly than having to use a name such as test-tnufi77g9wh7@example.com).
I also found that I had to specify the name of my Dev Hub org (in this case ‘roger@web.sandbox’), and the edition (in this case ‘developer’)
sf org create scratch --alias myScratchOrg -v roger@web.sandbox --edition developerAfter a few moments a new scratch org will be created.
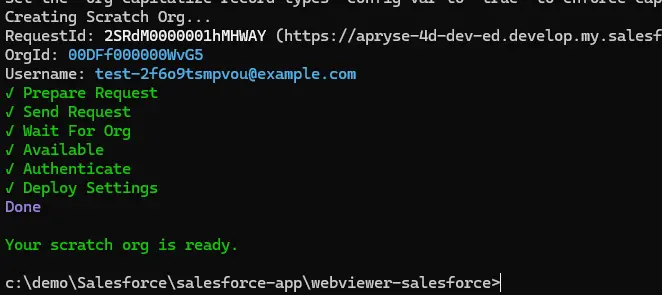
Figure 5 - The result of successful scratch org creation.
One problem that you may run into is that you can only have three active scratch orgs - if you reach that then you will need to delete one (note: you can only create six scratch orgs per day).
You can get a list of your existing Orgs using:
sf org list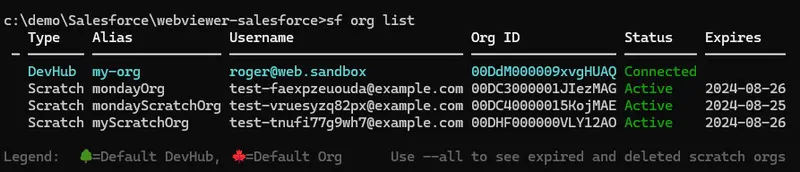
Figure 6 - A typical list of orgs. Note that there is a limit of three active scratch orgs.
You can now delete one of the orgs using either the Alias or the Username.
sf org delete scratch -o [org name]Step 5: Push the app to your org
Once you have your Org created, deploy the files there using:
sf project deploy start --target-org myScratchOrgThe first time that you do this, there will be a lot of files to upload so it may take a few minutes.
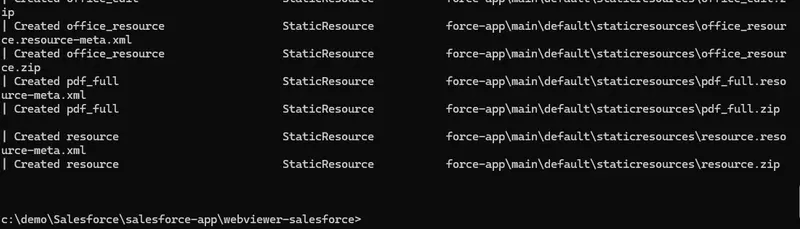
Figure 7 - At the end of the deployment process.
Step 6: Open the Org
That’s it. All you need to do now is open the org in the browser.
sf org open --target-org myScratchOrg
Figure 8 – A scratch org, opened in a browser.
Using the app within Salesforce
Step 7: Launch the App from within the browser
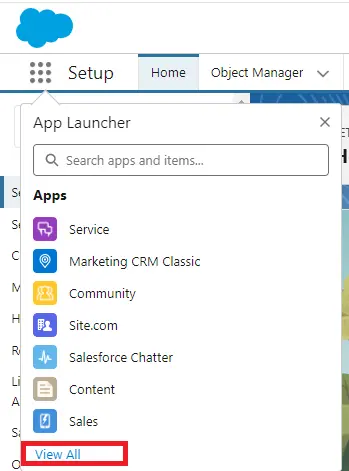
Figure 9 - The App launcher menu in Salesforce
This will show the list of apps that are available, including the one that you have just deployed.
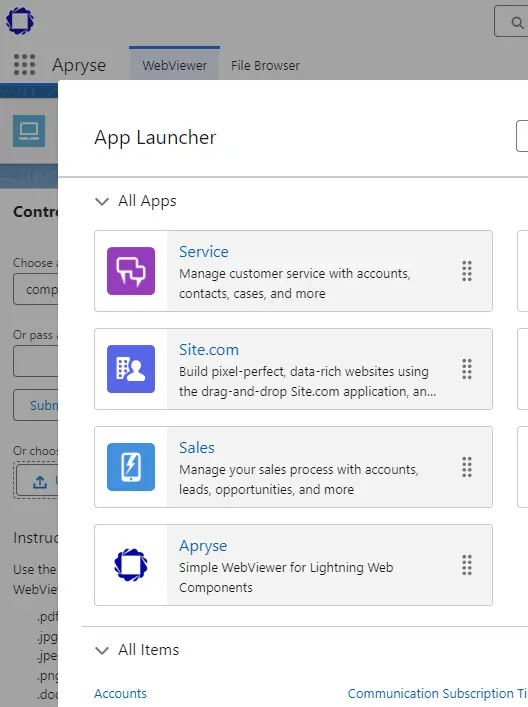
Figure 10 - The Apps available within Salesforce including our newly deployed one.
Click on the new app, and within a few seconds you will have WebViewer running within the Salesforce UI.
Choose a file from the list available in the controller; or enter a URL; or upload a local document, and it will be shown within WebViewer. Alternatively, WebViewer has been configured to allow you to pick files directly from within it.
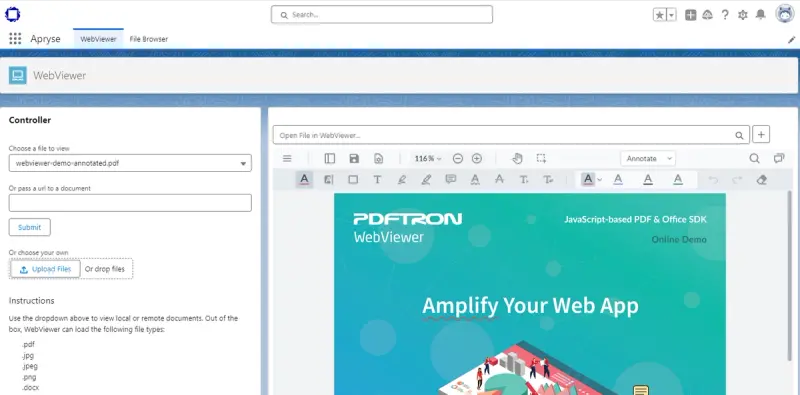
Figure 11 - The working app! Choose a file either from the controller or the hamburger menu.
Nice! That’s the app working. Having chosen a file you can add annotations, or rotate pages, even redact text – in fact all of the great things that WebViewer supports are available.
Updating the version of WebViewer
At the time of writing the sample code uses WebViewer 10.9.0 – You can find the version number by looking in the DevTools Console window.
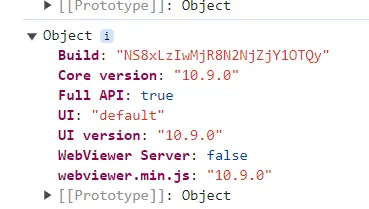
Figure 18 - Typical WebViewer version information.
Updating the version is easy, but there are a few steps involved, so we’ve put together a separate article for this.
Learn more about updating the Version of WebViewer used in Salesforce.
Where Next?
If you have followed this article, then by now you should have WebViewer running within the Salesforce UI, with the ability to view, annotate and redact PDFs and DOCX files.
We’ve put together a “Getting Familiar with WebViewer in Salesforce” article which will show you one way that you might want to go – changing the appearance of the UI and the name of the app.
Before you go there though, it’s worth noting that the code sample already contains a number of classes that we haven’t used which can help you to integrate WebViewer with data from Salesforce – but that is beyond the scope of a Getting Started article, so you check out the WebViewer in Salesforce documention for more information.
Beyond that it depends on what you are trying to achieve. WebViewer supports a vast range of functionality – for example you could modify the content of the PDF before it is opened, or allow different users to be able to see different annotation types.
You can even create an app to support Digital Rights Management (DRM), so that your files can only be read in that app – then if your files were to ‘leak’ they would not be openable by anyone without your app. In a world where maintaining confidentiality is of increasing importance, that, in itself, could justify your use of WebViewer in Salesforce.
We are currently working on a range of other articles to help you get started with WebViewer in Salesforce – check those out as they appear.
If you run into any problems, then contact the team on Discord and they will be happy to help.