Heather Dinsdale
Published October 26, 2022
Updated May 18, 2026
3 min
How to Validate Digital Signatures in PDF Using JavaScript
Heather Dinsdale
Related Products
This tutorial demonstrates how to verify digital signatures and certificates using JavaScript right in your web application with just one component, Apryse’s WebViewer SDK, and a few lines of code.
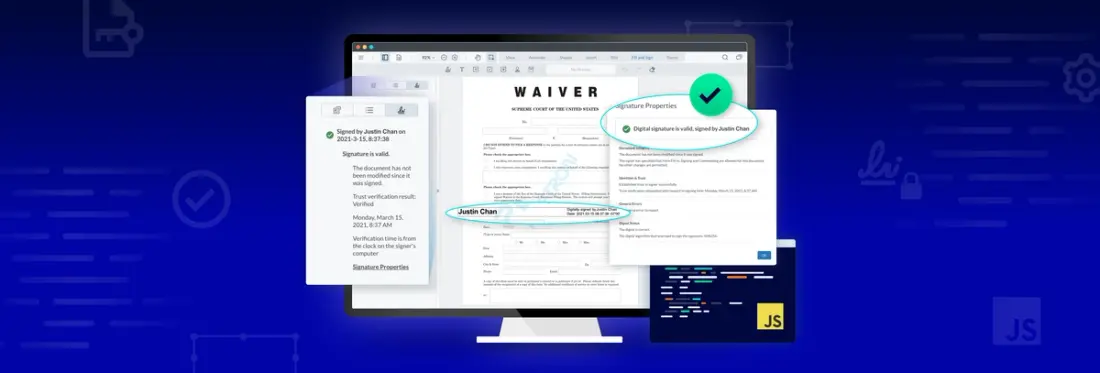
At the end of the process, you’ll see your validated signature and document displayed in WebViewer:
WebViewer extracts, validates, and displays results in any web app
For more in-depth information, see our certificate authority documentation. You can also check out our digital signature validation sample.
Additionally, there’s a full code sample on using a digital signature API to digitally sign, certify, and/or validate PDF documents. See the documentation for digitally signing PDFs in JavaScript.
Learn how digital signatures ensure document authenticity in the age of AI.
Step 1: Install WebViewer
So you want to set up an environment where your users can digitally sign, validate and view documents in just a few steps, but you aren’t sure where to start. Thankfully, with Apryse’s WebViewer, you can easily add and display digital signature verification results for the user to see.
Note: Since this component uses JavaScript and WebAssembly, signatures are validated right in the client application. No data leaves the client during validation, ensuring no sensitive information is transmitted outside of the client application.
Let's start with installing WebViewer. WebViewer supports a full range of frameworks such as React, Vue, and Angular. You can even demo new features in your environment today, no trial key required. Just visit our get started page.
There are different ways to install WebViewer, but we’ll use NPM for this example.
To use WebViewer for validating digital signatures, download and install versions 8.0+ via NPM. (The following examples are all for version 8.0+.)
Since WebViewer requires static resources to be served (which cannot be bundled), an extra step involves manually copying static files into your dist directory.
Prerequisites
First, install Node (which includes NPM).
WebViewer does not require Node, NPM, or the node_modules directory. These tools are only required to run the samples.
1. Install via NPM
Note: The following instructions are for JavaScript.
Run the following command in your project:
npm i @pdftron/webviewerThis installs the main JS entrypoint, and downloads static assets required for WebViewer to run.
2. Copy static assets
Next, copy the static assets required for WebViewer to run into a public location that is served via HTTP/HTTPS (usually a dist or build folder). The static files are in:
node_modules/@pdftron/webviewer/publicYou can add a script to your package.json that moves the static files for you.
This copies all required files into the dist/public folder after your build is complete.
3. Usage
When using WebViewer in your code, you must tell it where you copied these static files using the path parameter.
For example, if you copied the static files into dist/public/webviewer, your code would look something like this:
For info on the next steps, visit integrating WebViewer via NPM.
Digital signature properties and functions are available in the API documentation.
Step 2: Export the Trusted Certificates List into WebViewer
Note: Please consult your Adobe license terms and make sure you have any necessary permissions before proceeding.
After installing WebViewer, the next and last step is to set up your trust list. This list tells WebViewer which digital signatures and certificates are safe and already validated by a reliable certificate authority. Since users probably want digital signature validation results similar to Adobe’s, we’ll export the Adobe Approved Trust List and EUTL to WebViewer. This allows your users to validate the results using the same public certificates that Adobe Reader uses. They can then open the signed documents in their own web application, without leaving their environment.
Use the following steps to export the list into WebViewer:
1. Open Adobe Reader.
2. Click the Edit menu button on the top left.
3. Go to Preferences.
4. Go to the Signatures category on the left.
5. Click the More... button under the Identities & Trusted Certificates section.
6. Go to the Trusted Certificates list on the left.
7. Highlight all the certificates on the list (click on first, hold Shift, click on last).
8. Click Export.
- Leave the default radio button options.
- Save the exported data to a file.
- Choose Acrobat FDF Data Exchange.
9. Save the .fdf file.
10. Import the .fdf file via the UI.VerificationOptions.loadTrustList API, for example, extending the code example above:
WebViewer then attempts to validate digital signatures in the PDF documents using the public certificates.
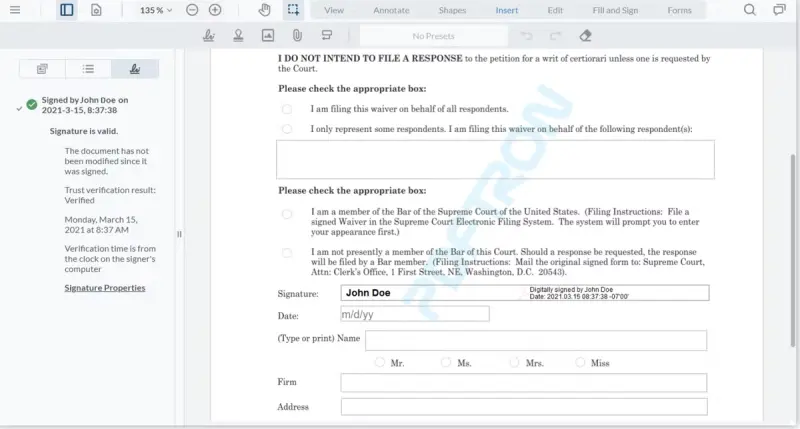
And that’s it! Once these steps are complete, you can open a digitally signed document in Apryse WebViewer and view the document and its signature properties, like so:
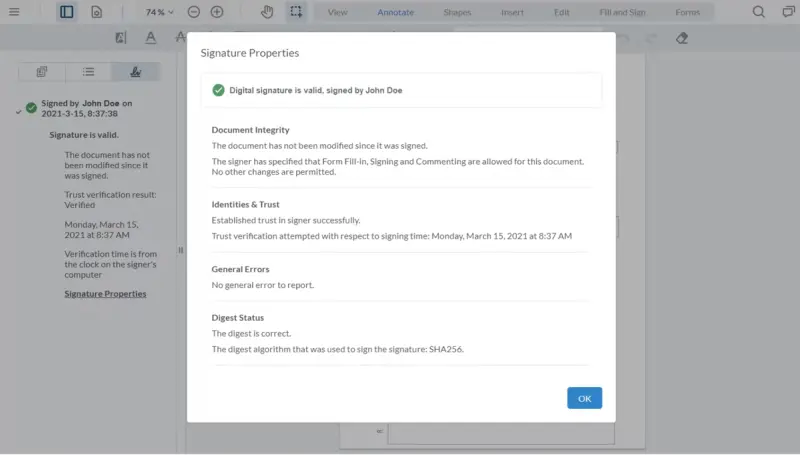
Valid digital signature properties displayed in WebViewer
What's Next
In this tutorial, we’ve set up an environment where users can validate digital signatures right in their web app using a single component, WebViewer. We installed WebViewer and exported a trust list, so end-users don’t need additional tools or programs.
WebViewer also supports additional security features, such as dig sig insertion, long-term validation (LTV) and modification detection permissions (MDP). And WebViewer offers granular reporting on validation results for developers to build secure applications. For more details, read How We Secure our Digital Signature Validation in PDF.


