Roger Dunham
Published October 11, 2024
Updated May 18, 2026
4 min
Protecting your PDFs by adding watermarks using JavaScript
Roger Dunham

Summary: Learn to protect your PDFs from unauthorized use by adding watermarks using JavaScript in WebViewer. This blog will teach you how to create visually distinctive watermarks that indicate ownership or copyright.
Introduction
Here’s the problem: you have a PDF that is confidential and shouldn’t be shared, and you want the reader to be aware of that.
One way that you can do that is to use a watermark. This gives a visual identifier right in the middle of the document that ensures that when people are working with the document, they see the message.
In this article we will look at how the Apryse SDK can automatically apply a watermark to the pages of a PDF before the user gets to see them.
While this processing could be done on the server, for this article we will implement it within the browser, on the client’s machine, using Apryse WebViewer.
Watermarking is just one of the ways that the Apryse SDK can be used to manipulate PDF pages either before or while a user is viewing them, but for this scenario, it is ideal.
What is the difference between watermarks and stamps?
Before we go further let’s look at the difference between watermarks and stamps, since both could be used to give a similar appearance to the PDF.
Watermarks, once applied, are image based, and generally go behind the page content. They can also be considered of being part of the document content.
Stamps, on the other hand, can contain text, vectors or images, and they usually, but not exclusively, go in front of the page content.
As with everything though, the best way to understand things is to work with them, and we will do that using WebViewer.
What is WebViewer?
WebViewer is a JavaScript Document SDK that runs within all modern browsers with no dependencies on third party software.
Despite its name, it does much more than just allowing you to view PDFs, it also allows you to edit, annotate, measure and perform many other documents processing functions on PDFs and a range of other document types. It even allows you to create and edit DOCX files, all without leaving the browser.
If you haven’t used WebViewer before, then check out the Getting Started with WebViewer guide. In particular, we will use the React sample, but everything in this article applies to other frameworks too.
If you prefer videos to written guides, then have a look at the video for Creating a PDF WebViwer App using React, Vite and TypeScript.
Throughout this article I will use a PDF based on one available in the Apryse sample files - there’s nothing special about the file, it could just as easily be an invoice, or report or whatever kind of document that you use in your business.
A note on versions
This article was written using WebViewer 10.12 running on Windows 11.
There might be minor changes with other platforms, and since WebViewer is being actively developed the UI may change over time. If you have any questions, then please feel free to contact us on Discord.
Adding a text watermark to a page
Let’s start off by creating two watermarks on a single page.
The first one will be placed diagonally in the center of the page and say ‘Restricted’. If you wanted then you could change the code so that PDFs from one source (a ‘secure’ folder) have one watermark, and those from another (perhaps a ‘public’ folder) have a different one, but for now, we will keep things simple.
The second watermark will be in the footer and will include the name of the person who requested the document, in this case me (with a made-up email address). I’ve hard-coded the email address (again, to keep things simple) but it could easily be based on data from the authorization system you use for your website.
Assuming that you have downloaded or created a WebViewer sample project, then the following code needs to be added to the WebViewer code so that is called once the initialization promise has resolved.
Your code will now look something like this.
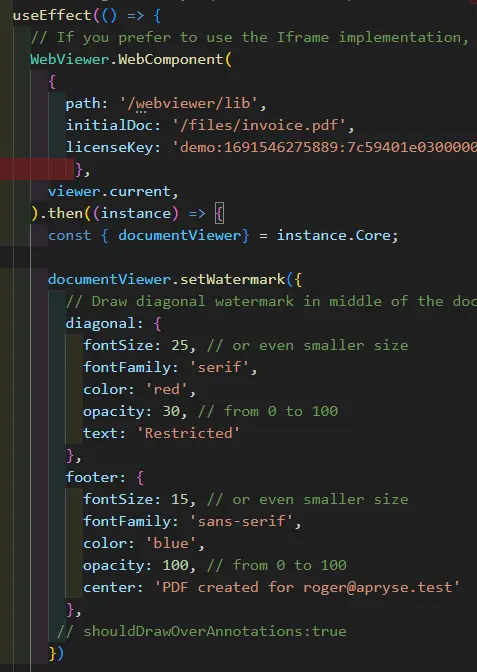
Figure 1 - Typical code as it would appear in VSCode.
You can also see that I have specified a license key – in this case a free trial license key – that gives full access to all the Apryse functionality.
If you refresh the browser then now you should get:
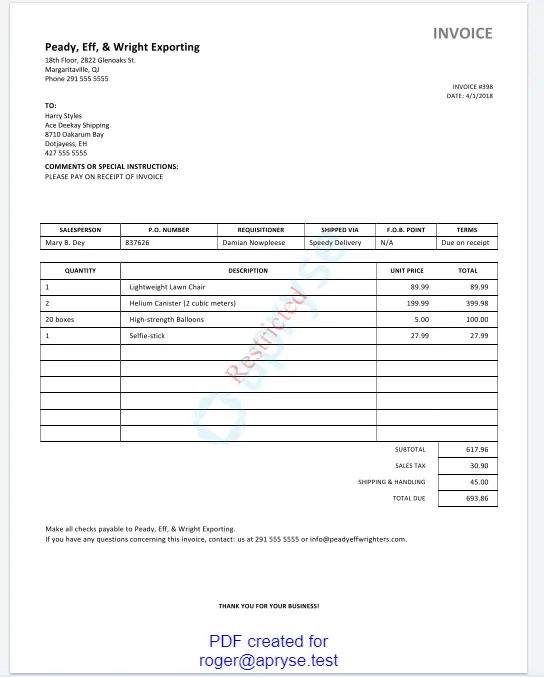
Figure 2 - The PDF, shown in WebViewer with the watermarks added.
You can see straight away that the document is restricted (based on the diagonal watermark), and the footer watermark contains the name of the person for whom the PDF was created.
It's also possible to add watermarks to the header; and for both header and footer you can have three separate pieces of text – one at the left, one in the center and one at the right – so there are many options available.
Before we move on, you will notice that there is another diagonal watermark that says “Apryse”. That is only present because I’m using a trial license. With a commercial license that would not be present. In fact, for the rest of the images in this article I will use a production license, so you won’t see that watermark, but it does mean, if you are following along in code, that your images will not look quite the same as mine.
What happens when the document is saved?
If the PDF is saved, or downloaded, the watermark will then be embedded within in, so even if it is opened elsewhere, it will still be visible.
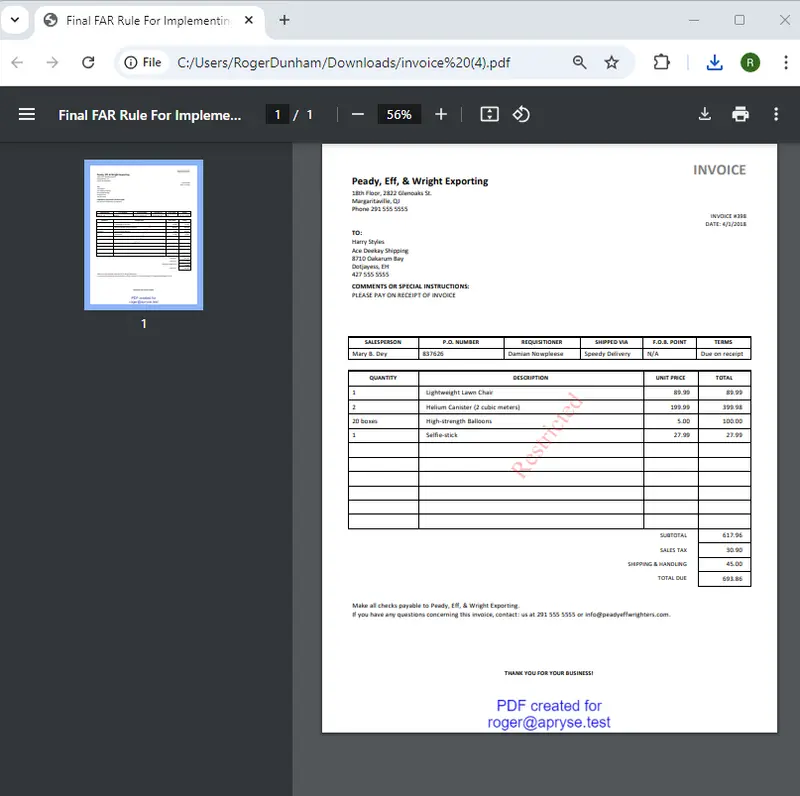
Figure 3 - The downloaded PDF shown in another PDF Viewer (in this case Chrome). The watermarks are still present.
If you try to remove any of the watermarks, then you will find that it is extremely difficult. The watermark's contents are included directly into the main content of the PDF. They are no longer available as editable text.
Therefor if the file is downloaded and shared then it’s easy to see where the file came from (in this case me!).
Putting watermarks over annotations
I said earlier that watermarks appear behind the page content.
Typically, watermarks would also appear behind any annotations that are at the same location. However, if for some reason you want the watermark in front of the annotation, then that can be done using the option “shouldDrawOverAnnotations:true”
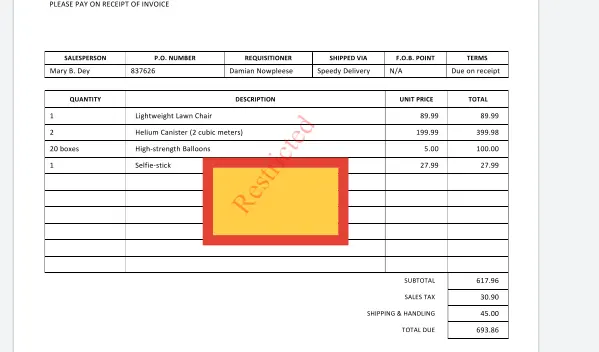
Figure 4 - An example of putting a watermark over an annotation.
Can you create watermarks that aren’t in the header, footer or diagonal?
Yes!
While the built in options give lots of flexibility, sometimes you need something else. That’s where custom watermarks come in.
These are implemented using an instance of CanvasRenderingContext2D canvas context object.
If that sounds scary, don’t worry; it’s straightforward. As an example, let's add two new watermarks, one at the left-hand side and the other at the right-hand side, and both will have vertical text.
We just need to add this to our setWatermark code.
You can see that initially we are setting the ink color and font. Then we use a translation and rotation to specify where the watermark should be and then the text to be written. There is even an option to specify offsets in fillText to adjust exactly where the text will be located.
Let’s save that code and now we have two new watermarks, one at each side of the page.
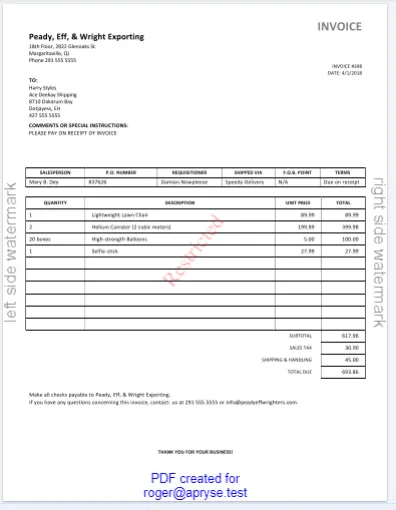
Figure 5 - Custom text-based watermarks added - offering a wealth of options.
Cool!
Can you use images in watermarks?
No problem!
We can build on what we learned about the CanvasRenderingContext2D object, since that also supports writing images. So let’s add a picture (in this case of a duck) as a watermark. We’ll make the image with 60% opacity, and draw it one quarter of the way down the page (pageHeight/4) at the horizontal center (pageWidth/2) of the page.
Now when we save that code we end up with the image as a watermark.
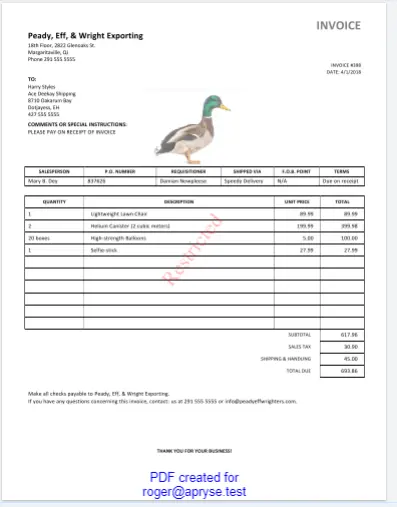
Figure 6 - A custom image-based watermark.
Is there more?
Of course there is! Since the watermark is being generated using the canvas context, any of the functions that are available for that object can be used. For example, you could draw lines, curves and rectangles should you wish, offering one way to add a vector graphic to the watermark.

Figure 7 - A watermark generated using canvas context vector functionality.
It really does give a wealth of opportunities to add value, even if my house-drawing skills don’t!
Conclusion
Adding watermarks is one way to make documents identifiably yours, and Apryse makes it easy to do.
We’ve seen how this can be accomplished in WebViewer on the client-side, but it could also be implemented on the server-side by using the Apryse SDK.
But don’t just take my word for it. Get yourself a trial license and try it for yourself. Not only will you be able to add watermarks, but you will at the same time have access to a wealth of other document processing functionality.
Check out the documentation to see everything that is available in the SDK, and don’t forget, you can also reach out to us on Discord if you have any issues.


