Apryse
Published October 05, 2023
Updated May 13, 2024
8 min
Understanding the RESTful Fluent Engine
Apryse
Learn how to set up a fully working Fluent document generation system on a Windows machine and see how you can leverage those skills towards developing a production system.
Introduction
Creating dynamic and personalized documents and reports is critical for modern digitally-driven businesses across many industries. Fluent from Apryse offers a way to simplify this process.
Fluent allows templates to be generated in a familiar MS Office environment and then used as a way to create sophisticated documents effortlessly using the latest available data from a huge range of data sources.
Previous articles have described document generation using the standalone .NET and Java engines, and example code is available from GitHub. In both of these two articles the Fluent Engine was accessed directly.
In this article we will
- Look at how we can use the RESTful Fluent engine to implement document generation via web calls.
- Work through the steps of setting up a fully working Fluent RESTful Engine and client on a local machine.
- See a typical document generated by the system.
- Get advice on the next steps to take in order to integrate Fluent into your existing document writing process.
What is the Difference Between Fluent and Windward?
Windward Studios have been producing an excellent document generation tool since 2003. In 2019 iText released DITO, specifically aimed at enabling PDF generation. Since then, both Windward and iText have joined the Apryse family of companies. This allowed the best elements of the two document generation tools to be combined into Fluent.
As such, Fluent is the same as Windward, only even better, and with a new name.
We strive to avoid making breaking API changes, so you will continue to see references to Windward in the API. Knowing this gives our customers the confidence that they will not encounter compiler issues when upgrading.
The Dynamic Document Generation Process
Before we go further, let’s have a quick review of the Dynamic Document Generation Process. There are three steps to generating a document:
Step 1: Set up the template look and feel.
Step 2: Bind data - map data fields to the appropriate placeholders in the template. This enables data to be automatically populated during document generation.
Step 3: Generate the document. The Fluent engine dynamically replaces placeholders with the provided data, resulting in personalized and accurate documents. The output can be seamlessly generated in a wide range of formats, such as DOCX, PDF, HTML, and many others.
There is lots of documentation to help get you started with template generation. As such, for this article we will just use the template and data that is shipped as part of sample code so we will be skipping straight forward to Step 3.
The Fluent Engine
This is the part of the system that takes the template and data and actually generates the report or document. You can read about this at https://fluent.apryse.com/documentation/engine-guide
The engine is available in two basic types – either as a library that can be directly embedded in your application, or as a RESTful API. When directly embedded the document generation is performed as part of your application, and blogs about doing so can be found for .NET and Java.
When called via the RESTful API. the document generation occurs on whatever machine is hosting the RESTful engine, whether that is local, on-premises or in the cloud. The RESTful engine is currently available in Java and .NET versions., but the .NET version is deprecated. The Java engine is also available within a Docker container to simplify deployment, and this is the recommended option for most users.
In this article, though, we will look at the Java RESTful engine, including how to install it on a local machine to evaluate the functionality.
Learn more about the transition to a Java-exlcusive Fluent RESTful engine.
Getting the Java RESTful Engine on Your Machine
The easiest way to get this to work is to use Docker. However, if for some reason you do not want to use Docker, then detailed instructions for getting the RESTful engine running are available here.
The quick summary is as follows:
You will need:
- The latest version of the Java RESTful installation, which is a zip file that can be downloaded from here.
- Java 17 installed on your machine.
- A Tomcat Server (V10) instance set up on your machine.
Normally Tomcat would be installed into the Program Files folder. However, non-admin users generally do not have permission to write to files in that folder which will be an issue. While that can be easily resolved, since this article is just about getting the engine running as a PoC it is easier to install the server into a folder where write access is available (in my case I used my ‘source’ folder).
If you have never used Tomcat before, then I recommend testing that it is working before you move onto the step of using the Fluent engine.
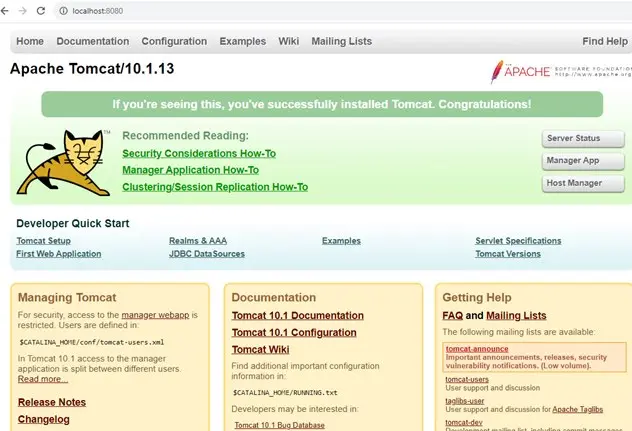
Figure 1 - Proof of a successful deployment of Tomcat.
Having verified that Tomcat is capable of running, extract the contents of the Fluent engine zip file into the webapps folder, and delete the default ROOT folder. When Tomcat restarts it will take the contents of the .war file and update the ROOT folder.
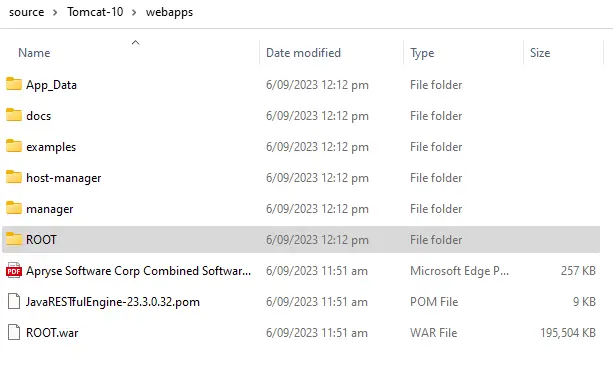
Figure 2 - Typical view of the file system ready to run the RESTful engine.
Next, restart the Tomcat server (using the startup.bat script in the bin folder). You should now see information about the engine within the browser, and server logging should be visible within a console window.
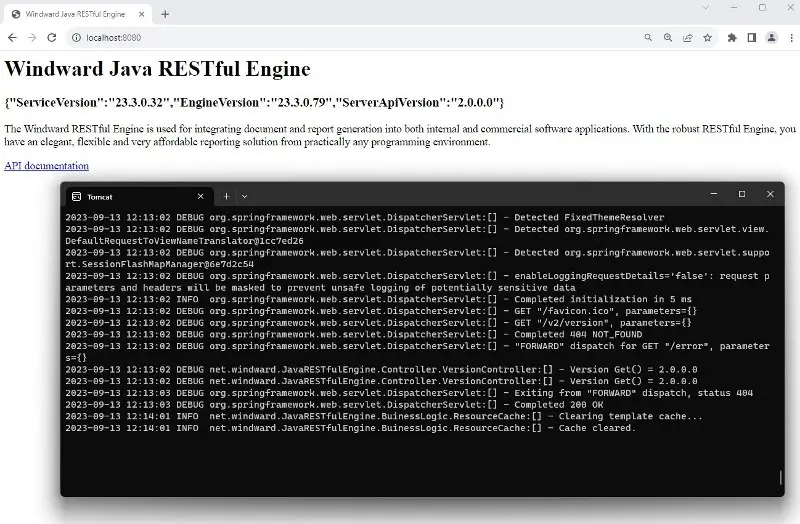
Figure 3 - The Tomcat server output indicating the version info, and, separately, the console window that logs the server activity.
Looks like things are working!
Before we can actually generate a document, we need to specify a license key. If you haven’t already done so, then request one here.
There are two ways that the license can be specified – either by adding it to the Fluent engine configuration properties, or by specifying it as the request header "X-WINDWARD-LICENSE” for each API call. For now we will add the license key to the configuration, but we will see how it can be used within the header a little later in this article.
Adding the License to the Fluent Engine configuration
The license key needs to be added to the file WindwardReport.properties.
Note: this file will not exist until the server has started and copied the contents of the .war file into the ROOT folder.
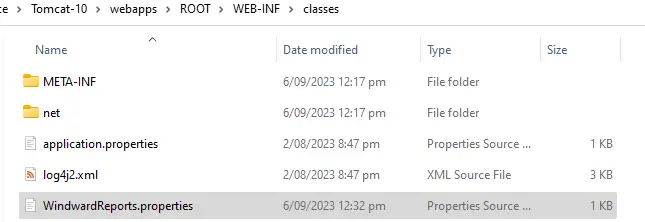
Figure 4 - The typical location of the config file for the RESTful engine. Find the file and paste the license details into it.
Find the file and paste the license details into it.

Figure 5 - Specifying the license to be used for the RESTful engine.
You now have a Fluent RESTful engine ready to accept requests and generate documents.
Using the RESTful Engine
While it is possible to write your own code for calling the API based on the documentation, and the Swagger Hub sample, Apryse have developed sample clients which can be used as a template for how to call the RESTful API. These are available for Java, Python, JavaScript and C# (for both .NET and .NET Core), and come complete with sample data.
While the Fluent system supports many types of data sources, the sample uses data from an XML file. While SML is a simple data format, what you learn with that data source can be extended to the other formats.
For this article we will look at the client for .NET Core. This is available either at GitHub, or as a zip file.
Download the zip file and extract it to a folder of your choice, and then open the solution file in Visual Studio. I used Visual Studio 2022.
The sample code references the WindwardRestApi via NuGet and will update to the latest version.
Configuring the RESTful .NET Client
Earlier in this article, we described how to get the RESTful engine running using Tomcat. We now need to update the App.config file to use the RESTful engine that we created. Update the url in the config file to match the port where the engine is running (typically this will be port 8080 of the localhost).
As an alternative to using a locally hosted engine, you could use the one available here which is available for trial purposes only. You will find the url to use when you navigate to the site.

Figure 6- Specifying the URL for the Fluent RESTful engine.
Specifying the License in the Client
If you specified the license in the WindwardReport.properties file, then you can skip this step. If not, then you need to do so in the client, so that all of the Web calls include the license in their header. Thankfully this is easy to do.
Within the Main method add a line of code that includes the LicenseKey. The library will then use that value for all of the web calls to the Fluent engine.
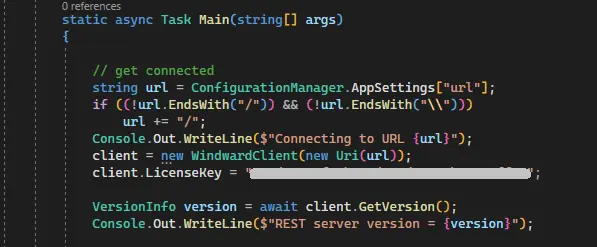
Figure 7 - Specifying the license for the Fluent engine.
Command Line Arguments and Generating the Document
The sample application requires various command line arguments to control the document creation. It is provided with all the files needed to get started, and has suitable arguments specified whether you run the program from the batch file, or within the debugger. As such you don’t need to change anything for the sample to run. It is, however, useful to know what the arguments are.
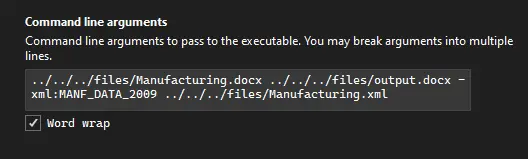
Figure 8 - Typical command line arguments for the .NET Core sample.
This means
- The template is Manufacturing.docx.
- The generated document should be called output.docx. The file extension is used to control the output document type, so in this case a Word document should be created.
- The schema for mapping data, as specified within the template, is called MANF_DATA_2009.
- The data source is called Manufacturing.xml.
Ok, we are ready to Run the project!
After a few seconds output will appear in the console.
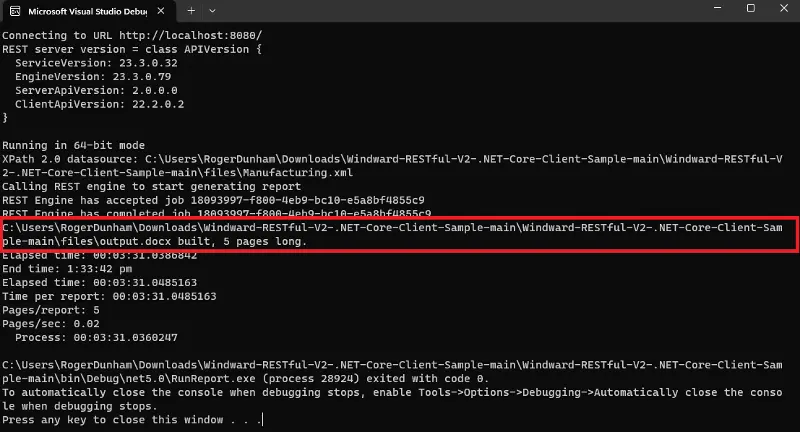
Figure 9 - Typical output of the Client, indicating that document generation succeeded.
Internally what is happening is that a POST is sent to the Fluent engine to start the process, which returns a GUID for the document, the status of the processing can then be queried repeatedly, and finally, when complete, the document is downloaded. However, from the user’s point of view, after a few seconds a document containing up-to-date data is produced.
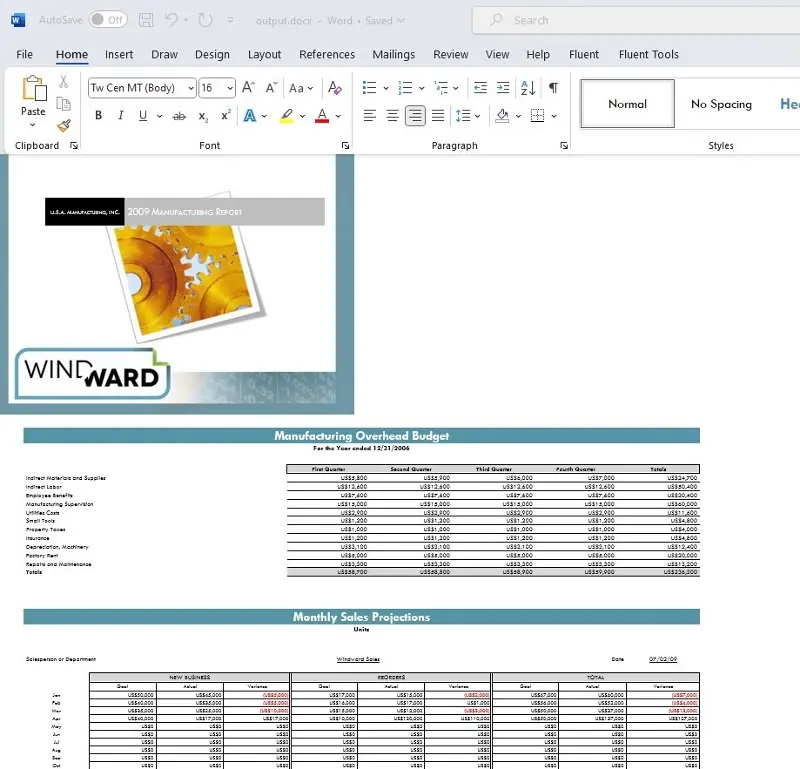
Figure 10 - The generated document
That was easy! A well formatted document has been generated from a template and data.
Next steps
In this article we have seen how to get a Fluent RESTful engine running on a Windows machine, how to set up a simple C# app that can access the data on that engine, and a typical generated document.
Next, you might want to try deploying a containerized Fluent engine, or you can try connecting to the server that is running on https://app.swaggerhub.com/apis/Windward-Studios/windward-rest_ful_api/2.0#/ by changing the url in the config file to match the one there. You will need to specify your license key as described in an above section so that it is included in the header of all web calls.
Conclusion
The Fluent document generation system allows high quality documents to be created from a range of data sources, using a template generation system that is familiar, and a range of Fluent engine hosting options. We have seen how easy it is to get it running, and how changes in data, templates and output document types can influence the generated document.
You will quickly realize how much time this will save and will want to know more. There is some great documentation to help you get started quickly. There is also a channel on Discord if you have any issues.