Roger Dunham
Updated July 05, 2024
10 min
How to Edit and Manipulate PDFs Using React
Roger Dunham
Introduction
When working with documents, a common problem is how to add, reorder, delete, rotate, replace, and extract pages from a PDF. Perhaps you want to combine pages from two different documents, or remove a page that isn’t relevant for the intended audience, or change the order of pages to emphasize a specific issue. Those are all reasonable things to want to do, so it shouldn’t be hard to achieve.
Thankfully, Apryse WebViewer – a React-based UI for working with PDFs and other documents – makes organizing your documents easy. (At the same time, it also offers a wealth of other functionality such as annotations, redaction, and the ability to edit PDF and DOCX content.)
It’s easy to get started on your platform and framework of choice – like React, Angular, Vue, or many others – so you can quickly get WebViewer running on your own machine.
In this article, we will primarily look at the Apryse Showcase, where you can try things out for yourself, right from your browser, without the need to install or build anything.
A Note on Versions
This document was created using Apryse WebViewer 10.8. The team at Apryse keep making WebViewer even better, so it is possible that some things, or the UI, may change over time.
Getting Started with the Apryse Showcase
Just click on https://showcase.apryse.com/ to open the Showcase. The left-hand panel offers a way to try out dozens of the available features. Feel free to try out those features now and come back to this article when you are ready.
In this article, we will mostly look at the document that first appears.
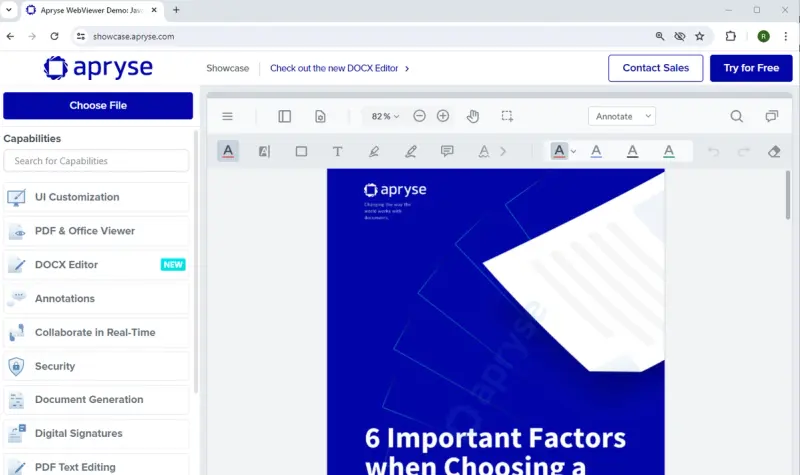
Figure 1 – The Apryse Showcase illustrating some of the functionality available to support your document processing requirements
The Showcase has the list of examples as well as a WebViewer pane. Here, we will just show images for the WebViewer pane. This means if you’re running WebViewer on your own machine, rather than from the Showcase, what you see will match what is shown in this article.
Now click on the Panel icon.
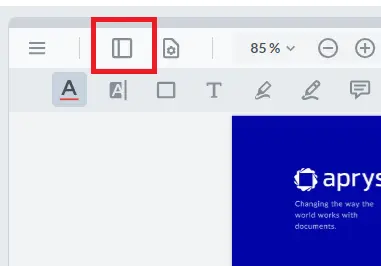
Figure 2 – The Panel icon
This will cause a panel to open that contains various tabs – each tab holds information for one aspect of the document. For now, we are just interested in the Thumbnail one, which by default is the first one that you will see.
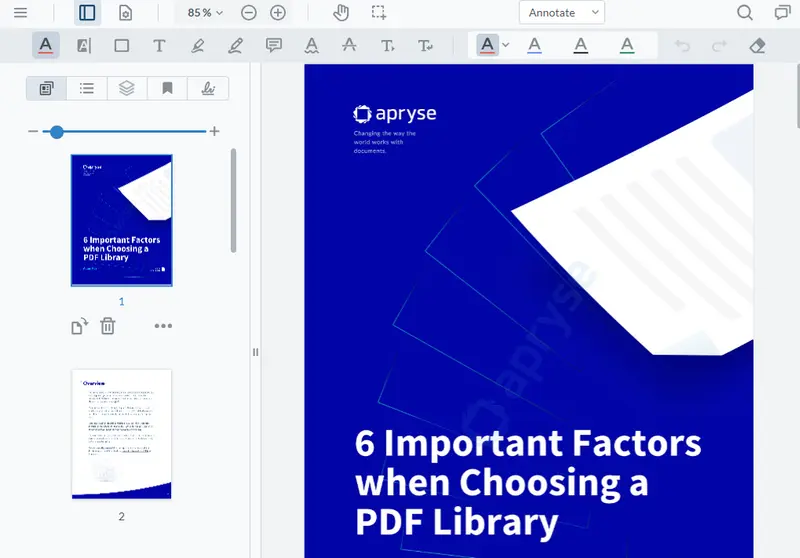
Figure 3 – The open panel showing the thumbnails. The other tabs can be hidden if desired.
If you want to hide the other tabs, this can be done in one of two ways:
1. The “classic UI” method for hiding elements in a panel:
instance.UI.disableElements(['outlinesPanelButton']);2. The Modular UI method for updating panel content:
The WebViewer Modular UI allows you to alter the content of all of the controls in the UI. This makes it easy to replace the existing Tab Panel with one that shows only what you want.
What Functionality Does the Thumbnail Pane Support?
The quick answer is: a lot! We’ll look at each area of functionality in a moment, but notice that, provided the browser is wide enough, you can grab the divider and make the thumbnail panel fill the entire width of the browser window.
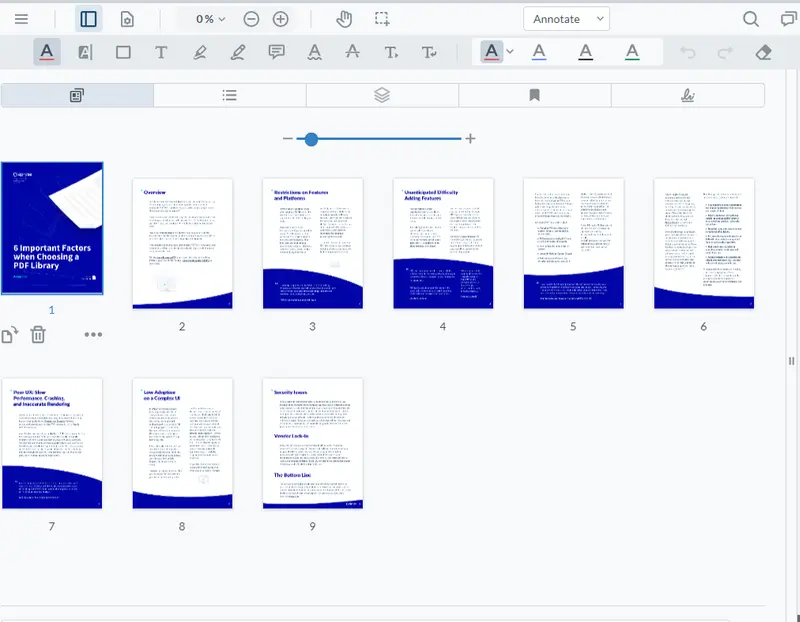
Figure 4 – The thumbnails shown in a panel that fills the entire width of the browser
Whether you want the thumbnail panel to just be a narrow strip, the entire browser width, or anywhere in between is up to you – it doesn’t affect the way it works.
For a start, let's consider the options that are available when selecting just a single thumbnail.
Rotate Pages
When a page is selected in the thumbnail panel, an option is immediately available that allows you to rotate the page clockwise. If, for some reason, the option isn’t visible, try right clicking on the thumbnail.
Clicking on the option will rotate the page clockwise, both in the thumbnail view and the main document.
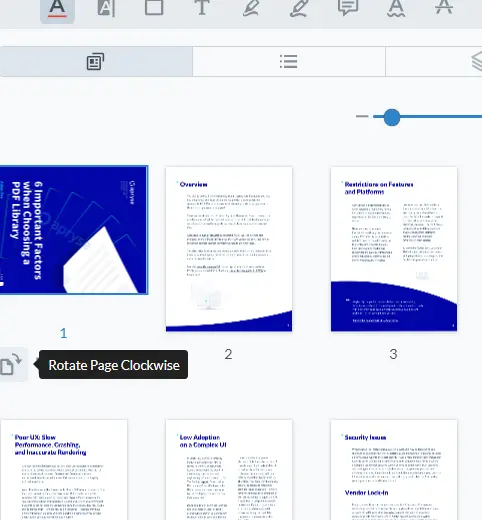
Figure 5 – The effect of rotating a single page from the thumbnail view
If you want to rotate the page counterclockwise, either click on “Rotate Page Clockwise” three times, or use the option on the dropdown menu that appears when the ellipsis icon is clicked – we will look at that menu in more detail in a few minutes.

Figure 6 – The ellipsis icon: Clicking on this or right clicking on the thumbnail shows more options.
Delete Pages
The ability to delete a page is available directly from the thumbnail pane for a selected page.
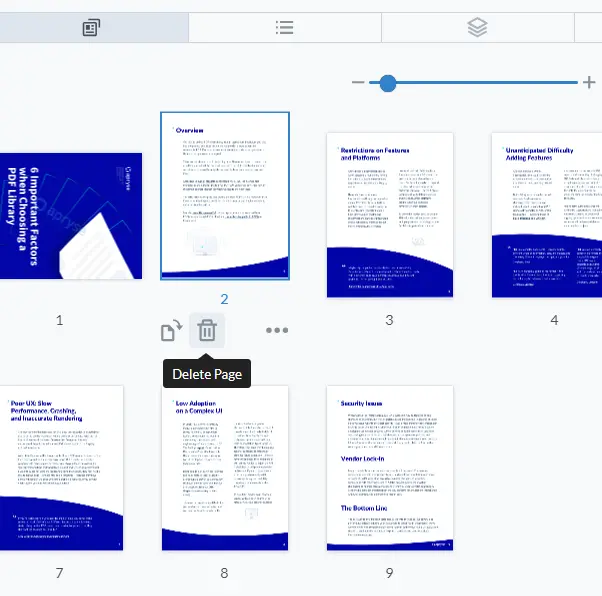
Figure 7 – The delete option on the thumbnail pane
You will be prompted to confirm that you want to do this, since page deletion cannot be undone.
Drag Pages to Reorganize the Document
A great feature of the thumbnail pane is that it allows you to drag pages around to reorganize the document.
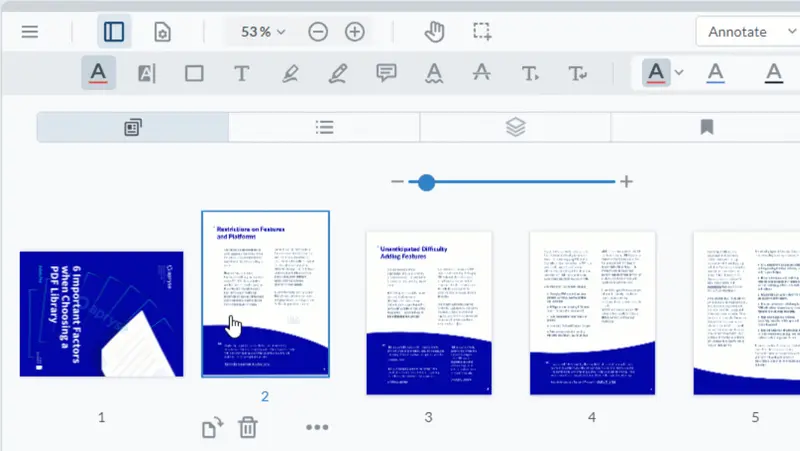
Figure 8 – An example of dragging pages around to reorganize the document
Any changes you make in the thumbnail view will be reflected in the final document.
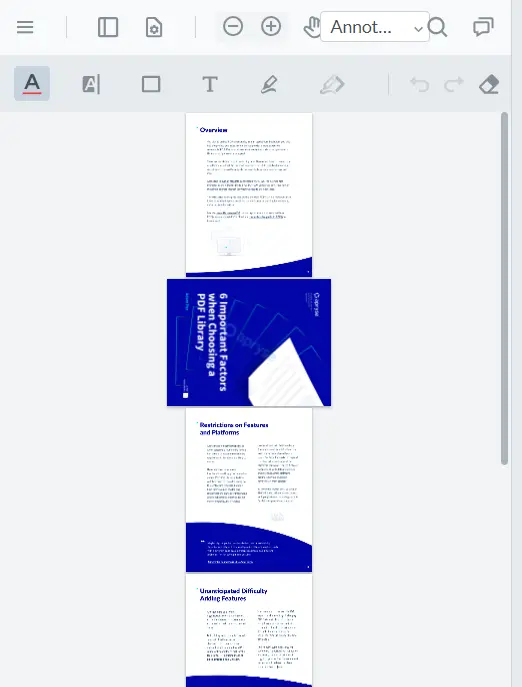
Figure 9 – The modified document. Changes made in thumbnail view are reflected in the actual document.
Drag Other Files into Your Document
Dragging and dropping pages goes much further than just moving existing pages within the thumbnails pane – you can also drag other files into your PDF.
For example, you can drag images straight into your document.
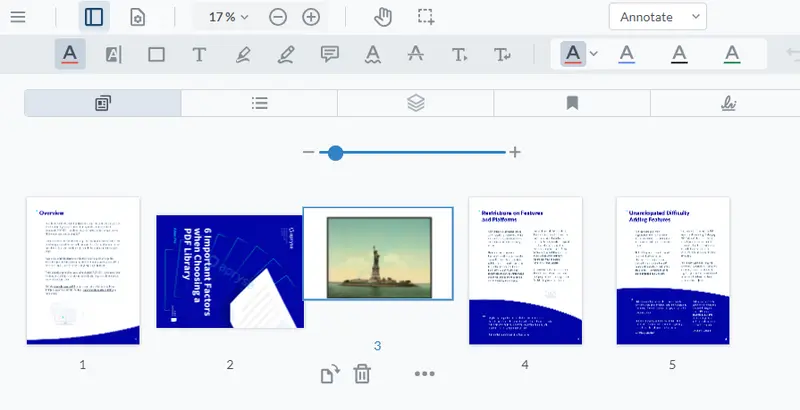
Figure 10 – The result of dragging a .png file of the Statue of Liberty straight into the thumbnail view
In the same way, you can drag Word documents or other PDFs into the thumbnail panel to automatically add them.
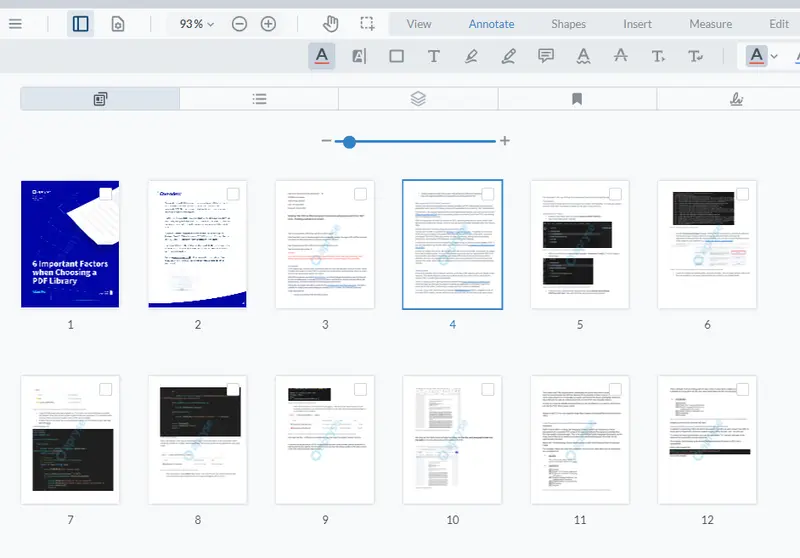
Figure 11 – An example of dragging a Word document into the thumbnail pane. The document has not just been added, it has effectively been converted into a PDF.
Drag Files from a Different Instance of WebViewer
It’s even possible to drag files from one instance of WebViewer to another allowing you to get the document processing benefits of WebViewer and be able to move pages around. Check out this great video about how to do this.
Quickly Move Pages to the Top or Bottom of the Document
We previously mentioned the More Options menu (the one with the ellipsis icon) as one way to rotate pages counterclockwise. The same menu also allows you to select a page and move it all the way to the beginning or to the end. That’s a great time-saver if your document is 200 pages long.
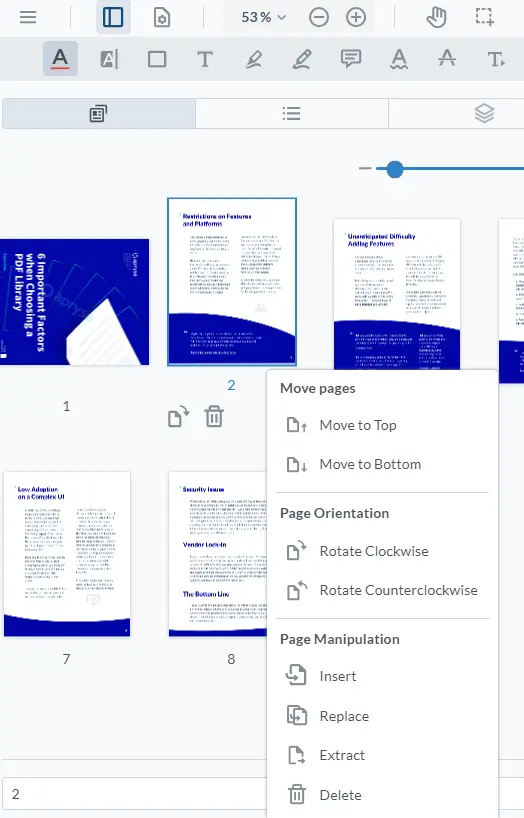
Figure 12 – The menu which appears when either right clicking on a thumbnail or clicking on the ellipsis
Insert Blank Pages into Your Document
The Insert option allows you to add blank pages – standard or custom size – either before or after the currently selected page.
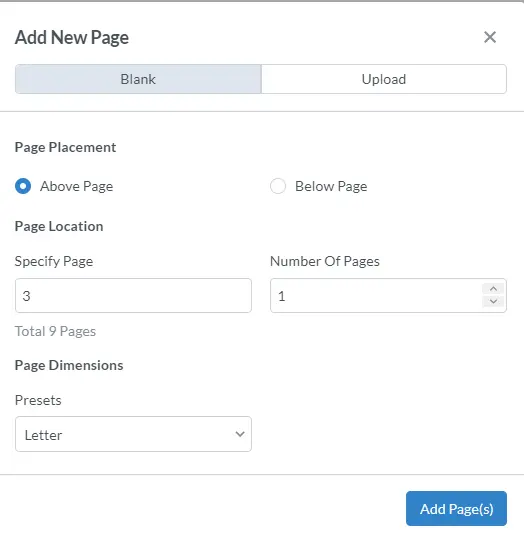
Figure 13 – The dialog for adding one or more new pages
Why would you want to add a blank page into a PDF? Well, you might just want to have a "spacer” page, and you can certainly do that. However, with the ability to edit text within a PDF page, you could also use this mechanism to add a title, summary, or explanation page relating to a section of the PDF you are working with.
Insert Pages from a Different Document into Your PDF
The insert menu offers an alternative mechanism for adding pages from a different file into the PDF that you are working on.
While this functionality can be achieved using just drag and drop as we saw earlier, this menu item gives greater granularity, with the option to insert just a subset of pages.
On the other hand, the drag and drop mechanism we saw earlier always adds the entire document.
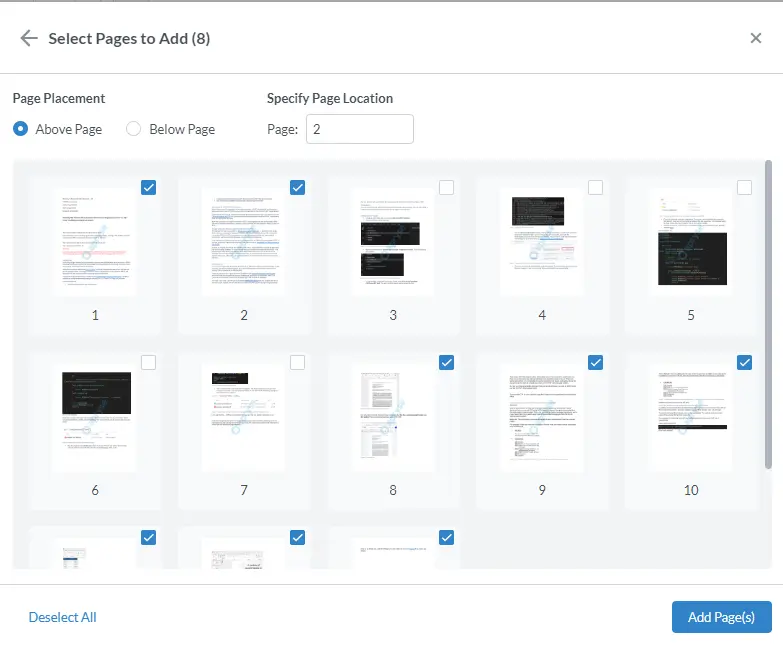
Figure 14 – Adding a subset of pages from an existing file into the one that you are editing
Replace Pages in a PDF
The Replace menu item allows you to replace the selected page with one or more pages from a different document (in a similar way to inserting pages). The document can either be local or specified by a URL.
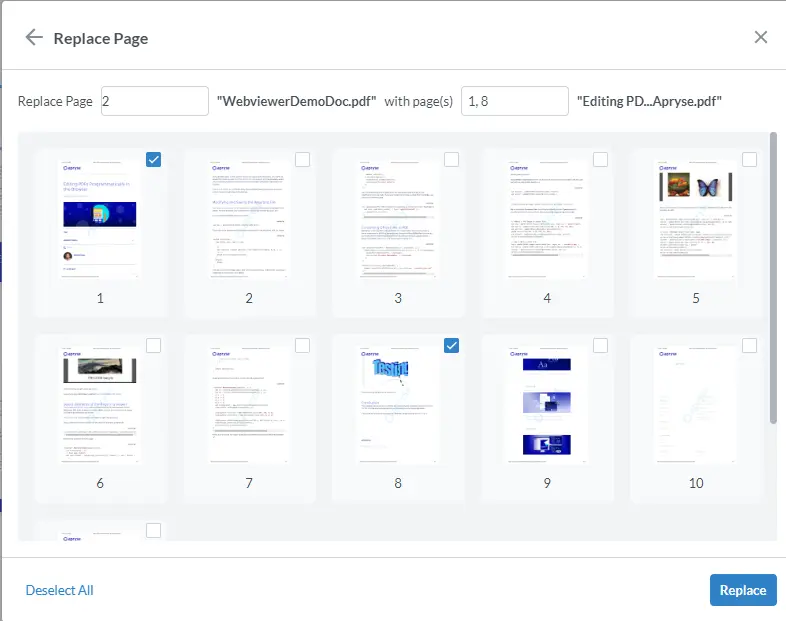
Figure 15 – Replacing a page with multiple pages from a different document
This makes it easy to replace a page in the PDF with one or more pages from an entirely different document.
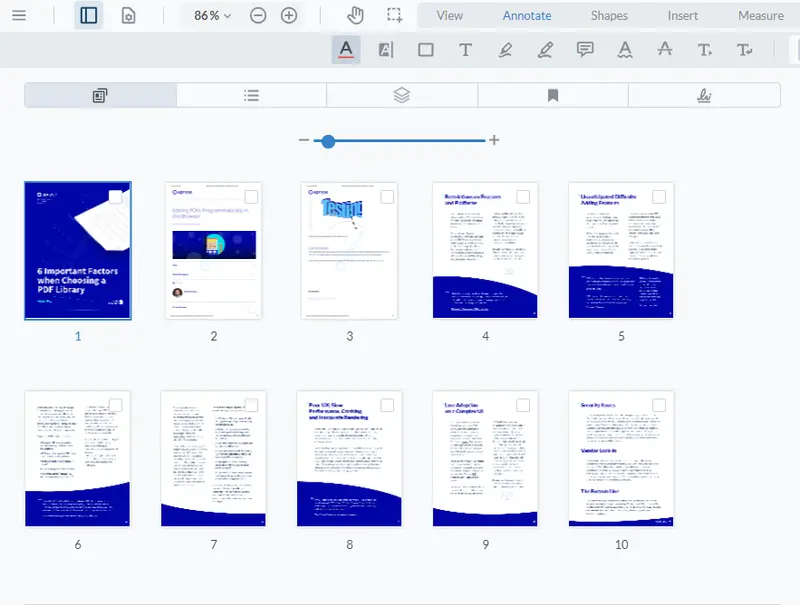
Figure 16 – The result of inserting two pages from a different document
Extract Pages from a PDF
The final option is Extract, which allows you to create a new PDF from an existing file.
You will be asked to choose whether to leave the extracted pages in the original PDF, or to remove them from the PDF – effectively splitting it into two.
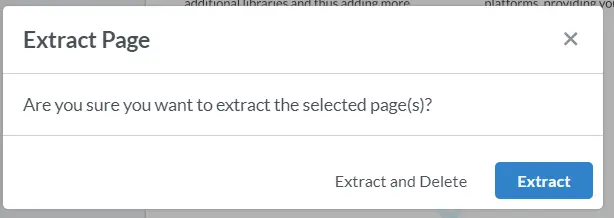
Figure 17 – The dialog for extracting pages. It offers you the choice of what should happen to the original document.
Working with Multiple Pages
So far, we have looked at working with just a single page, but it is possible to select multiple pages and work with them in a single operation. For example, you can move multiple ranges of pages to the beginning of the PDF or delete them altogether.
By default, the ability to select multiple pages is enabled. However, if you don’t want users to be able to work with multiple pages at a single time, this is easy to control.
First let’s look at how WebViewer is often set up. Typically, this involves instantiating the WebViewer within a useEffect (or something similar if you are not using React). This is illustrated in the following code from our React documentation:
The WebViewer constructor returns a promise, which, when it resolves, holds the instance of WebViewer. At its simplest, the instance can be ignored – but having access to it allows us to modify the UI for WebViewer, or access the documentViewer object (which can be used to allow us to programmatically edit the PDF, should we wish to).
If we take that code and change it slightly by calling disableFeatures, we can stop some of the default features from being available. In our case, we want to disable the feature ThumbnailMultiselect.
With a single line of code, we have modified the behavior so the user can now only work with one thumbnail at a time.
Next Steps
Clearly, the thumbnail panel is full of functionality. That’s often great, but if it is offering too much flexibility, we can expand on what we have learned here to easily remove some of the functionality.
For example, you might have a process where someone needs to review scanned documents and rotate any pages that are incorrect, but they should not add, remove, or insert pages. This can be easily achieved by hiding some features and elements.
WebViewer has been designed to allow you to control the way it works – try it out and see what it can do for you.
Start creating your React-based app with Vite and enable seamless PDF viewing and editing. Dive into our tutorial now!
Conclusion
We have seen how we can use thumbnails in WebViewer as a simple, interactive way to assemble and organize a document. WebViewer does many other things too – it allows you to edit or annotate the document, add redactions, and so on.
When you are ready to dive in, see the documentation for the SDK to get started quickly. Don’t forget, you can also reach out to us on Discord if you have any issues.


