Roger Dunham
Published August 15, 2024
Updated May 18, 2026
4 min
Customizing Annotation Authors in WebViewer
Roger Dunham
Summary: Apryse WebViewer lets you view, edit, and annotate PDFs in your browser. It shows who added annotations, but user names might change. To fix this, use unique user IDs instead of names. Store the mapping between IDs and names separately. This way, you can always display the correct name even if the user's information changes.
Introduction
The Apryse WebViewer is a superb JavaScript-based library that allows you to view, edit, redact, and generally work with PDFs and other document types entirely within the browser.
The ability to add annotations to PDFs is an awesome piece of functionality – whether those are notes, highlights, underlines or any of the myriad of annotation types that are supported. In fact, it is possible to have multiple people work on the same document, each adding annotations, and WebViewer allows you to see which ones were added by which user and when.
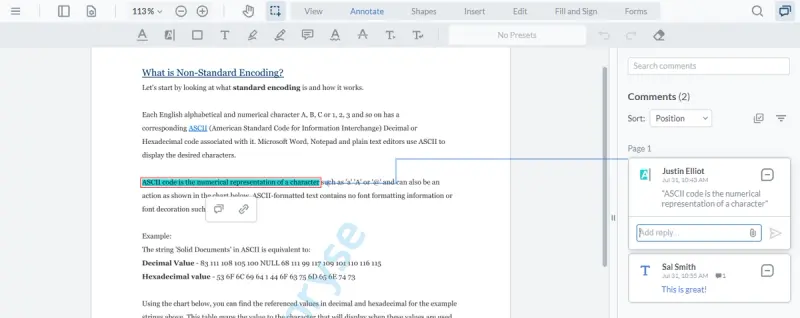
Figure 1 - An example of annotations added to a PDF. You can see who created each one, when, and the type of annotation.
Read our comprehensive guide to annotations.
Being able to identify who created which annotation is great – but how do you deal with the problem that multiple users could have the same name (apparently there are around 40,000 James Smiths in the US) or that they may want to change their name in the future?
In this article we will look at how we can use a unique ID to represent the user, and see how we can then show the appropriate user name when the PDF is displayed.
Default Behavior of WebViewer
Before we go further let’s look at the Annotation Permissions sample in the Apryse Showcase.
This is a useful way to see how multiple users can add annotations.
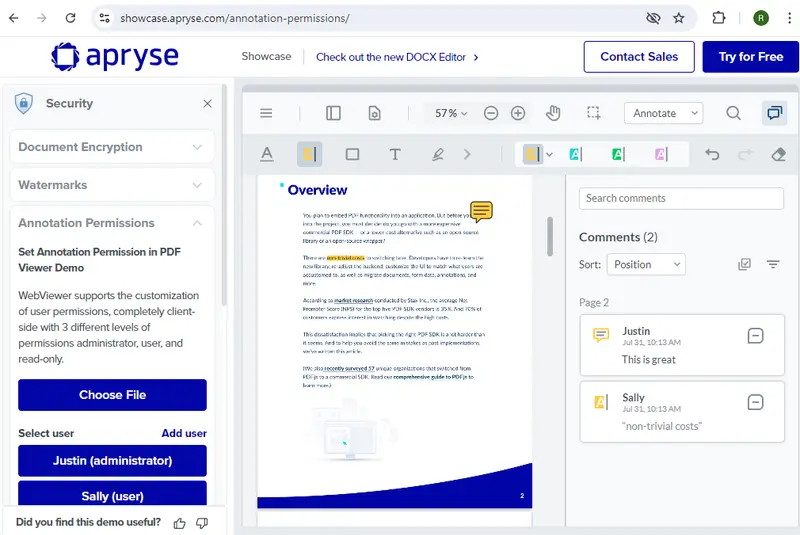
Figure 2- The Apryse showcase, showing how annotations can display their author.
That sample also demonstrates how you can control whether a user can edit or delete annotations created by other users – an idea that you could extend into a Role Based Access Control system. For now, though, we are just interested in setting the current user.
If you inspect the source code for the Annotation Permissions sample, you will find that the author is being specified via the annotationManager’s CurrentUser property.
annotationManager.setCurrentUser('Justin'); The sample has hard-coded users as a simple way of demonstrating functionality, but that’s not good practice. In a production system, you would likely get user information from an authentication mechanism rather than it being hard coded.
For now though, modify the code to use some kind of unique ID rather than the user name - whether that is an employee number, or their email address, or a unique ID created solely for the purpose of document processing – it doesn’t really matter - as we can link the annotations uniquely back to the user.
As an example, let’s assume that Justin is given the unique ID of 4301.
Our code would then be something like:
annotationManager.setCurrentUser(“4301”); Now, having set himself as the current user, whenever Justin creates an annotation, the author will be 4301.
Great, we have a unique identifier!
The downside is that within the UI, the annotation's author is now a number – which isn’t very intuitive.

Figure 3 - If a unique ID is used to identify the author, then there is a risk of it being meaningless to readers.
Don’t worry, we have a simple solution for that!
Take control of your PDF annotations with Apryse WebViewer. Learn how to manage user permissions and customize access based on roles.
Mapping the Unique ID to a Display Author
Behind the scenes, WebViewer has a function that calculates the name that an annotation should show based on its Author property.
const displayAuthor = annotationManager.getDisplayAuthor(annotation.Author) By itself, the getDisplayAuthor function does nothing useful, the default behavior is for it to return exactly what it is given, so passing in a value of 4301 would return 4301.
However, if a mapping function has been specified, then that will be used to convert the Author property (which is currently the ID) into the name that should be displayed in WebViewer.
How complex that function becomes depends on what you require it to do.
Let’s see an example in practice:
In this example only two users are known:
- If userId is 4301 then Justin’s name is returned
- If the userId is 5648 then Sally’s name is returned
- Any other values will fall through the if statements and be returned as ‘Guest’.
With that mapping function available, when we look at the PDF in WebViewer we can see authors’ names again, just as we might hope. In fact, now we can see their full names, which is even better than the initial example.
You may be asking why you would want to do this?
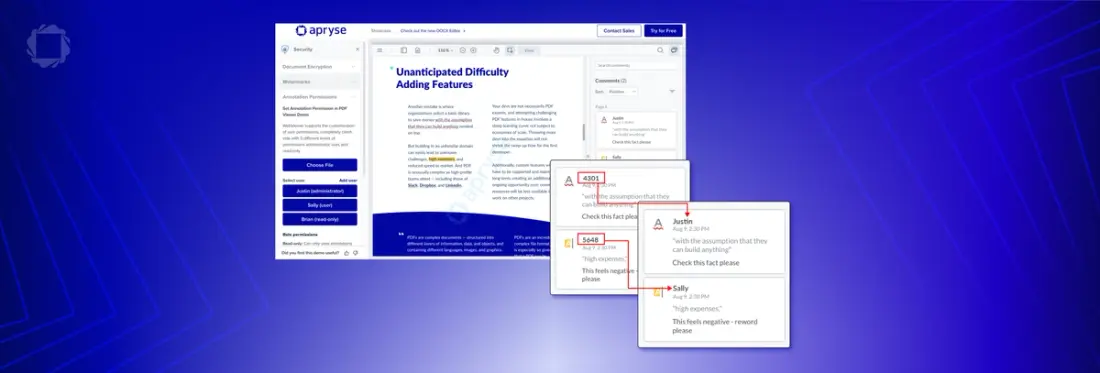
Let’s imagine at some point that Sally decides that she wants to be known as just “Sal”, and another Justin (with an ID of 8435) joins the company.
That’s not a problem, we can just update the mapping function as follows:
Now when we look at the PDF, we can see Sally’s name has been updated, and we have the option for the ‘new’ Justin to be included.
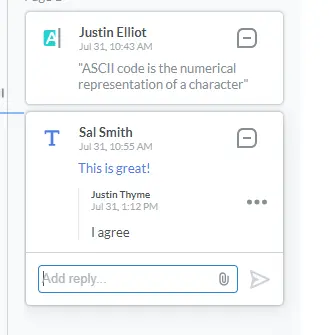
Figure 4 - By modifying the mapping function, it is easy to support changes.
That’s a great and flexible system!
Exporting Annotations
Part of your document processing workflow may require you to export the annoations into an XFDF file.
By default, the annotation Author is exported, but that is now just a somewhat meaningless ID, so exporting that may not be very helpful.

Figure 5 - Part of the XFDF file if the users are identified by ID, and useDisplayAuthor is false (which is the default value).
Once again there is an easy solution, just add useDisplayAuthor:true to the function that exports the annotations.
const xfdfString = await annotationManager.exportAnnotations({
      useDisplayAuthor: true,
    });
Now the exported XFDF file will contain the Display Author as specified in the mapping function.
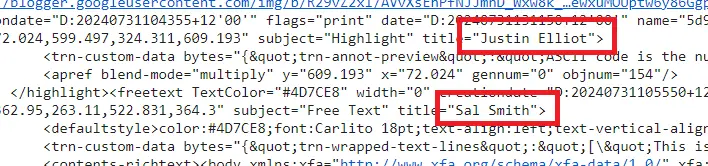
Figure 6 - Part of the XFDF file when useDisplayAuthors is set to true.
What happens if I open a PDF which uses user IDs in a different PDF viewer?
If you open the PDF that we have been using within Acrobat, for example, then the annotations will only show the user IDs, not the Author’s name, since the mapping of ID to Display Author is part of the WebViewer functionality, rather than being built into the PDF.
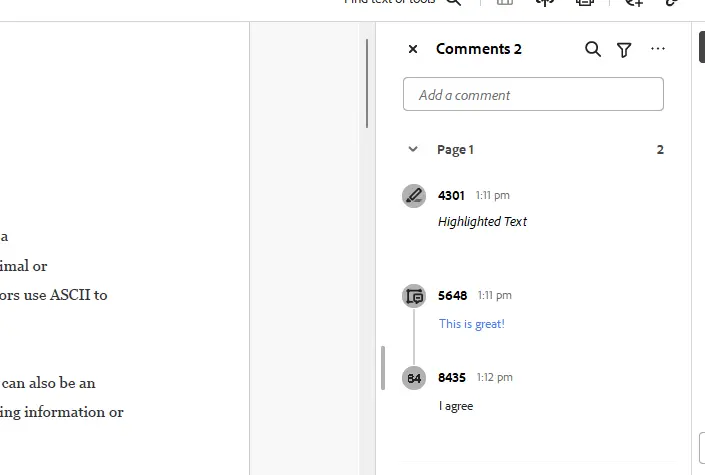
Figure 7 - Opening the PDF in Acrobat will just show the User IDs.
Don’t let that stop you using the system though. You can, if necessary, create a copy of the PDF that contains the Display Authors.
There are two ways to do this. You can just extend what we have already learned about exporting Annotations with useDisplayAuthor:true, then reimport the XFDF data back into the PDF, replacing the annotations with ones that have the Author set as the user name rather than the ID.
Once you save the new PDF, the authors will then be visible in Acrobat.
Alternatively, you can export the PDF using the downloadPdf function, which takes several optional parameters, including the ability to useDisplayAuthor.
UI.downloadPdf({filename: '[Filename]', useDisplayAuthor:true}) In either case, the result will be a PDF that has the author names, rather than the author IDs baked in.
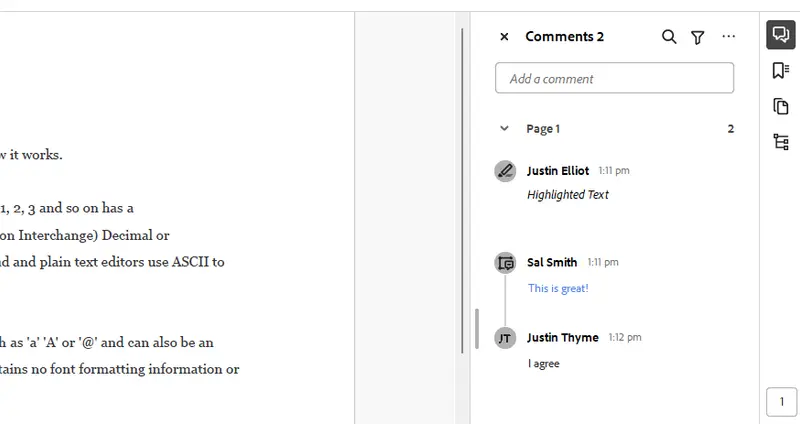
Figure 8 - Our PDF within Acrobat - the Author names are now visible.
This is a one-way conversion though, and you will have lost the ability to later update the author names in the way that we have seen, so you may prefer to stick with WebViewer.
Conclusion
We’ve seen how you can use functionality built into WebViewer to gain control over how author names are displayed, while at the same time getting the benefit of using unique IDs, avoiding name clashes and even allowing people to change their names.
There are heaps of documentation for the WebViewer available, covering the myriad of functionality that it supports. It does much more than just annotations!
Try it out, see what you can do, and don’t forget, you can also reach out to us on Discord if you have any issues.