Home
All Blogs
How to Add a PDF or MS Office Document Viewer to Salesforce as a Lightning Web Component
Apryse
Published August 15, 2024
Updated May 18, 2026
3 min
How to Add a PDF or MS Office Document Viewer to Salesforce as a Lightning Web Component
Apryse

At Apryse, we have worked with many clients who use Salesforce’s full-featured app framework to develop apps accessing the wealth of information stored in Salesforce databases. However, a number of these clients expressed frustration when trying to display PDF, DOCX, XLSX, or PPTX documents within their web-based Salesforce solutions. Salesforce provides some PDF functionality, but Microsoft options are limited.
Two years ago, we came up with an answer: a specific build of our pure JavaScript PDF and MS Office SDK for Salesforce—crafted to work around issues hosting libraries with Salesforce. This enabled users to open, view, and annotate PDF or MS Office documents entirely within a Salesforce app without you or your users needing any MS Office software or MS Office licenses. And now with the recent release of Salesforce Lightning Web Components supporting the latest versions of JavaScript, we were able to upgrade our Salesforce fix to support the latest version of WebViewer, ensuring even better rendering accuracy and access to the latest and greatest web features.
If you’re interested in plugging a professional PDF and MS Office document viewer into your Salesforce web experience—read on! This article will show you how to add Apryse WebViewer to Salesforce as a Salesforce Lightning Web Component.
Getting Started
To get started with WebViewer and Salesforce, you’ll first need to clone our sample Lightning Web Component project from GitHub. You can find the sample project here. You will also need to download WebViewer.
You will need to have access to a Salesforce Org. The org can be a Dev Hub, scratch org, developer edition org, professional org, or enterprise org.
Setting up Salesforce DX
Next, you’ll need to set up a Salesforce environment for your organization through your Salesforce Dev Hub scratch orgs—or by signing up for a Salesforce Developer Edition Org. Follow the instructions in the Salesforce DX Setup Guide. The steps include:
- Install the Salesforce DX CLI.
- Install Visual Studio Code Install Salesforce VSCode Extensions
Optimizing WebViewer Source Code for Salesforce
Now, you need to optimize the original Apryse WebViewer code for Salesforce. To accomplish this, extract the WebViewer.zip that you downloaded earlier into a folder and run this npm script:
$ npm i
$ npm run optimize
The optimized prompts are meant to minimize the package size that gives you access based on your needs. You will then encounter the following prompts, to which you should answer y/n:
After answering “y” to “Do you need to deploy to Salesforce?” The script will optimize and zip the source code you’ll need later.
Optimize: Do you want us to backup your files before optimizing? [y/n]: n
Optimize: Will you be using WebViewer Server? See https://docs.apryse.com/documentation/web/guides/wv-server/ for more info. [y/n]: n
Optimize: Will you be converting all your documents to XOD? See https://docs.apryse.com/documentation/web/guides/optimize-lib-folder for more info. [y/n]: n
Optimize: Do you need client-side office support (docx, pptx, xlsx)? [y/n]: y
Optimize: Do you need client-side office support for legacy office files (doc, ppt, xls)? [y/n]: y
Optimize: Do you need the full PDF API? See https://docs.apryse.com/documentation/web/guides/optimize-lib-folder for more info (most users dont need this option). [y/n]: y
Optimize: Do you want to use the production version of PDFNet.js? The production version does not have type checking and console messages, but is much smaller than the development version. [y/n]: n
Optimize: Do you need to use the content editing feature? (This is for editing content on the page in the viewer) [y/n]: y
Optimize: Do you need to use the office editing feature? (This is for editing docx files in the viewer) [y/n]: y
Optimize: Do you need to deploy to Salesforce? See https://docs.apryse.com/documentation/web/guides/optimize-lib-folder for more info (most users don't need this option). [y/n]: y
Optimize: Would you like to use the web component version of WebViewer (instead of the iframe)? [y/n]: n
Note that this optimization produces .zip files of no more than 5 mb in size—small enough for safe upload to the Salesforce platform.
Take control of your PDF annotations with Apryse WebViewer. Learn how to manage user permissions and customize access based on roles.
Installing the Sample LWC App Using Salesforce DX
Next, you’ll need to clone our sample webviewer-salesforce project, configure it accordingly, and get it up and running. Follow these steps:
1. Clone the webviewer-salesforce from Github repo:
git clone git@github.com:PDFTron/webviewer-salesforce.git
cd webviewer-salesforce
2. Copy all the zip files generated after running the npm optimizing script from the output folder webviewer-salesforce into the force-app/main/default/staticresources folder of your newly cloned project.
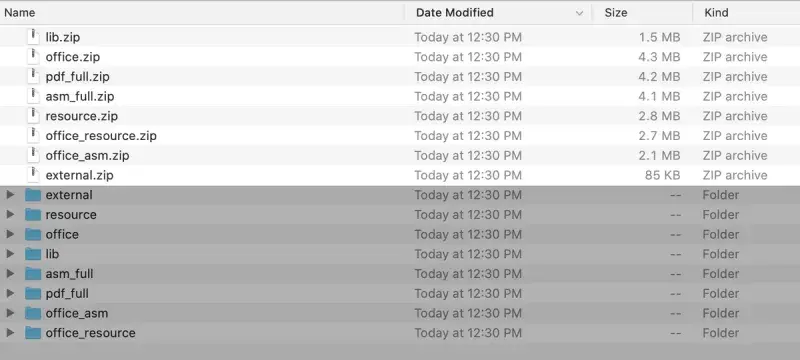
The files you will need to copy from the “webviewer-salesforce” directory.
You can add your WebViewer license key in staticresources/myfiles/config.js file or add it in WebViewer constructor by passing l: "LICENSE_KEY" option.
If you haven’t done so, authenticate with your hub org and provide it with an alias from your terminal (macOS) or cmd (Windows). Execute the following command as is from this list of commands:
Sf org login –loginMethod
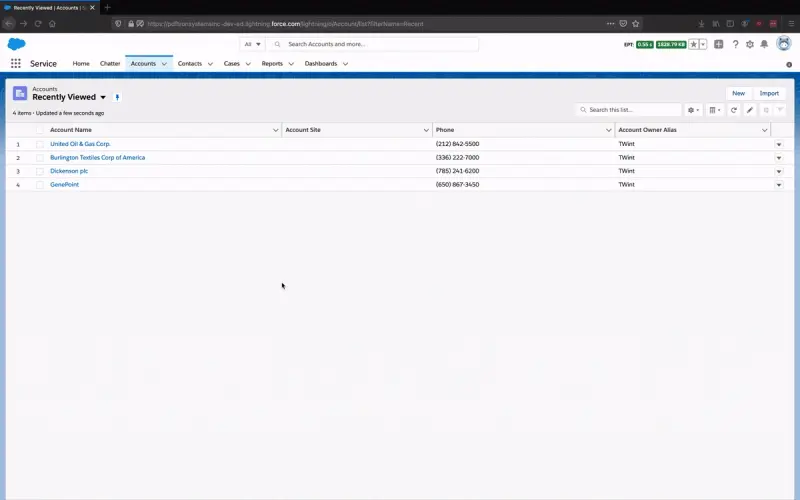
3. Enter your org credentials in the browser that opens. Enable devhub by typing dev hub in the quick find search and toggle to enable as shown in the picture below:
4. Enable Salesforce Cli access to your org. Now you are able to deploy WebViewer to your org. Here are multiple deploy methods:
- `sf project deploy start`
- Use VSCode Salesforce extension and right-click to deploy
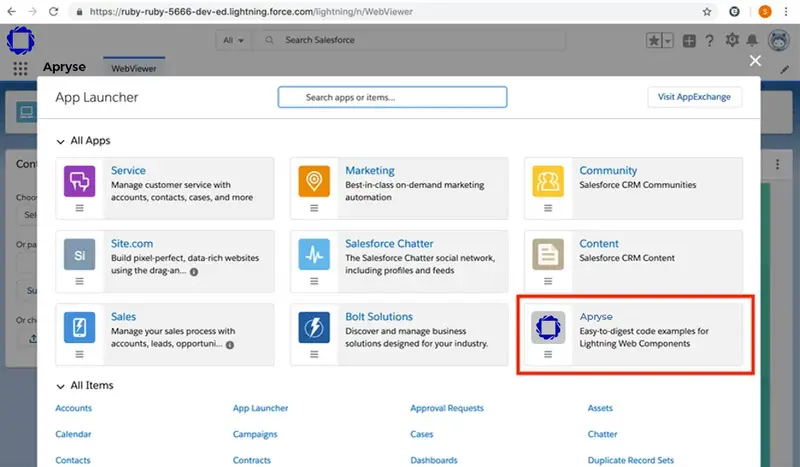
Here is the opened app:

Include the following in your profile to view the Apryse application and tabs from the sample repository:
Implementation Details for Developers
Setting Worker Paths in Config.js
Optimizing the original WebViewer source code for the Salesforce platform means that we will also have to set a few paths in config.js in order for WebViewer to function properly.
Open the config.js file in your myfiles folder and paste the following:
Communicating with CoreControls from Lightning Web Component
On the Salesforce platform, Lightning Web Components have limited access to the WebViewer’s iframe due to LockerService requirements. However, with Lightning Components, you can still enable limited communication between components with the postMessage mechanism.
Here is the implementation of the postMessage mechanism used in our sample project. You can use this approach to communicate with the iframe’s contentWindow.
Inside the config.js file, use the following:
And in the Lightning Web Component, send messages with postMessage using the following:
To open DOCX, XLSX, or PPTX files, swap the initialDoc with the appropriate file. PNG and JPG file types are also supported.
Additional Features
You can now start adding features to your viewer:
And much more!
Suggested Read: Learn how to add PDF viewing and editing to Mendix apps with WebViewer
Wrap up
To learn more about this integration, visit our Salesforce documentation section, explore our guide on getting started with WebViewer in Salesforce or watch our recorded webinar on integrating WebViewer into Salesforce. If you have any questions about implementing WebViewer in Salesforce, please feel free to get in touch and we will be happy to help!