Roger Dunham
Updated June 23, 2025
Detecting ‘Wet’ Signatures using Apryse Smart Data Extraction
Roger Dunham
Summary: Discover how Apryse’s Smart Data Extraction automates wet signature detection in PDFs, enhancing accuracy and efficiency while reducing human error.
Introduction
So, here’s the problem – you need to extract the signatures from a large number of documents that need to be manually signed – whether that is with a physical pen (hence the term ‘wet’ signature, as there is real ink involved), or using a signature annotation (or appearance) such as can be done using the digital signature sample on the Apryse WebViewer Showcase.
Perhaps the documents are contracts, or employment agreements, or applications for credit cards – it doesn’t really matter because the underlying concept is the same.
There are lots of reasons why you might need to extract the signatures from a document, but let’s assume, for this article, that you need to compare the signature with a known reference signature as part of an anti-fraud process.
We know that this is a real scenario because customers have asked us how to do this on our Discord channel.
You could of course, manually view each document and scroll through it until you find a signature, then screenshot it.
You could even do so in Apryse WebViewer, and use its built in PDF snipping and cropping tool to do so.
However, even with such a great tool as WebViewer, having to manually search for signatures would be a slow process that would soon become hard to concentrate on, leading to who knows what mistakes.
This is where Apryse Smart Data Extraction comes in - offering an automated solution to the problem of form field detection.
In this article we will look at how to leverage Smart Data Extraction to offer a configurable way to automate the process of detecting signatures within a PDF.
The sample document
As a way of illustrating the technology for this article, I created a fake employment agreement between two fictitious people, printed it out, physically signed it, then scanned the resulting document to create a PDF. That may well be similar to the way that you get documents in which you need to find signatures.
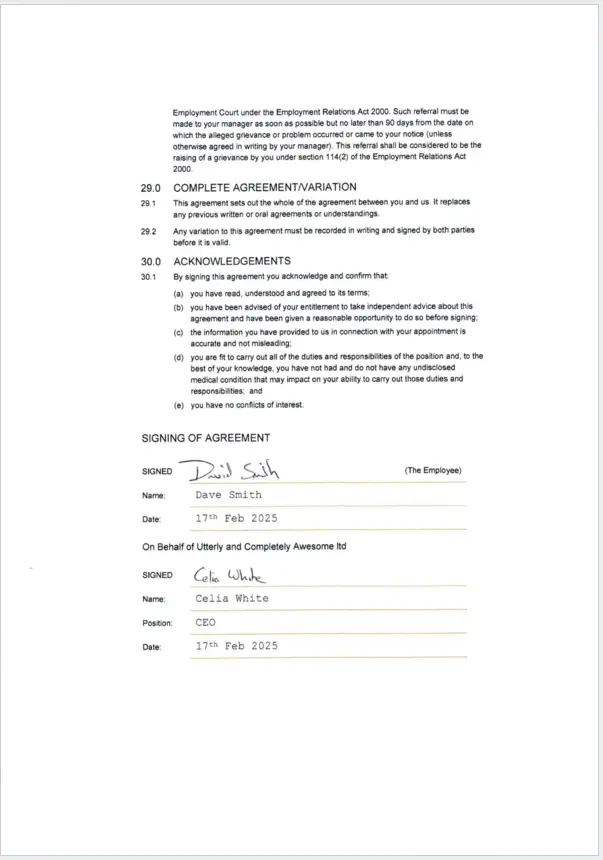
Figure 1 - The sample document. Note that there is a set of form fields on the page.
The document, effectively, contains a form with seven different fields – two of which are signatures, and the others hold text. However, while the document is visually a form, it’s only a scanned document, so there are no hints in the PDF as to what the various parts of the page mean. The technology needs to detect not only that a form is present but also which parts are fields in the form, and which are just part of the document itself (that is ‘paragraph text’). That is quite a challenge – but one that Smart Data Extraction can handle.
The sample code
We are going to be using sample code that is available in a GitHub repo.
You will need to have Node and npm installed. For this article I was using Node 22 on Windows 11, but it will work with many other versions of Node, for example Node 14, as well
Step 1: Clone the GitHub Repo
Navigate to the folder where you store your source code (in my case “c:\demo”) and enter:
git clone https://github.com/Apryse-Samples/apryse-server-signature-idp-sample When this has complete a new folder called “apryse-server-signature-idp-sample” will have been created, so navigate there.
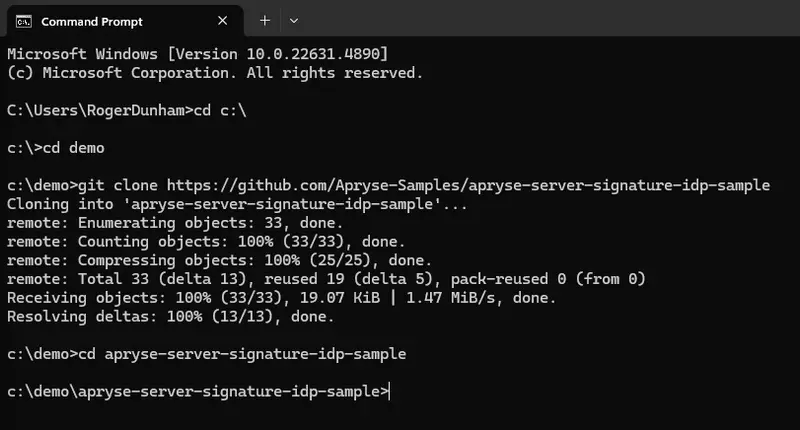
Figure 2 - Clone the repo then navigate to the newly created folder.
Step 2: Install the project dependencies
The project relies on a few modules that are described in the package.json file. You can install these by entering:
npm install Step 3: Open the project in VSCode and add a license key
Open the project in VSCode (or another code editor). You will need a license key to use the sample, but it’s free to get a trial one, and you can do so by clicking on https://docs.apryse.com/core/guides/get-started/trial-key.
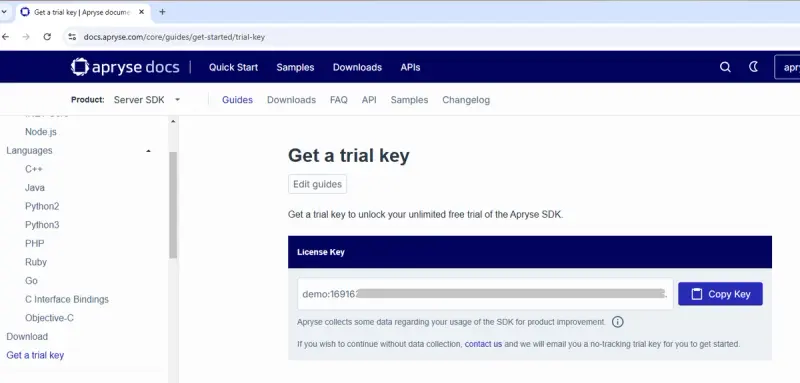
Figure 3- Getting a trial license key. This is free but you should keep it secure.
Once you have a license key, copy it and paste it into the file “license-key.json”
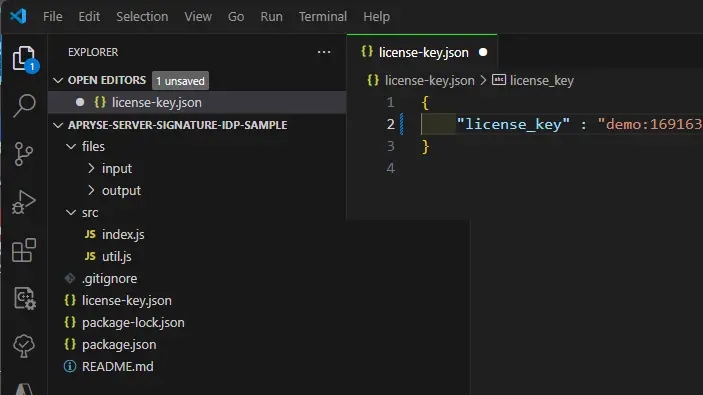
Figure 4 - Copy the license key into the file "license-key.json"
Step 4: Create the collection of files where you want to find signatures
Copy the files that you want to search for signatures into the “input” folder of the project.
In our case, this is just a single file – the Employment Agreement that I created, and scanned, earlier, but you can add more if you wish.
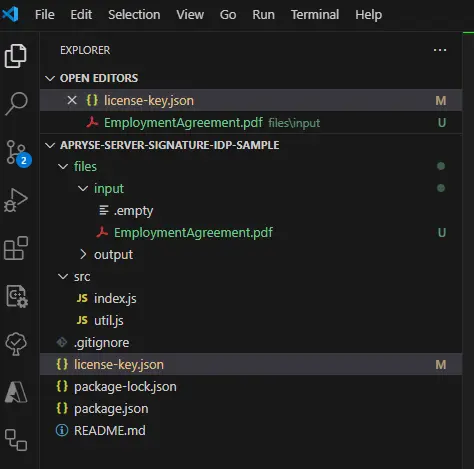
Figure 5 - Copy the files that you want to search into the "input" folder.
Step 5: Run the code
Great! That’s everything in place, so you can now run the code using:
npm run start Step 6: Review the results
After a few seconds the processing will stop, and any signature fields that were detected will be shown.
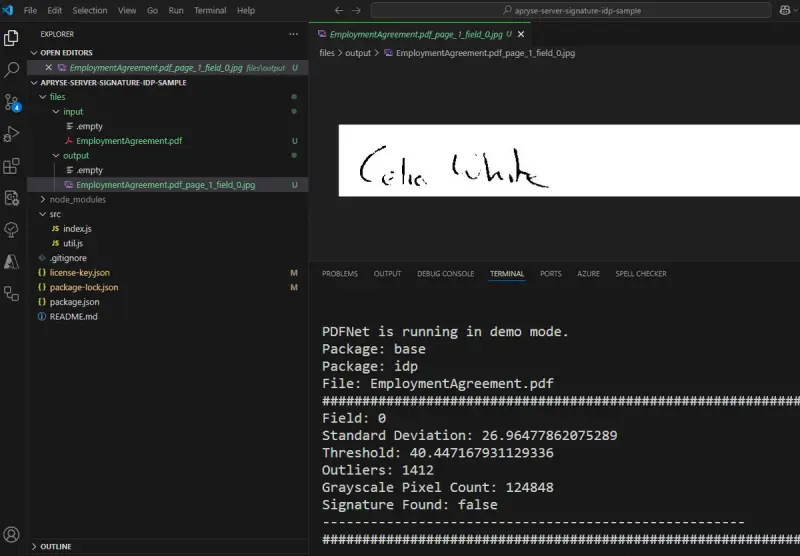
Figure 6 - A signature field was detected in the PDF. Clicking on the file in the "output" folder shows its contents.
The code has found a signature, but there were two in the original file – we need to tweak the algorithm used to identify what a signature field is.
Step 7: Adjust algorithms as necessary
Let’s make a couple of changes to the code.
When Smart Data Extraction detects fields, it gives a confidence value that indicates how certain Smart Data Extraction is that the field is a signature and not something else. Adjusting the minimum value that is needed before a field is considered valid allows us to alter the number of fields that are considered. There is an art to this – reducing it too low may result in things being detected as signatures when they are not, but too high and the code will discard valid signatures. For now, though, let’s change it to 0.88.
We will also alter the value for “THRESHOLD_ACCEPTANCE” which is a value used to identify whether the signature field actually contains a signature, rather than, for example, a coffee stain or a dog hair. In this case let’s reduce it to 0.02.
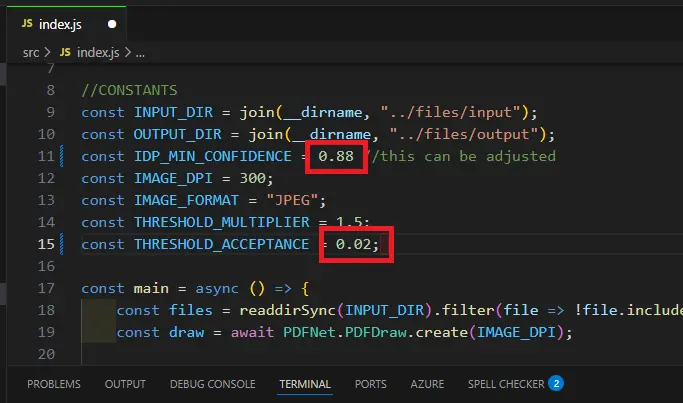
Figure 7 - Adjusting values used to detect valid signatures.
Now, if you run the project again, the other signature is also found.
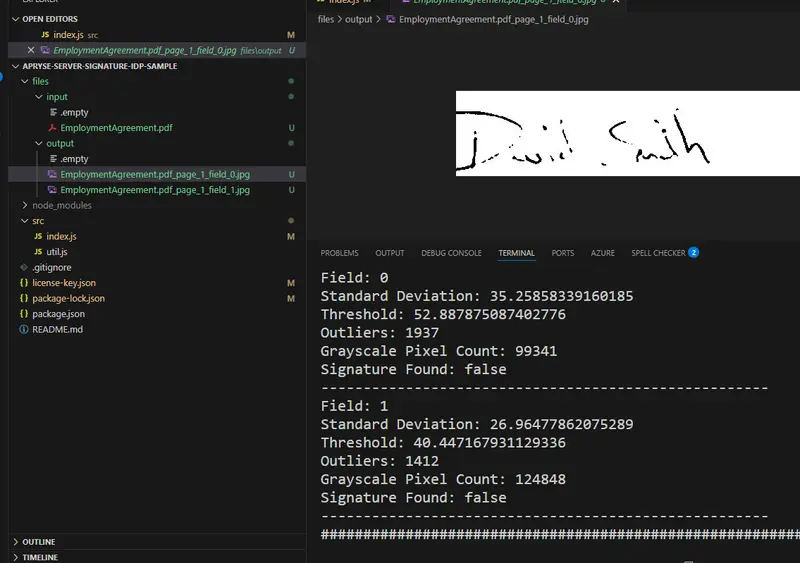
Figure 8- With the altered parameters, the second signature is also found.
One last change that we will make is to tweak the threshold that is used to determine whether a specific pixel should be considered as black or white. The default value is 128, and while that works, the output image is sketchy – while we could extract the image separately, for now let's just change the threshold to 170.

Figure 9- You can also change the threshold that determines whether a pixel is considered to be black or white.
Now the signatures are both detected but are also clear:
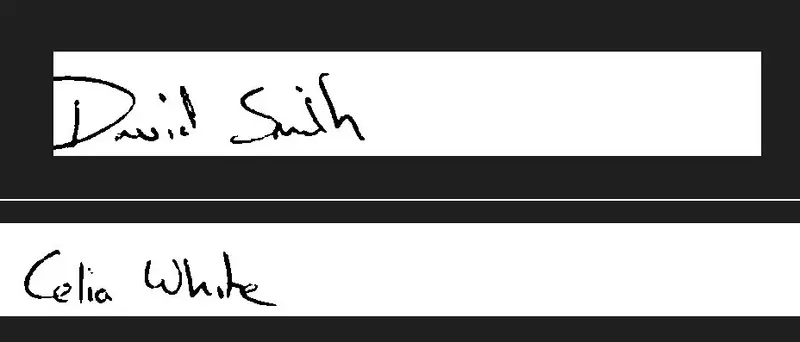
Figure 10- Now both signatures are correctly detected.
That’s awesome! What you do next is up to you – you could, for example, use those images as part of a process to verify that they look similar to reference signatures as part of a fraud detection process.
How the code works
Let’s look at how the code works.
The initial detection of field is being performed by the Data Extraction Module that is included in pdfnet-node package that provides a wealth of document processing functionality that you can used with Node.js.
The Data Extraction Module allows you to detect data in various different ways, for example it can be used to extract tables, or document structure. For this article, though, we are using its ability to detect form fields within a PDF and extract the locations of those fields as a JSON string.
You can see what is going on by adding some logging into the code, in which case you would see that the JSON looked something like:
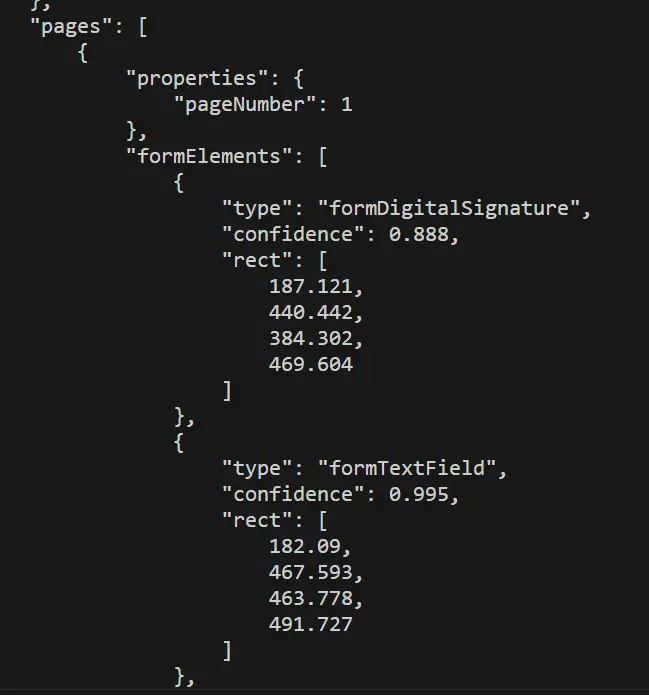
Figure 11 - Part of the JSON file that Smart Data Extraction creates. You can see that two fields were detected, along with their location and the confidence in the result.
While Smart Data Extraction returns data for several field types we are only interested in Signature Fields, and as such the results are filtered to included only that kind of field, and to avoid “false positives” we require that confidence is greater that the threshold specified (this is one of the parameters that we tweaked earlier).

Figure 12- the code used to filter the list of fields to just those that we are interested in.
The entire page is then converted into an image, and for each candidate signature field the grayscale pixels that make up that part of the image are extracted and stored into an array, based on the locations that we saw in the JSON file earlier.
The values in the array are then used to figure out whether the field contains a signature using some clever math that has been found empirically to give good results. You could, of course, use an alternative method if you preferred which can still use data extracted using Smart Data Extraction.

Figure 13- The algorithm for deciding if the field contains a signature.
And that’s the hard work done – if a signature is found then an image of the field is saved with the “signed” in its name, otherwise it is saved without the word ‘signed’ – suggesting that it was incorrectly detected but still making it easy to review.
You could extend the code and extract all the fields within the file – the easiest way is to remove the filter shown in figure 13. Just run the code again, and now all seven fields are extracted, and you can scroll through the results.

Figure 14- The result of extracting all detected fields, and not just signature fields.
You can see that despite the PDF being scanned, Smart Data Extraction correctly found and extracted all the fields on the page.
Conclusion
We’ve seen how we can use Apryse Smart Data Extraction to detect fields within a scanned PDF – one that contains no clues, other than its visual appearance as to what it contains.
Apryse lets you take this much further too. For example, if you have many forms that are similar then you can use Apryse Template Extraction to create a template from one form that can then be used to improve detection on other, similar forms. That is really cool!
What’s more, we’ve only looked as a small part of what the Apryse SDK can do. In addition to detecting forms fields, the same SDK also offers a wealth of other document processing functionality – whether that is automated data extraction, or automated document production, or redaction of content, or collaboratively annotating documents with your colleagues, or many, many other things.
So why not check out the SDK, get yourself a license and see how much time you can save with the Apryse SDK?
It’s easy to get started - there’s a wealth of documentation, and a dedicated Discord channel if you run into any problems.


