Roger Dunham
Published May 22, 2026
Updated June 05, 2026
7 min
Creating Redactions with Overlay Text
Roger Dunham

Summary: Protecting sensitive data in industries like healthcare, law, and insurance is vital for compliance and risk reduction. This article demonstrates how to use the Apryse SDK to automate the detection of sensitive content inside a PDF within the browser. You will learn how to automatically scan and identify sensitive keywords, names, and addresses upon document load, programmatically generate redaction annotations using text coordinates (quads), and customize redaction styles by adding descriptive overlay text like replacing a name with "Witness A".
Introduction
Redaction matters.
Whether you are working in health care, insurance, or legal services, you are almost certainly handling documents that contain sensitive personal or confidential information. Names, addresses, medical details, financial data, and witness statements can all cause real harm if disclosed unintentionally. Effective redaction is how organizations meet privacy obligations, reduce legal risk, and ensure that information is shared only with the people who are entitled to see it.
In this article, we will see how we can use the Apryse WebViewer to find and redact specific content within a PDF.
The Sample PDF
For this article, I asked Copilot to put together a fictitious legal case. It mentions the names and addresses of the victim and the witnesses, as well as lots of detail relevant to the case.
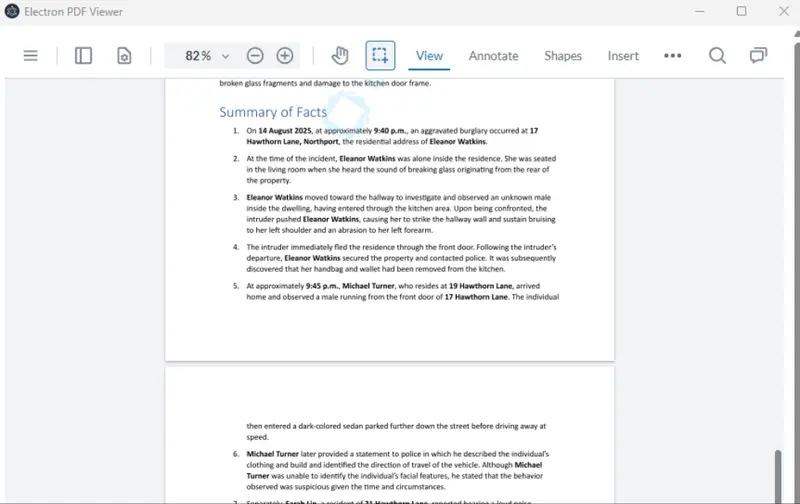
Figure 1: Part of the sample data - Witness and Victim names are shown along with addresses.
We want to create a PDF that contains information that is relevant to the case, but which doesn’t directly name the victim or witnesses or include their addresses.
There are many ways that we can do this. For example, we could use the Apryse SDK running on a server to replace that content before we even see it. Or we can display everything within WebViewer and allow the user to manually search for text, possibly using patterns to find things like phone numbers, while still allowing them to manually add redactions to images or other parts of the text.

Figure 2: The Apryse Showcase lets you try out functionality. In this example, you can use the pattern-based search tool to find phone numbers in a document, allowing you to quickly detect things that should be redacted.
For this article though, we will get the Apryse SDK to automatically identify what needs to be redacted when a document loads but get the user to review and manually confirm the redaction.
We’ll also see how we can add overlay text to, and change the style of, redactions.
What’s more, we will do all of this within the browser.
You can get the source code from this GitHub repo.
Redaction is much more than just blanking out text with a black rectangle. The Apryse SDK also removes the text that is underneath, even if it is on a different layer.
Read our Ultimate Redaction Guide.
Defining What to Redact, and What to Replace it With
While redacted text could just be marked with a black rectangle, it can also be replaced with a description of the type of text that was removed. For example, we can use “Witness A” instead of the witness’s actual name. That makes it easier to understand the context of the unredacted text, while still offering anonymity to the people mentioned.
For this article, I have hard-coded some data for redaction. In practice, though, that data would likely come from a database, and might well be in the form of JSON.
The schema that we are using includes a label, one or more search terms, and the replacement text to be used.
 type RedactionRule = {
        label: string;
        searchTerms: string[];
        replacementText: string;
      };
The data that we will use (which is currently hard-coded) is:
When we use that data, if we find the search term “Eleanor Watkins” then we want to replace it with “Victim A”. Similarly, if we find either “17 Hawthorn Lane”, or “number 17”, then we will replace that with “Victim Address”.
Finding the Text to Redact
Once WebViewer has loaded a document, the “documentLoaded” event is used to trigger searching the text within the document using documentViewer.Search.
In fact, we do that repeatedly, once for each search term defined in the REDACTION_RULES JSON object.
Setting Search Mode
As part of setting up the search functionality, we need to specify a searchMode.
We could decide to use enforce case-sensitivity, or look only for whole words, or even use REGEX, though I chose not to.
We must, however, include Search.Mode.HIGHLIGHT. If that is not included, then the quads (the coordinates that define where matches were located) will not be returned, and we need those in the next step.
A quad defines the location of a block of text in a PDF. At its simplest it can be thought of as a rectangle, but it is possible for it to be rotated or skewed.
Having specified how we want to search, we call the async function getAll and await getting an array of results returned.
Once we get the search results back, we process each one in turn and create a redactionAnnotation for it (we’ll cover that in the next section).
We then push the redactions that have been created for that search term into an array and repeat the process for all of the other search terms.
Finally, we add and redraw all the new annotations to the Annotation Manager as a batch process using the array that we had built up. We could have added them as we found them, but using a single batch process is more efficient.
Creating Redaction Annotations
We have gotten ahead of ourselves though. We still need to create the redaction annotations. Let’s look at how we can do that.
Each result from searchStream.getAll() contains information about where it was found within the document.
This includes the pagenumber , and the quads that define exactly where on the page the text was found. However, since text could wrap around the end of a line, it is possible that there might be multiple quads for a single search result.

Figure 3: Examples of text being found (in this case "Michael Turner". If it is in a contiguous block (as in the first result) then a single quad is returned, otherwise multiple quads will be associated with the result.
Multiple quads are not a problem when creating redactionAnnotations since they have built in support for multiple values.
If we run this code, we’ll see a list of redaction annotations in WebViewer. That’s great. With a “Human in the loop” we can add extra items to that list or remove any that we think are unnecessary.
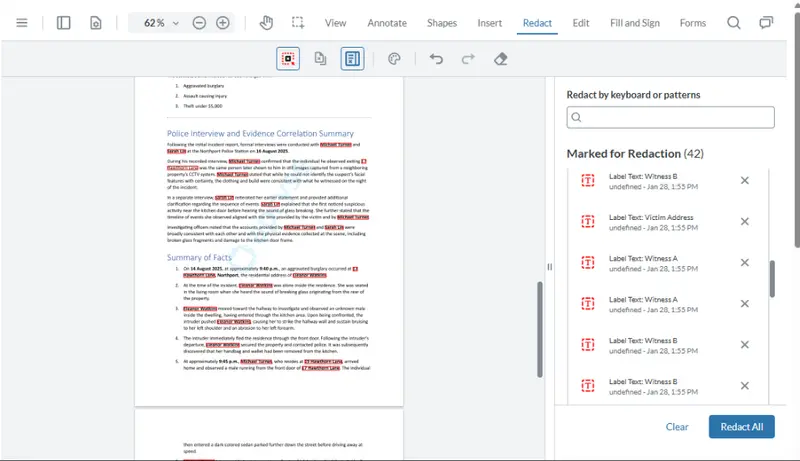
Figure 4: Text to be redacted has been identified and is shown in WebViewer. The user can now verify this before implementing redaction which will remove the underlying text, and blank out where the text was.
At the moment though, the text is still present. We can see what has been identified but the redactions have not been applied.
How does a redaction annotation differ from a redaction? A redaction annotation indicates the text that has been marked as needing to be redacted, but it has not yet been removed.
Redaction is the process where the marked text is actually removed from the PDF. Effectively, you are shredding that part of the document permanently. The visual clue that text was removed (typically, but not necessarily, a black rectangle) is also known as a redaction.
Applying the redactions is, with the current workflow, a manual step as the user needs to click Redact All then confirm that they want to continue.
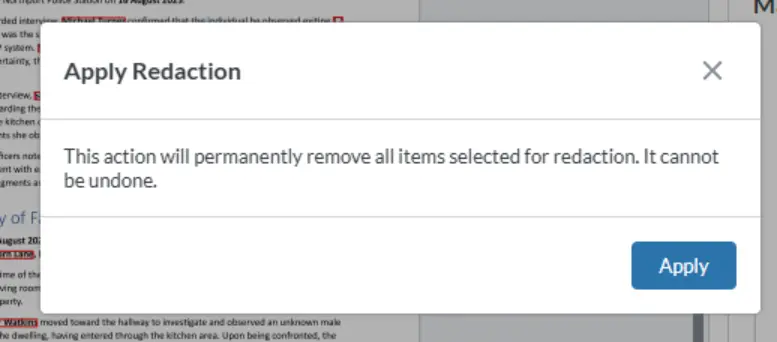
Figure 5: The dialog for confirming that the redactions should be applied.
If they click Apply, then the text beneath the marked redactions will be removed and a rectangle will be added to the PDF to show where the text was located. That rectangle will contain the text that was specified in the JSON as “replacementText”.
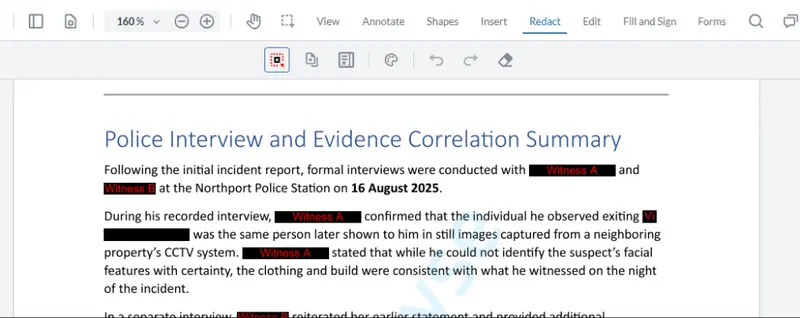
Figure 6: Our document after redaction. Black rectangles show where the text was removed.
That’s great, but there are a couple of things that aren’t ideal. The first one is that it’s hard to read the replacement text. Let’s fix that.
Making the Redactions Easier to Read
Red text on a black background isn’t a great combination, but with WebViewer, you have the freedom to define the color scheme that you prefer. We could just change the text color (perhaps making it white, so that we can see it on the black rectangle), but as an example, let’s also change the rectangle color, and have red text on a yellow background.
Now when we apply the redaction, we get something that is more readable (or just more ugly – there is a reason that I am not allowed to choose the color scheme when decorating my house).

Figure 7: Red text on a yellow background makes it easier to see the overlay text. You can choose whatever colors you prefer.
Adding an Annotation Author
The next issue with our initial code is that the redaction annotations don’t have their author specified, so that value just displays as "undefined".
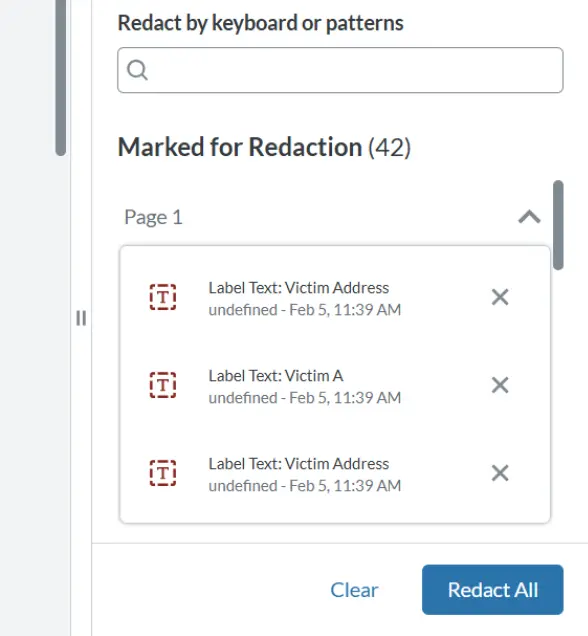
Figure 8: The redaction author is not defined.
That may, or may not, matter to you, but if it does, then it is easy to specify an author as we just need to set the Author property for the annotation.
annot.Author = 'Redaction Tool';While we are looking at authors, we will also set the Current User for the AnnotationManager.
Now we can see which redactions were marked automatically and which were created manually.
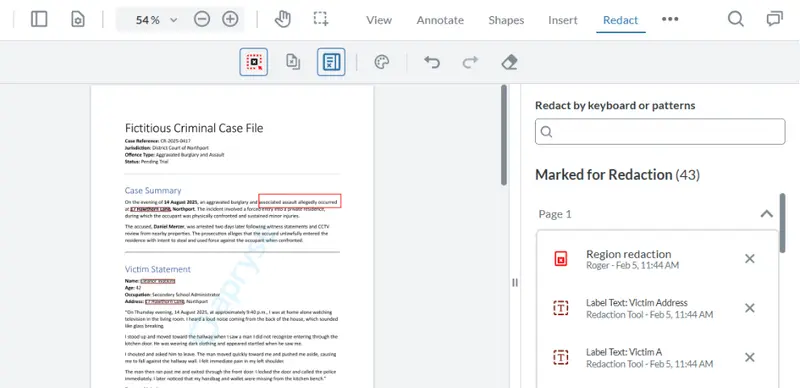
Figure 9: By setting the author when the annotation is created, you can see which annotations were added manually, and which were found by our tool.
Read more about How to specify Annotation Authors
That’s starting to look really good!
Fitting the Overlay Text in the Redaction
I mentioned earlier that redactions can be made up of multiple quads. For example, when the search result is split over a line break.
When that happens, the overlay text gets squeezed into the first quad, and if there isn’t enough space, then it gets truncated.
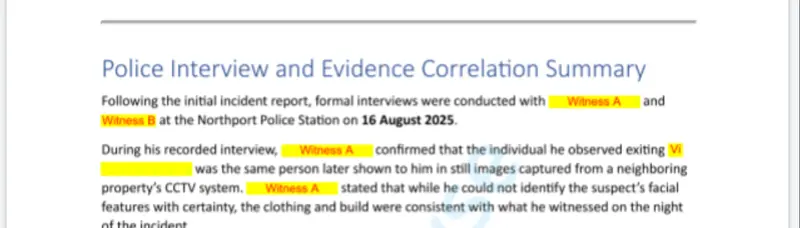
Figure 10: If the Overlay text won’t fit then it is truncated, so we just get to see “Vi”.
The obvious solution is to set the font size to something that will fit into the redaction.
There is a gotcha here though.
If you use annotation.Width, then it will often work, but If the redaction annotation is split over two or more lines, then there will be multiple quads, and the reported width is that for the rectangle that enclosesall of the quads. This could make it almost the page width and much larger than any of the individual quads.

Figure 11: If the redaction has multiple quads, then the width will not be what you might expect.
As a work around, we can just get the width of the first quad. There is no built-in width function, but we can calculate that from the first and second x values.
const width = quads[0].x2 - quads[0].x1;
annot.FontSize = getFontSize(width);
Now when we run the code, our overlay text fits, although for small rectangles the overlay text may wrap.
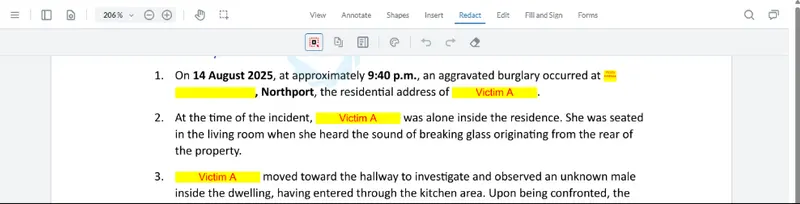
Figure 12: By calculating the size of quads, we can get the overlay text to fit into the redaction.
There is still one problem though. If there are multiple quads, then the overlay text is only shown for the first one; later ones have no text.
Let’s change our code and create a separate redaction annotation for each individual quad that is found in a search result.
A side effect of this is that now a redaction annotation hasexactly one quad , so we can use annot.Width as a reliable way of knowing the space into which the overlay text must fit.
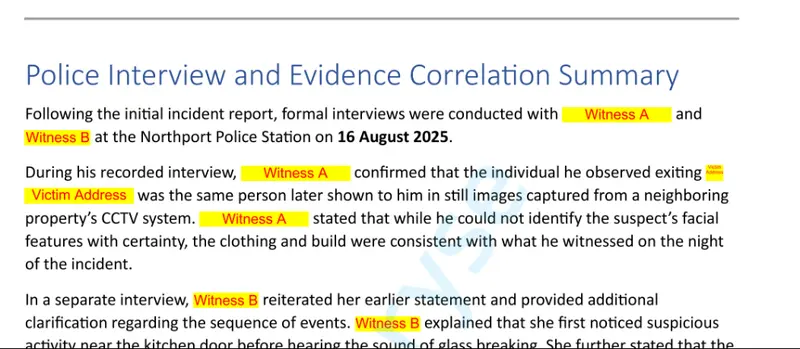
Figure 13: The final result – each redaction has the correct overlay text.
And the final result is exactly what we want. Awesome!
Conclusion
We’ve seen how we can use basic built-in WebViewer functionality to find text within a document and create redaction annotations that can be used to remove that text.
We’ve also seen how we can add overlay text that identifies the type of text that was removed, and ways in which we can adjust the styling of the final redaction.
That’s a huge range of flexibility and illustrates how WebViewer allows you to tailor the appearance to your specific needs.
And that is just one of the many things that WebViewer can do for you. Check out the Apryse Showcase to see some of the other functionality.
If you want to see all the code that we have used, then get the source code that goes along with the article.