Roger Dunham
Published May 15, 2026
Updated June 12, 2026
5 min
“GoToR Links—Twice the WebViewer, Twice as Good!”
Roger Dunham
Summary: This article demonstrates how to implement side-by-side GoToR link functionality in Apryse WebViewer by using two separate instances, allowing for a mix of editable and view-only documents. The approach enables advanced navigation and annotation workflows across complex document sets, leveraging custom configurations in a React environment.
Introduction
GoToR links are a great way of being able to jump quickly from one document to a specific page in another. That’s really useful if you have a complex collection of legal documents, notes relating to an insurance claim, or medical notes relating to a patient or any other scenario where you want to quickly move between files.
In the previous article in this series, we saw how Xodo PDF Studio can display the document that a GoToR refers to within a new tab, and we saw how we can get a similar result using the Tab Manager in Apryse WebViewer.
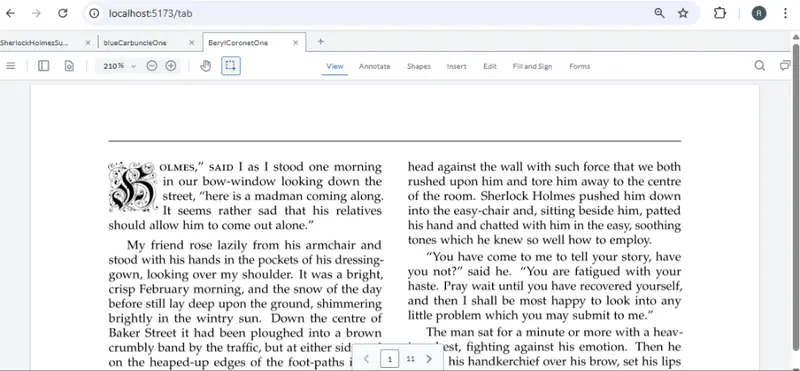
Figure 1: GoToR links shown within tabs of WebViewer.
In this article, we will look at how we can take another step and show two documents side-by-side, rather than in tabs.
We’ll take the opportunity to add extra functionality as well and let the user add annotations to the document that contains the links, while restricting them to only viewing the content of the file that is linked to. That means that one WebViewer is view-only, but the other is not. Cool!
Getting the GoToR Link From the PDF
Before we go further, let’s just review what we saw in the previous article, where we got the filename and page number associated with a GoToR link by processing annotations in response to the user clicking on the viewerElement (the element with the DOM where WebViewer is mounted).
If you haven’t read it, then check out that article. For now, though, I’ll just repeat the code for getting that information from the link.
So, now we know the name of the file and the page number that we want to show, but how are we going to implement that?
There are at least two ways that we could implement this; one using built-in side-by-side WebViewer functionality, and the other is by using two WebViewers and interacting with both.
Side-by-Side View in WebViewer
One way of solving this problem would be to use the Apryse WebViewer Side-by-side functionality. You can check that out using the Apryse Showcase.
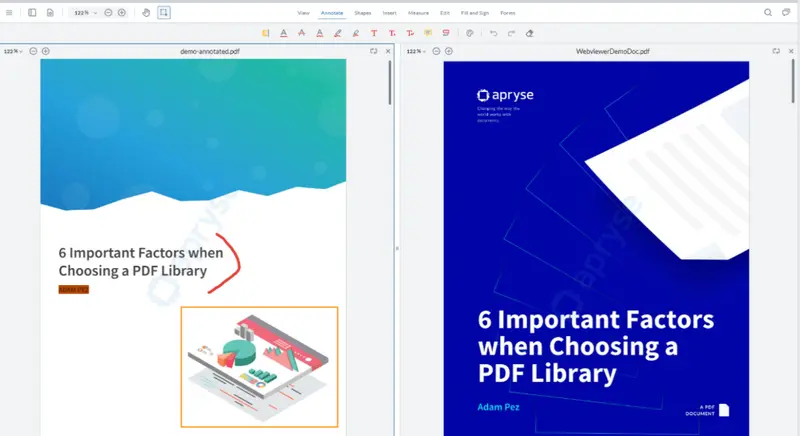
Figure 2: Side-by-side view in WebViewer.
It’s a great piece of functionality as not only can you see two documents side by side, you can also synchronize their scrolling.
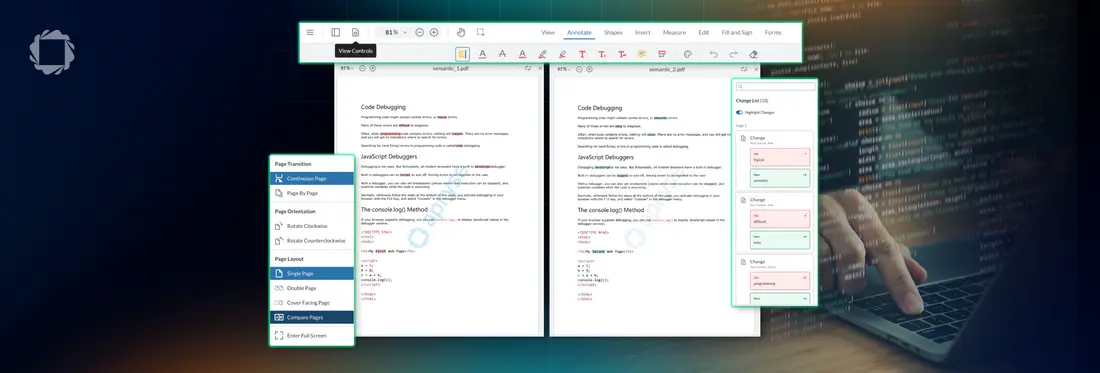
You can even take it a step further and compare semantic text differences between two documents.
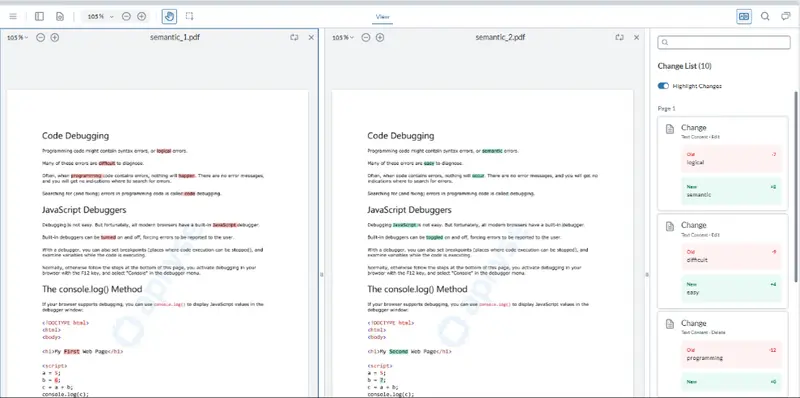
Figure 3: Comparing semantic text differences side by side.
That is awesome and it’s already built into WebViewer, and that could be a great solution.
However, I want to make one document editable and the other not, and the built-in functionality has a single set of controls that relates to both documents.
So, let’s look at an alternative: two separate instances of WebViewer.
Multiple Instances of WebViewer
With recent versions of React, it is not unusual to see warnings about two instances of WebViewer being mounted on the same Div Element if Strict mode is enabled. That’s not what we are talking about here. Instead, we are going to have two separate Div elements, each with a single WebViewer mounted.
I’m building on the code that was used for the previous article, but you can download all of the source from GitHub. For this article, we are looking at the code in the file OpenInOtherWv.tsx.
We have added another WebViewer to our project. It’s much the same as the first one, but we will use the ref of “viewer2“ and create a state variable called “wv2Instance” so that we can refer to it once it has been constructed.
Setting Up the UI
I have updated what the component returns by adding the new div for the second WebViewer plus a narrow div for styling reasons.
We’ll also give a unique id to each div where a WebViewer will be mounted, which helps the Apryse Web SDK to keep state for each specific instance.
Our React return function now includes:
We will use the left-hand viewer (which we will call “WebViewer1”) to show the summary document (the one that contains the GoToR links), and the right-hand one (which we will call “WebViewer2”) to show the page of the document that the link points to.
Both WebViewer objects are created in a similar way and in both cases, we need to store the instance object (that is available when the constructor promise resolves) in a state variable. I’m using the names wv1Instance for the left-hand one and wv2Instance for the right-hand one. The code for the right hand WebViewer is shown below:
For both WebViewers, I need to specify the path to the WebViewer static assets. I also need to specify a licenseKey. The mounted reference is used to work around React Strict mode and isn’t needed in production code.
For the left-hand WebViewer, I’m enabling a FilePicker, but not for the right-hand one since in this case, the document that is shown is controlled by the GoToR links in the left-hand document.
Finally, for the right-hand WebViewer only, I am also specifying UI.enableViewOnlyMode();. That single line of code means that all the UI elements that would have allowed me to modify the document will be removed.
Handling the Filename and Page Number
The code at the start of this article gets the filename and page number from the GoToR links and logs it to the console. In the previous article, we passed the filename (though we could have passed a blob or byte array) to the TabManager which then opened the file.
In this example, we need a method that will tell the right-hand WebViewer (which we reference using the wv2instance state variable) which file to load.
Just as before, we are also registering an event that will fire just once, when the document and its annotations have been loaded. When that event fires, it will scroll the viewer to the required page using setCurrentPage().
That’s it. All that remains is to restart the server, load the page, select a file that contains links, and click one.
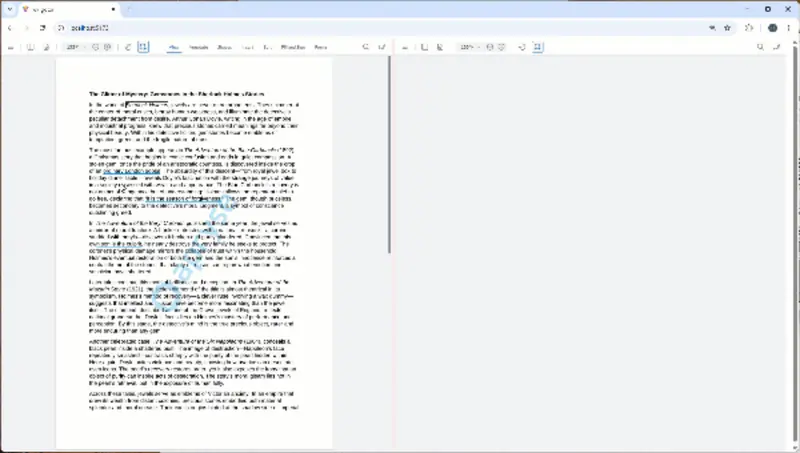
Figure 4: The final result. You click a link on the left and the file loads in the right-hand pane and scrolls to the correct page. Notice how the left-hand viewer has lots of controls, but the right-hand one is in view-only mode.
Now I can see both the document that contains the links and the document that the links point to.
And because we specified that the right-hand document is view-only, but the left-hand one isn’t, we can add annotations to the document that contains the links. That gives us the ability, for example, to add a note that says why the link matters, or to do whatever you need in your use-case.
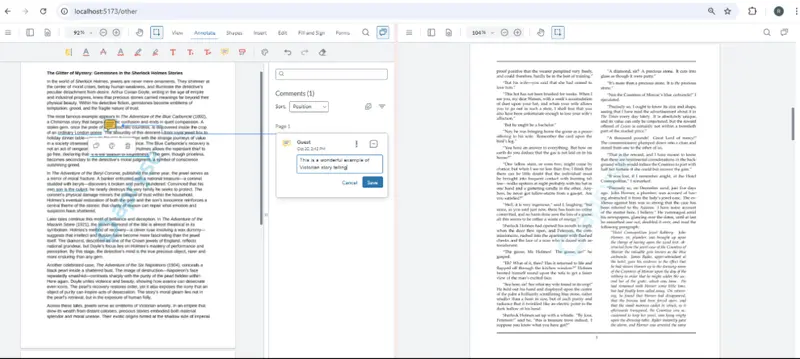
Figure 5: WebViewer offers huge flexibility, allowing you to add annotations if you require, or to have the WebViewer as View-only.
That’s awesome. More flexibility than Acrobat offers, and you control what can be done.
What’s more, we’ve achieved this with about 100 lines of our code.
Where Next?
We’ve already seen two different ways that we can use GoToR links to navigate to a different document. In the next article in this series, we’ll create a web page that allows us to define these links. We’ll build on what we have already seen and use two instances of WebViewer and a custom button, showing how to add even more functionality to Apryse Web SDK powered apps.
We shouldn’t forget, though, that WebViewer isalready awesome , even without this customization. You’ve already got built-in access to a huge range of tools like annotation and redaction, plus PDF, DOCX and Spreadsheet editing, and much more.
So, grab yourself a trial license key and check things out for yourself.
Or head over to the Apryse Showcase and see, right now, what WebViewer can do, knowing that you can quickly extend it to tailor it for your particular requirements.


