Roger Dunham
Published August 06, 2026
Updated August 06, 2026

6 min


Beyond GoToR — Adding Highlights
Roger Dunham

Summary: Building a GoToR link that jumps to another PDF is useful but what if it could highlight the exact text you meant, not just point at a rectangle? This post picks up the WebViewer GoToR series by showing how to store text quads directly in a link's custom data, so clicking the link highlights precise, multi-line selections in the target document—something desktop PDF apps can't do. It's a hands-on walkthrough with working TypeScript, building on the previous articles in the series.
Introduction
Previously, in this series of articles we have seen how we can work with, and create, GoToR actions using Apryse WebViewer, then build on that functionality to use custom data to highlight a rectangle in the target document.
In this article we will use custom data in a different way and create text highlight annotations to indicate specific blocks of text—something that is not available for desktop apps.
And we’re going to do this by adding just a little more functionality to the code that we have created.
You can get all of the source code for this series of articles from this GitHub.
This article specifically relates to the files CreateWithhQuads.tsx and ShowHighlight.tsx
Functionality we have already used
We have already seen:
- How to create two instances of WebViewer side by side
- Have different UI configuration for each WebViewer
- Find the selected page and file in WebViewer
- Find the Quads for selected text in WebViewer
- Create a Rect than encloses the quads
- Use that data to create a GoToR action on a link annotation, that opens the required document, scrolls to the correct page, then shows the selected text using a rectangle annotation
It sounds like we have almost everything that we need!
Working with Quads directly
In the previous article, we created a link annotation using a custom button. When that button was clicked, we got the collection of quads that described the location of the target text using Core.documentViewer.getSelectedTextQuads(). We then created a Rect that enclosed the quads.
That’s great, but runs into problems if, for example, if you have multi-column text and the selected text runs from the bottom of one column to the top of the next.
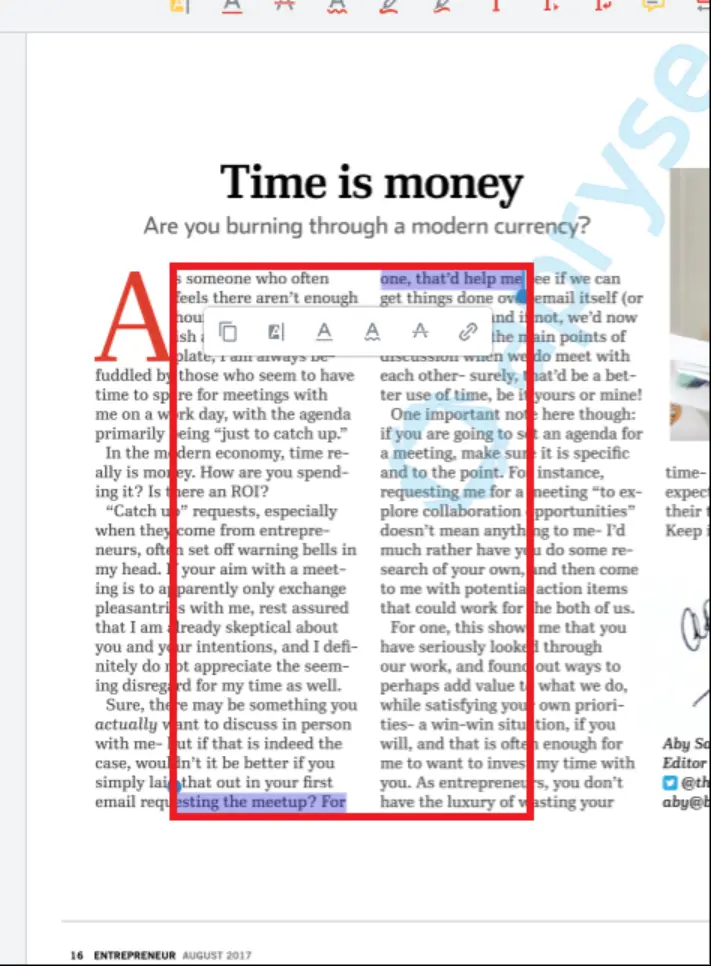
Figure 1: Creating a Rect that encloses the quads can give unhelpful results. A more robust solution is needed.
Thankfully there is an easy solution at hand. We can put the quads directly into the custom data.
Adding Quads information to the Annotation
In the previous article, we created four key/value pairs for custom data explicitly setting the values for left, right, top and bottom of the Rect object that enclosed the selected Quads. We can simplify our code significantly and just save the quads
const selectedQuadsInVW2 = wv2Instance.Core.documentViewer.getSelectedTextQuads()
link.setCustomData("quads", selectedQuadsInVW2
That’s easy and the quads object will be implicitly converted into a string. Who said that software development had to be hard?
We need to decide where to place the new link in the left-hand WebViewer. Previously, we created a rect that enclosed all of the selected text, and we could do that here, but let’s use the quads directly.
Often a link is from a single word, but it doesn't need to be. It could be from a short group of words or potentially extend over several lines.
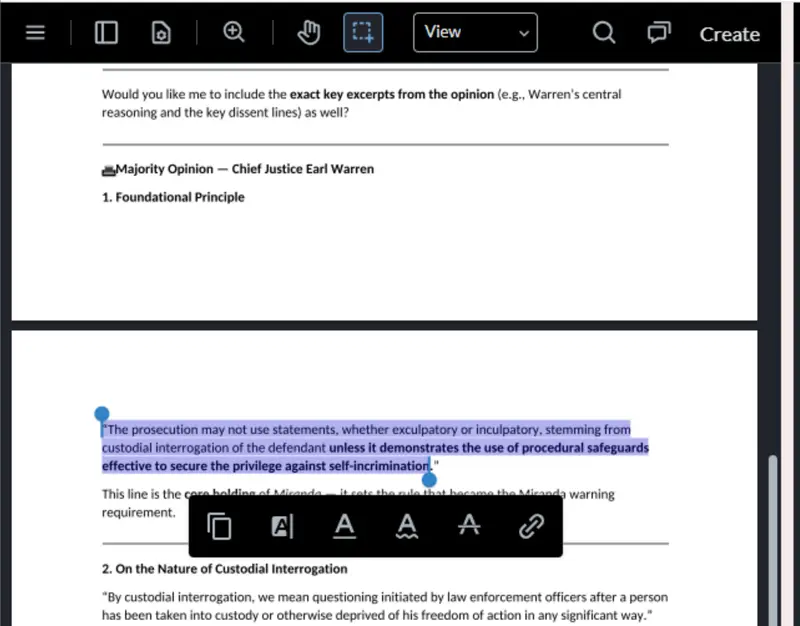
Figure 2: Potentially the selected text could split over several lines.
If the selected text is spread over several lines, then the quad collection for the page will contain multiple quads. Typically one for each line of text (though it could potentially be broken into smaller chunks of text).
We could create multiple links, one for each quad, but for this article (and to focus on the main points of the code), we will arbitrarily choose to just use the location of the first quad, and use the built-in method to convert it into a Rect.
We can use that Rect with the code that was used in the previous article to create the link annotation on the PDF.
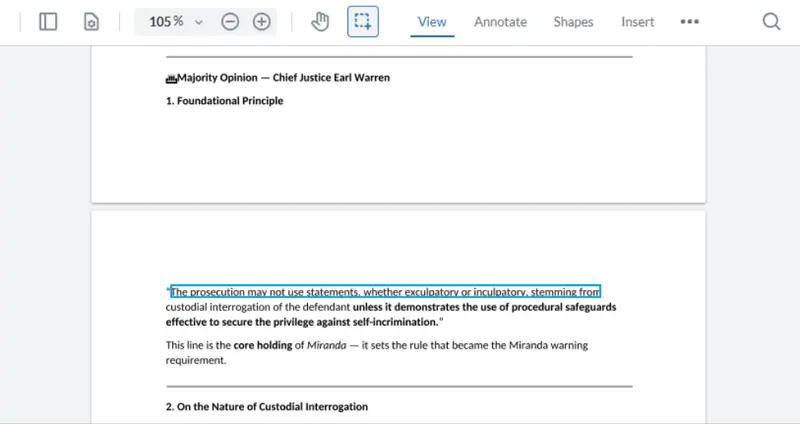
Figure 3: Although we selected the entire paragraph, we chose to just use the first line to get the size and location of the link.
There are other things that you can do with Rect andQuads objects , for example detecting intersections, or whether one object is entire within another. You can also use a TransformationBuilder to transform a rectangle in a certain way if you need to.
Cool. That’s everything that we need to add the quads information to the annotation. Now let’s view that information.
Extracting and using the custom data from links
Just as in the previous article, we can get the document and page that should be opened from the GoToR action.
We can also use exactly the same code from the previous article to open that page.
The last part of the puzzle is getting the custom data from the link. This is similar to what we did in the previous article, although now we use the key “quads”.
const quads = annot.getCustomData('quads')At this point, quads will be a string. I created a type to hold the page number and quads, and I’m storing that in a state variable that I’m calling “selectedQuads”.
  const selection = new PageQuads(page, quads)
  //Setting the selected quads will trigger a useEffect
  setSelectedQuads(selection);
When selectedQuads is updated, a useEffect is triggered.
In the useEffect we are parsing the string that we received in the custom data, then extracting the quads data for the current page (we could even extend the code to allow for selections that are across multiple pages, but I’ll keep things simple).
Previously, we used a RectangleAnnotation. In this article, though, we’re creating a TextHiglightAnnotation. That’s great, since it accepts a collection of Quads as an option, which is what we have. We are also specifying the page number and the stroke color (in this case yellow).
Finally, we’re adding the new annotation to the annotationManager for the right-hand WebViewer (wv2Instance), just as we did in the earlier article.
Now if we run the code, when we click on a custom GoToR link, the code will not just navigate to the correct page, but also show the exact text (rather than a rectangle) that was selected.
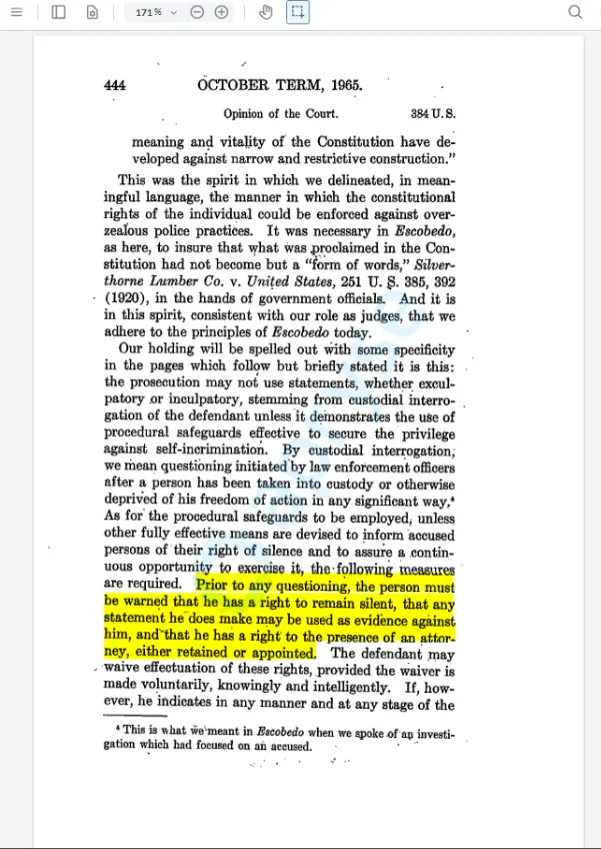
Figure 4: Clicking on the custom GoToR link that we just created now highlights the text that was selected when the link was created. This is done using custom data that was stored with the link.
When you combine this with the features that are built into WebViewer, such as the thumbnail view, this adds a whole new level of value to the document.
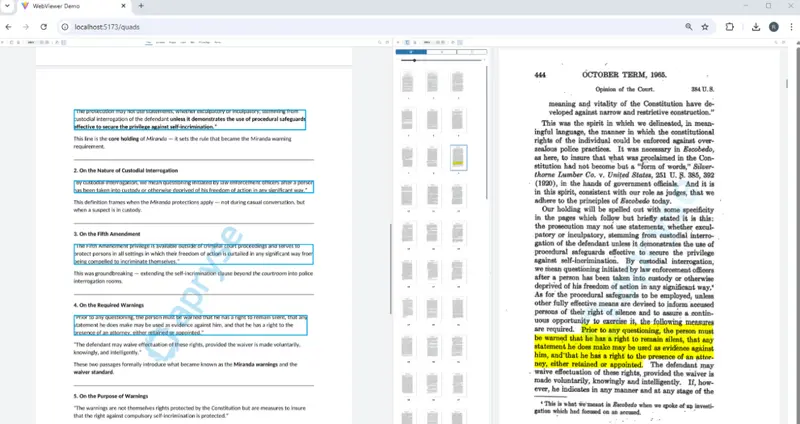
Figure 5: We can now click on a link on the left-hand PDF, and it will take you to the correct page and highlight the exact text in the right-hand document. You can also see from thumbnails where the section relates to the rest of the document.
What about using our PDF in desktop tools?
Even though we created the GoToR link with custom data, it can still be used in a desktop app such as Xodo PDF Studio, or Adobe Acrobat. While the highlight annotation won’t be shown as that requires our custom code, the correct page will still be navigated to (provided that the target document is available).
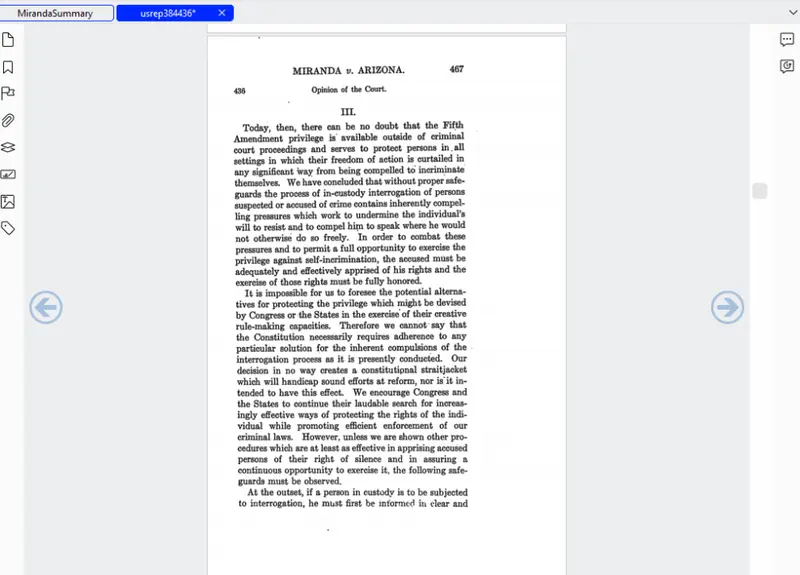
Figure 6: If we use our PDF with custom GoToR links in a regular PDF viewer, then you will still be taken to the correct page. But it's up to you to find where it is on the page the link was actually pointing to without the added value that WebViewer is giving.
Our code is providing something as good as those Desktop tools create, but with our custom code we have added functionality that can make document understanding faster and more intuitive in WebViewer.
Wrapping up
We’ve shown one way that you can create links in one document that take you to the exact text on the correct page in another document.
By adding custom code to WebViewer, we now have a solution that is better than desktop apps deliver. Plus, we have control over where the document is loaded from, improving data security.
So why not check out the Apryse Showcase? You can see for yourself right now, how WebViewer offers a huge range of functionality
Imagine how built-in functionality, coupled with custom code, will allow you to rapidly develop highly customizable solutions that are tailored to your specific workflow. Why wait? Get started now with a free trial license key and the dozens of samples that are available, including the GitHub that goes with the article. If you have any questions, then you can contact us via Discord.