Garry Klooesterman
Senior Technical Content Creator
Published April 16, 2026
Updated May 18, 2026
7 min
How to Integrate a PDF SDK into SharePoint
Garry Klooesterman
Senior Technical Content Creator

Summary: SharePoint’s native PDF viewer is great for viewing files, but to get actual work done, you need an SDK integrated directly into the UI. This moves tasks like editing, signing, and redacting into the browser. Most importantly, it uses a client-side architecture, so your documents never leave your SharePoint tenant, keeping them secure. This blog explores why you’d want to integrate a PDF SDK, like the Apryse Web SDK, into SharePoint and how, along with some frequently asked questions.
Introduction
SharePoint is arguably a great place to store files, but working on files stored in SharePoint is another story. The built-in SharePoint previewer is just a visual check. It’s fine for seeing if you’ve got the right invoice, but you can’t leave a comment, merge two files together, or sign anything legally. This is what forces people to move files to their local "Downloads" folder. Once a sensitive contract is on a laptop’s hard drive, your IT department has officially lost the trail.
In this blog, we’ll look at why you’d want to integrate a PDF SDK like the Apryse Web SDK into SharePoint, how to do it, and some commonly asked questions.
Integrating a PDF SDK with SharePoint
When you integrate a PDF SDK like the Apryse Web SDK into the SharePoint Framework (SPFx), you're adding a full workstation into the browser. This adds high-fidelity viewing for 30+ formats, including Office and CAD files, without needing the original apps. You can split a 50-page scan, rotate a stray page, or redact PII.
Keeping it Secure
Security is the biggest hurdle for any SharePoint admin. The beauty of a WebAssembly (WASM) setup is that it's entirely client-side.
When a user clicks Open, the document is pulled using the Microsoft Graph API and rendered right in the browser. Any changes, like a signature or a redacted line, are saved directly back to the library. No document ever leaves your secure SharePoint environment to be processed by an external server.
Saving Time in Your Workflows
Think about the tasks that currently take ten minutes and three apps:
Merging Files: Taking five separate PDF reports from different departments and combining them into a single, board-ready document without leaving the browser.
Redaction: Permanent scrubbing of a client's address from a contract before it gets shared externally.
CAD Markup: Letting an architect or engineer mark up a drawing (DWG/RVT) without needing to install a $2,000 desktop viewer.
One SDK, Any Platform
The smartest part of this approach is that the same WebViewer you set up here is the same one that works in Salesforce, Mendix, or your own custom-built apps. You get a single licensing relationship and, more importantly, a consistent experience for your users regardless of which portal they’re logged into.
Getting Started
Setting this up isn't difficult, but there's a specific workflow. You use the standard SPFx toolchain, clone the integration repo, and point it at your tenant.
The one thing that catches everyone off guard is the "Custom Script" toggle. You have to turn it on in the SharePoint Admin Center, and it can take up to 24 hours to kick in. Once that's live, you can deploy the viewer as a web part or add an Open in Apryse menu option directly to the document library toolbar.
How to Integrate Apryse WebViewer into SharePoint
In this example, we’ll integrate Apryse WebViewer into SharePoint Online as a web part. We’ll need to clone the SharePoint sample repository and then integrate WebViewer with the clone.
Prerequisites
As with most projects, there’s a few things we need to get out of the way before we start into the main part.
- Install Node.js and NPM
- Install SPFx
- Download and install WebViewer
- Install Node Version Manager (optional, but recommended)
- Get your Apryse trial key
- Set up your SharePoint dev environment
Note: For help on setting up a SharePoint dev environment, see the following:
- SharePoint DX Setup Guide
- Set up your Microsoft 365 Tenant
- Set up your SharePoint Framework Development Environment
Initial Setup
Now let’s get started.
1. Make sure that you're running Node.js v22.21.0 or newer. You can check by running the following in the console:
node -v2. Enable using custom scripts with the following code in the SharePoint Online Management Shell:
Connect-SPOService -Url <AdminSiteURL> -Credential <AdminUser>
Set-SPOsite <SiteURL> -DenyAddAndCustomizePages 0
The following are placeholder variables for the SharePoint Environment:
- The <AdminSiteURL> is the admin SharePoint URL, typically in the form of [your-tenant-name]-admin.sharepoint.com.
- The <SiteURL> is the target SharePoint Site you are modifying, usually in the form of [your-tenant-name].sharepoint.com/sites/[sitename].
- The <your-tenant-id> is your tenant ID. For example, contoso.sharepoint.com.
- The <your-sharepoint-site-name> is the SharePoint Site Name where WebViewer was added. For example, "All Company" is a default Site Name added to a fresh SharePoint environment.
- The <your-shared-document-url> points to the SharePoint Site where WebViewer was uploaded. For example, <your-tenant-id>.sharepoint.com/sites/<sitename>/Shared Documents.
Note: It may take up to 24 hours for the configuration to complete.
3. In the Document Library of your SharePoint site, create a WebViewer folder.
4. In the WebViewer folder, create a js folder.
5. Copy the lib folder from the extracted WebViewer.zip file to the js folder you created.
Note: The WebViewer lib folder is now available from the url https://.sharepoint.com/sites//Shared Documents/WebViewer/js/lib.
Development
1. Clone the sharepoint-integration-examples sample from github:
git clone https://github.com/ApryseSDK/sharepoint-integration-examples.git2. Switch to the sharepoint-web-part folder and install gulp, yeoman and Microsoft SharePoint Generator using npm:
cd sharepoint-web-part
npm i -g gulp-cli yo @microsoft/generator-sharepoint
3. Use the following command to install all the packages:
npm install4. In the sharepoint-web-part folder, create a .env file and include the following parameters in the file:
TENANT_ID=<your-tenant-id>
SITE_NAME=<your-sharepoint-site-name>
WEBVIEWER_LIB_FOLDER_PATH=WebViewer/js/lib
FOLDER_URL=<your-shared-documents-url> // This is where you save the opened local files in the WebViewer
5. In the sharepoint-web-part/config/serve.json file, change the initialPage property to your tenant id and SharePoint site name.
6. Start the web part in the workbench with the following code:
gulp serveNote: If this is your first time setting up the SharePoint Framework, you must call the following code:
gulp trust-dev-certWith your local SharePoint instance running, you should now see a blank SharePoint canvas.
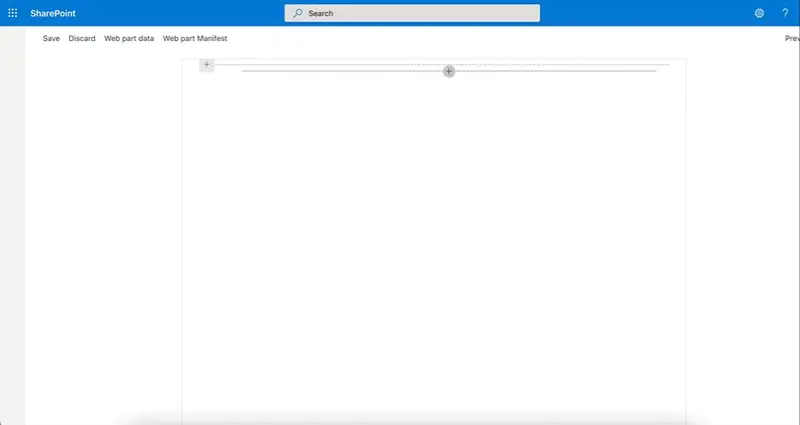
Figure 1: A blank SharePoint canvas.
You can add an Apryse WebViewer web part by adding a new web part to the page and selecting the webviewer web part.
With the web part added, you can now open a local file in WebViewer.
Deployment
1. Run the following code to generate the webviewer.sppkg file in the sharepoint-web-part/sharepoint folder:
gulp bundle --ship
gulp package-solution --ship
2. Switch to the SharePoint admin center and go to the More features page.
Note: It should be https://<your-tenant-id>-admin.sharepoint.com/_layouts/15/online/AdminHome.aspx#/classicFeatures.
3. Under the App section, click Open.
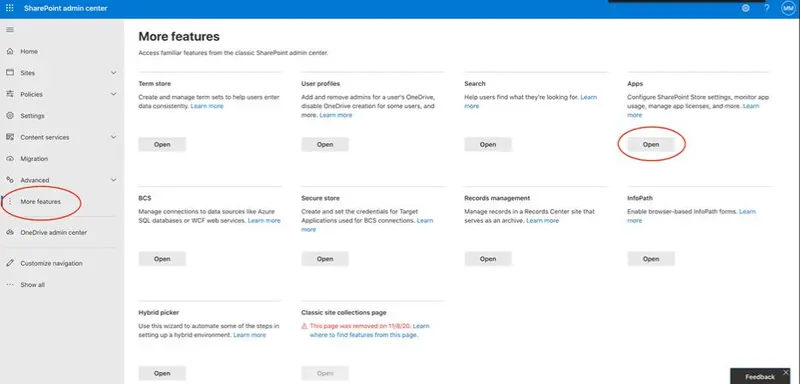
Figure 2: The App section.
4. To upload the webviewer.sppkg file, click Upload and then select the webviewer.sppkg file in the sharepoint/solution folder.
5. After uploading the file, enable the app by selecting Only enable this app.
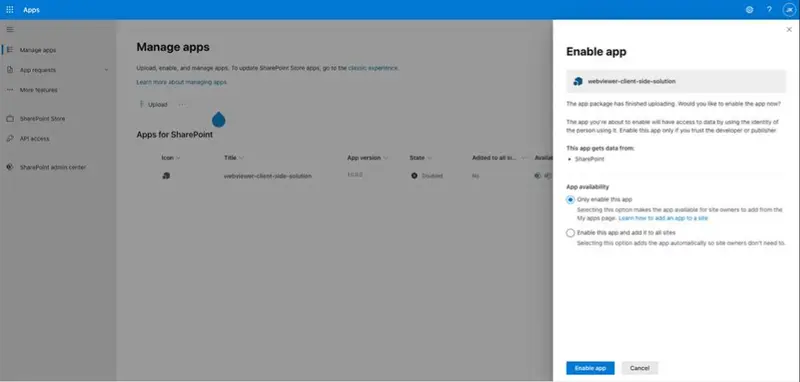
Figure 3: To enable the app, select "Only enable this app".
6. Click Settings in the SharePoint site and then click Add an app.
7. In My Apps, enable the webviewer-client-side-solution.
8. To create a new site page in the SharePoint site, click + New and then select Site Page.
9. Rename the page to WebViewer and then add a one-column section.
10. In the new section, click +, select the webviewer web part, and then publish the page.
Integrate with SharePoint Extension
Next, we’ll look at adding an Open in Apryse menu option to open and process documents in the SharePoint Documents Library in WebViewer. To do this, we need to integrate with SharePoint extension. This allows you to add a menu option to any List View in SharePoint, such as your document libraries.
1. In the sharepoint-extension folder in the sharepoint-integration-examples repository, create a .env file and add the following parameters in the file:
SITE_PAGE=WebViewer.aspx
SHAREPOINT_SITE_URL=https://<your-tenant-id>.sharepoint.com/sites/<site-name>
2. In the sharepoint-extension in the terminal, run the following:
npm install3. In the sharepoint-extension/config folder, change the pageUrl in the serve.json file by replacing the tenant id and site name:
{
...,
pageUrl: "https://<your-tenant-id>.sharepoint.com/sites/<site-name>/Shared%20Documents/Forms/AllItems.aspx"
}
4. Run the following command:
gulp serveYou will see a new window in the Document Library and a popup and warning for you to allow debug scripts.
5. Select Load debug scripts.
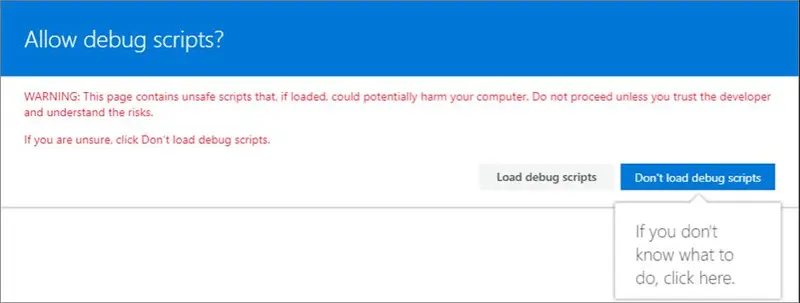
Figure 4: New window to select "Load debug scripts".
Now when you right-click a document in the Document Library, you’ll see the option to Open in Apryse.
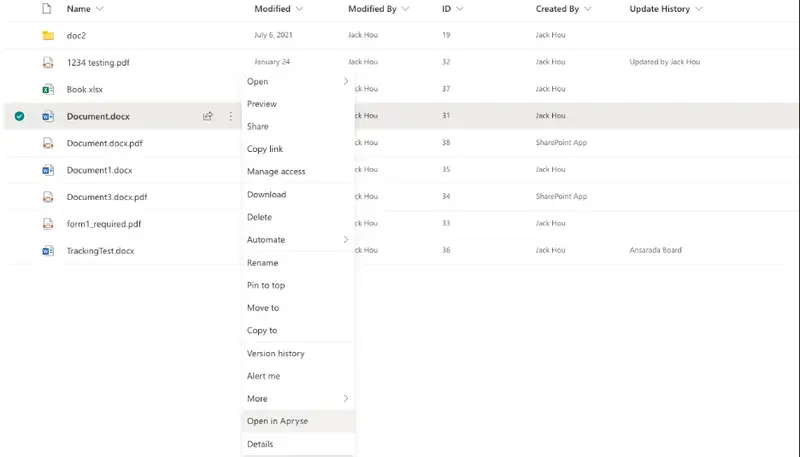
Figure 5: Right-clicking a document now shows an option to "Open in Apryse".
7. Click Open in Apryse and it will direct you to the page you specified in the .env file. In this case, it should be the https://<your-tenant-id>.sharepoint.com/sites/<site-name>/SitePages/<site-page>.aspx page that has the webviewer web part.
Note: SharePoint Framework currently has issues hosting workbench on any port other than 4321, making it difficult to have the web part and the extension running locally at the same time. To solve for this, we recommend deploying either the web part or the extension and host the other one locally.
Deploy the Extension
Here, we’ll look at how to deploy the extension.
1. Use the following commands to generate the sharepoint-extension.sppkg file in the sharepoint-extension/sharepoint/solution folder:
gulp bundle --ship
gulp package-solution --ship
2. Upload the sharepoint-extension.sppkg file to the Apps in SharePoint Admin center and enable it for the website.
You should now see an option to Open in Apryse when you right-click a document in the Document Library.
FAQ
Is it hard to keep versions straight?
Not at all. The SDK hooks into SharePoint’s native versioning. When you save an edit, it can either overwrite the current version or save as a new one, keeping your audit trail intact.
Does this work on mobile?
Yes. Since it’s a browser-based viewer using WASM, it works on any modern mobile browser without requiring a separate app installation.
Can I customize the UI?
Yes. You can hide buttons, like Download or Print, based on user permissions in SharePoint, ensuring that sensitive files are viewed but not leaked.
Conclusion
As you can see, integrating the Apryse Web SDK into SharePoint is fairly straightforward and can be done with minimal coding.
By adding a professional PDF SDK, like the Apryse Web SDK, you can eliminate the export-upload loop and keep your data safe in your own environment. It’s a cleaner, more secure way to manage and edit documents in a high-powered document platform.
WebViewer has many powerful features that can be extended to your documents now that it’s integrated with SharePoint, such as digital signatures, redaction, annotation, and more.
Check out our WebViewer demo or get started with the Apryse Web SDK.
You can also contact our sales team for any questions and support.