Roger Dunham
Published June 12, 2026
Updated June 12, 2026
8 min
GoToR Links Made Easy–Clicking is Easier Than Typing
Roger Dunham
Summary: This article demonstrates how to create a highly intuitive tool for generating GoToR links by using two side-by-side instances of Apryse WebViewer. By utilizing a custom button in a dual-viewer setup, developers can enable users to select text and link it directly to a document's current page in a view-only pane, eliminating the need for manual metadata entry.
Introduction
This is the third article in a series about working with GoToR links in Apryse WebViewer.
We have already seen how you can open those links either in a new tab, or even a separate instance of WebViewer. What’s more, since we control exactly which documents are opened and from where, we have a more flexible, and more secure, solution than is offered by desktop tools such as Adobe Acrobat.
In this article, we will look at the other side of the problem—how to create GoToR links within Apryse WebViewer. We can do that using a few dozen lines of code and a custom button within the Modular UI.
Before we do that, let’s look at how the Apryse Desktop app creates these links.
How Xodo PDF Studio Adds GoToR Links
Xodo PDF Studio allows us to create link annotations by first selecting the Create Link menu option (or using a keyboard shortcut).

Figure 1: The first step of creating a GoToR link in Xodo PDF Studio.
Next, we need to select the text where we want the link to be anchored, typically by dragging the mouse over it. When we finish selecting the text, a dialog is shown that allows us to manually enter the document that should be opened, as well as the page number that the document should scroll to when the link is clicked.
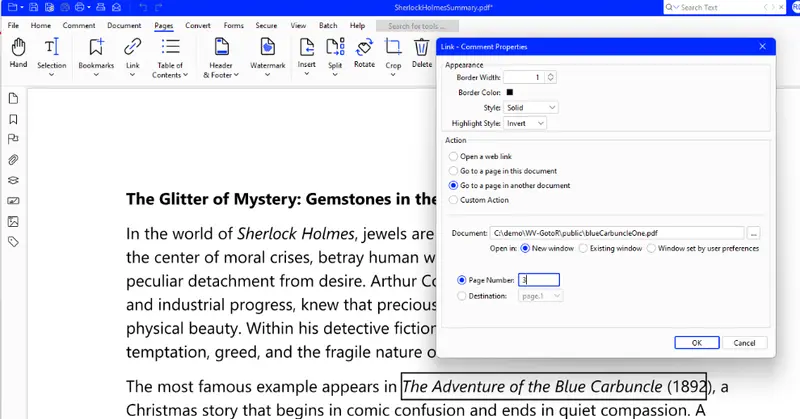
Figure 2: Adding a GoToR link in Xodo PDF Studio. You need to manually enter the Document path and page number.
Adobe Acrobat supports GoToR actions. The documentation says that it is possible to create them, but the mechanism is extremely unintuitive. After 10 minutes of getting nowhere, I gave up trying.
In my opinion, Xodo PDF Studio offers a much simpler system than Acrobat. It would be easy to recreate that workflow using Apryse WebViewer (and by the end of this article, you should know how to do so), but I want to make something even better!
Rather than having to manually enter the page number for a link, I want, instead, to be able to select and view the “target” (or “destination”) document in the UI, scroll to a particular page, and then get the software to enter the page number and filename.
Intuitive and simple. And that is exactly what we are going to do!
Outline of the Solution
We saw in the previous article that we can create a web page that contains two instances of WebViewer. In that article, the left-hand PDF contained the links, and the PDF that they targeted was shown in the right-hand viewer (though I could have swapped them around if I chose).
For this article, we will keep that arrangement, but now we will add a custombutton to the left-handWebViewer, and when that is clicked, it will create the link for us.
The link will be created on whatever text is selected in the left-hand pane, and will point to the page and document that is shown in the right-hand viewer.
That means that I can use the browser to find exactly the page that I want and have the link added with a single button click. Nice!
Just as in the previous article, we will take advantage of WebViewer’s modular UI. We will allow the user to have full access to the editing controls for the left-hand WebViewer, but make the right-hand WebViewer “view-only”. We will also remove a few other things from the right–hand viewer like the options that allow the user to see comments, or view thumbnails, bookmarks, etc. That’s not necessary, but it’s good to know how to do so.
We will also set the “Theme” for this page to dark. That’s not necessary, but by using different themes I can quickly create a website where pages that let me view links have a light theme, and the ones that let me create links have a dark theme. That way I can tell which page is which, without extra CSS.
That sounds like a lot, but it is really very easy. You can find the code for this entire series of articles at this GitHub. For this article, we are looking at the file CreateGoToR.tsx.
Creating Two Instances of WebViewer on the Same Page
Just as we did in the previous article, we will define two separate div elements, one for each WebViewer. It’s absolutely fine to have multiple instances of WebViewer on the same page provided that each is mounted on a different div.
It is, however, important to giveeachWebViewer a unique ID , since the Apryse Web SDK does some clever caching which uses the WebViewer ID.
The return block of our React function now looks like:
We need to instantiate each WebViewer. The code is essentially the same for each (although this is the code for the right-hand one).
The main parts are that we need to specify the path to the WebViewer static assets and a license key. I am also enabling a file picker dialog in both WebViewers so that I can choose which file to open.
The WebViewer constructor returns a promise, and when that resolves, a WebViewerInstance object is available. This instance object is often used to control the UI (and we’ll do that in a moment), but we also want to work with it outside of the useEffect that calls the constructor, so we will save it into a state variable using setWv2Instance.
We are controlling the appearance and functionality of each WebViewer using that instance object.
For both WebViewers, we are setting the theme to “dark” (as we mentioned above).
For the right-hand viewer we are also:
- Enabling “ViewOnly” Mode.
- Hiding a few elements like the panel that allows notes to be seen, the view controls (which lets us specify how the PDF is displayed), and the left panel (which includes thumbnails etc.).
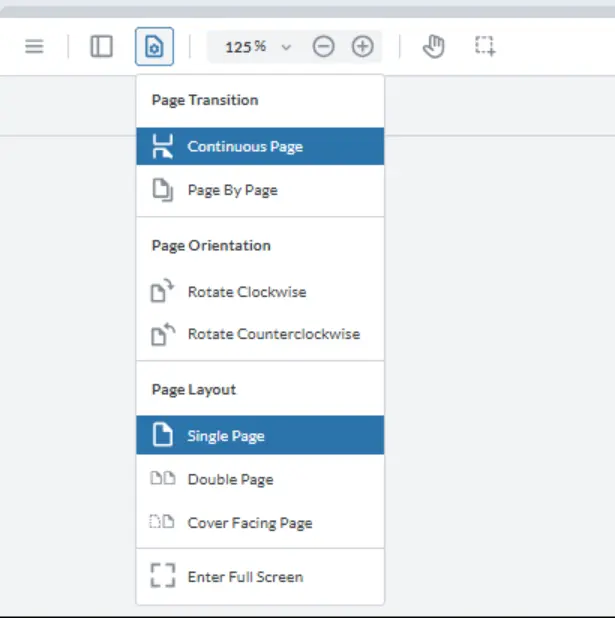
Figure 3: The View-Controls panel in WebViewer. We have disabled this for the right-hand pane.
If we run the code at this point, then things look very different from the previous article. Not only has the theme changed from light to dark, but I can open a different file in each WebViewer.
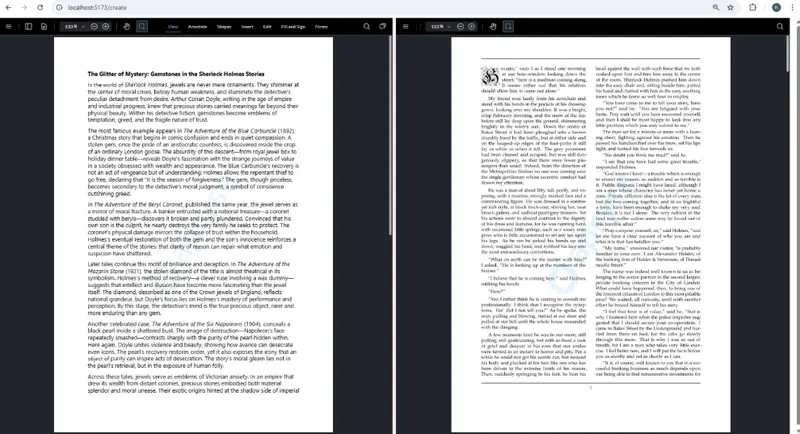
Figure 4: Already the UI is very different. The left-hand WebViewer is fully functional. The right-hand one is view-only and has had some UI elements removed.
That’s pretty cool. You can see how we can control the look and available functionality with just a few lines of code.
Working With the Two Instances of WebViewer
It is already possible to select text independently in each document, and we can select text in each of them. In a moment, we will use the location of the selected text to define both where a new GoToR link will be created, and where it should point to.

Figure 5: Already we can select text in each WebViewer.
Currently though, there is no way to create that new link. Let’s solve that by creating a custom button that we will add to the left-hand WebViewer.
We’re creating a custom button, giving it a dataElement (which means that we can refer to it easily when we need to), then creating a label and title that will display when the user navigates over the button.
We could also add an icon if we wish, but I won’t do that here.
We’ve also defined an onClick function, which for now I am leaving empty, though we will implement that shortly.
Finally, I’m adding the button to the Modular UI’s default top header. In this example, I am just simply adding it to the end of the elements in the header (which means that it will appear at the right-hand side of the header), but I could place it elsewhere if I wished.
Now, when we run our code, the custom button is present, and it even has a hint.
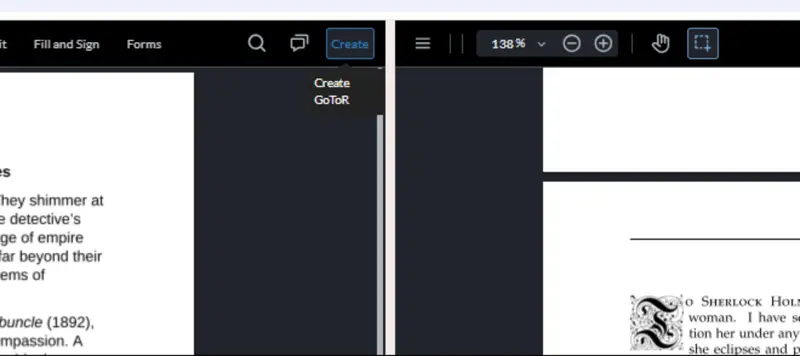
Figure 6: Our custom button added to the UI of the left-hand WebViewer.
That’s looking good!
Working Out Where the Link Should Point To
We need to define where we want the target for the link to be. That’s easy to do. We can get the current page and the path to the document that is open in the right-hand WebViewer using the wv2instance state variable.
We just need to call getCurrentPage() and getDocument(), then getFileName() on the documentViewer object for the right-hand WebViewer.
That code just logs the information, but we will use it to create a link in a moment.
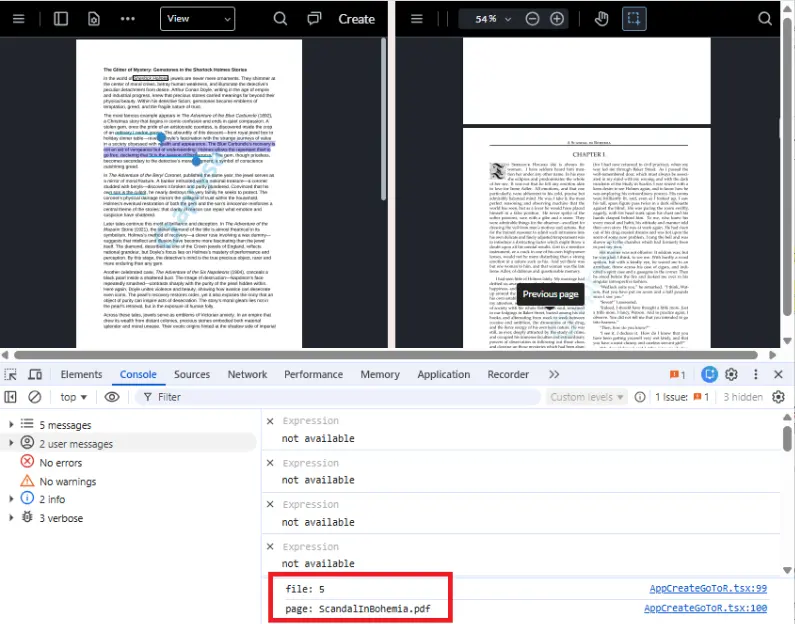
Figure 7: For now, we are just logging the target page number and filename.
Working Out Where to Place the Link
We need to know where to place the link. There are different ways that we can do this (and we will look at others in a later article in this series).
For now, though, we will keep things simple and work out where the link should be based on what text has been selected in the left-hand WebViewer. We can get the location of that using getSelectedTextQuads().
This returns a collection of “quads” (essentially rectangles, but they don’t need to be horizontal since they could be rotated).
The collection of quads can be complex since it’s possible that the selected text could be spread over multiple lines as well as multiple pages. As such, the collection of quads is indexed by page number. To keep things simple, we will just use the data for a single page which is the one that WebViewer says is the “current” page.
Even for a single page, the collection of quads could be split over several rows. There are different ways that this could be handled, but I’ve chosen to create a rectangle that encloses all the quads for the current page. That’s a simplistic solution, since the selected text could be at the bottom of one column, and run onto the top of another column, which could give a large rectangle even if just a couple of words were selected. For now, though, we will accept that in order to keep the code brief. You may choose to do something different that suits your particular use-case.
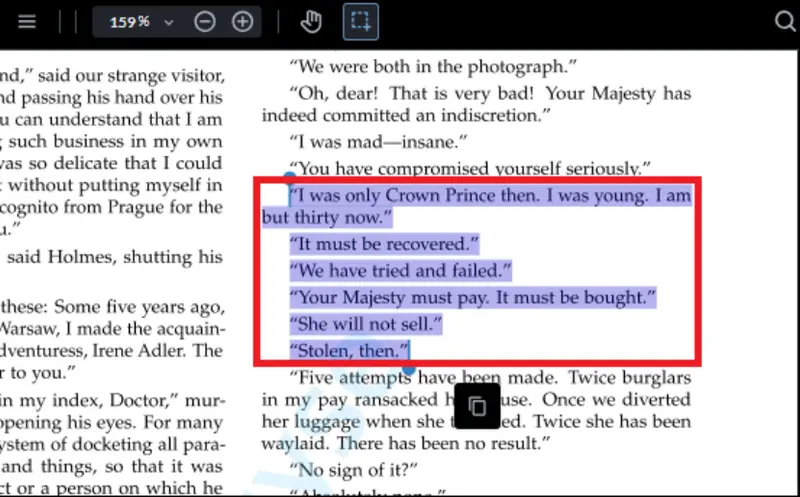
Figure 8: The selected text could be split over several lines. I've chosen to create a link based on a rectangle that encloses all the selected text, though you might want to use a more elegant solution.
There is no built-in function to create a Rect that encloses an arbitrary set of quads, but ChatGPT or Copilot will soon create one for you. The code that I used is as follows.
Adding the Link
We now know where the link should be placed and also the document and page where it should point to.
All that remains is to create a Link Annotation that includes that information.
We won’t go through all the details of the code, but the things that you might want to change are the StrokeStyle which I am specifying as “solid”, but you could use other options for example, ‘underline’ or ‘dashed’.
I’m creating a Dest object that includes the page number that we want to open and I’m using that Dest and the filename to create a GoToR action.
The action is then added to the link, using the key “U” (which means that it is an action that will fire when the mouse button comes “Up”).
Finally, I’m adding the annotation to the annotationManager for the left-hand WebViewer and refreshing the UI.
Once the PDF has been saved (which we could do automatically), we can then open it using the code from the previous article. If we click on one of our newly created links, then the target document (provided that it is available) will open in the right-hand viewer and scroll to the correct page, just as we saw in that article.
What’s more, our GoToR Link is valid in other viewers, so you can navigate with it using desktop tools such as Xodo PDF Studio. Exactly as you would expect and a great result.
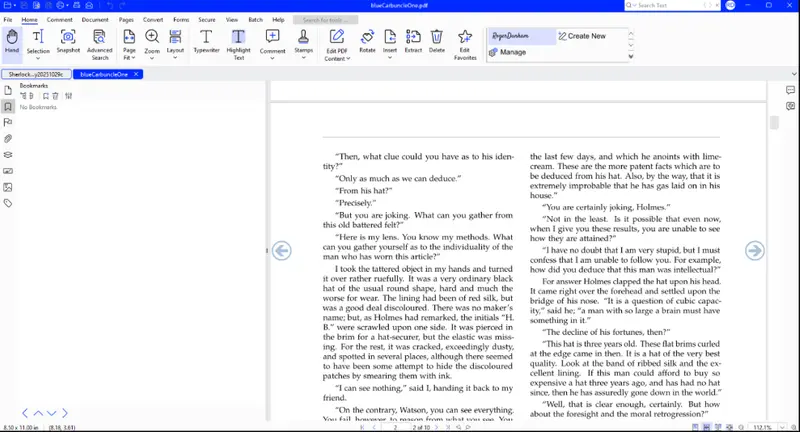
Figure 9: The link that we created also works in Xodo PDF Studio.
Conclusion
We’ve now seen how we can both create, and work with, GoToR annotations (technically “link annotations with GoToR actions”) within Apryse WebViewer.
We’ve also seen how we can configure the UI to control what functionality is available (in this case, removing unnecessary options from the right-hand WebViewer), and add a custom button, allowing us to guide users through a specific workflow.
Already, we have created code that gives us something that is better than using a desktop application such as Adobe Acrobat. We create links from the UI by selecting the target in a viewer rather than having to manually enter the page number or follow some cumbersome process.
In the next part of this series, we will look at doing more with the link and going not just to the correct page but highlighting the exact text that was selected when the link was created. For now, though, check out what else you can do with WebViewer at the Apryse Showcase, then get yourself a trial license key and see how easy it is to get started.